Set up your name and timezone
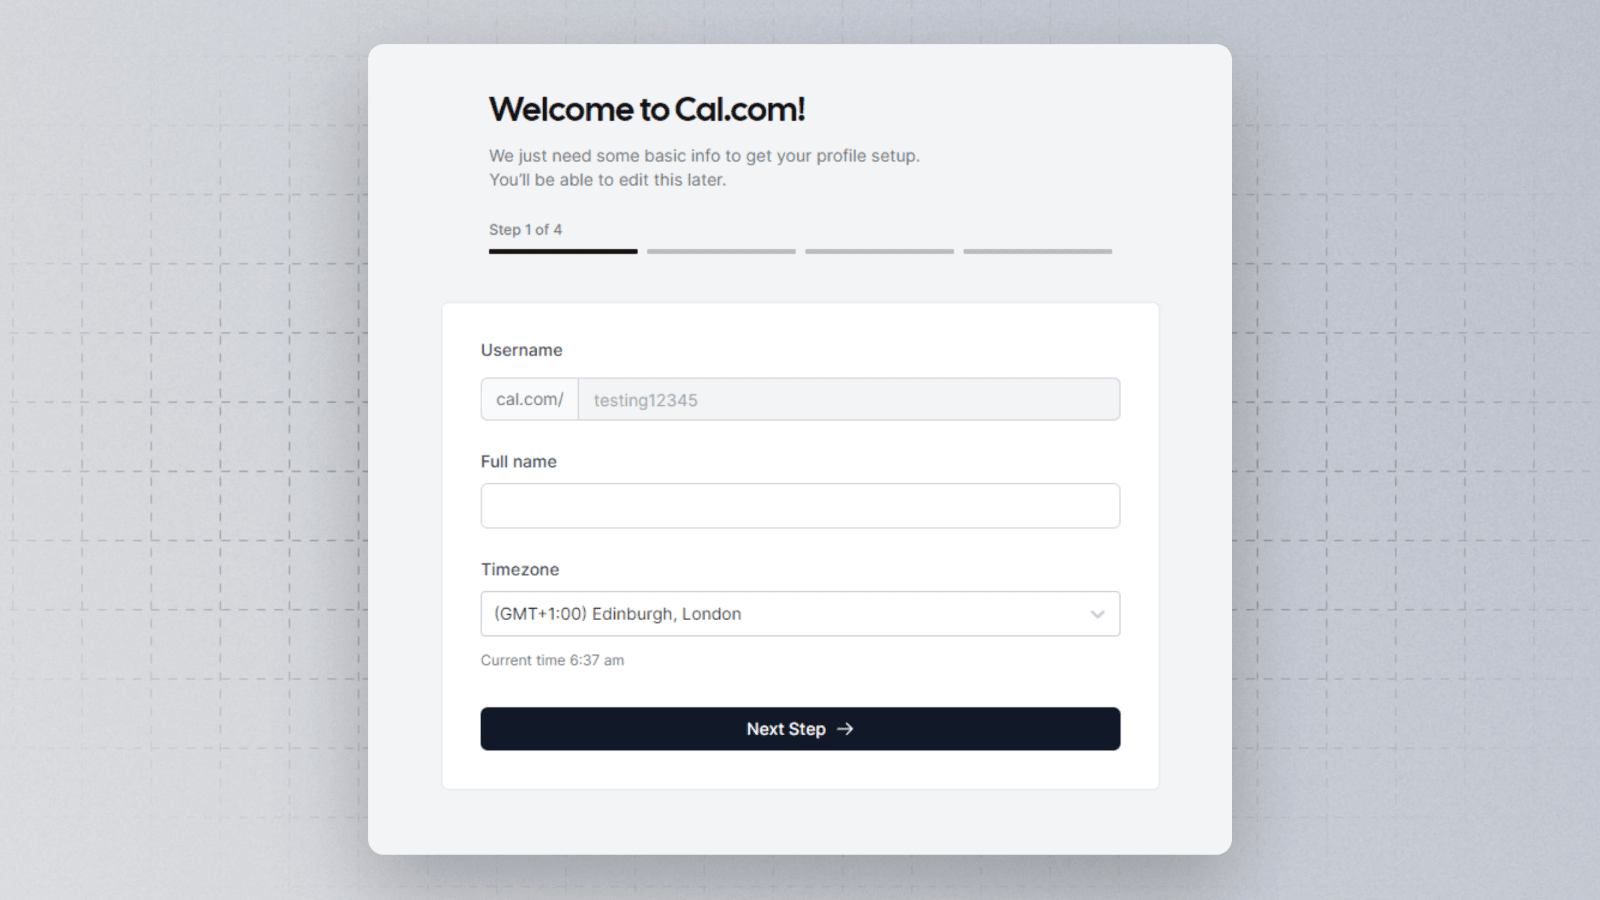
Here all you need to do is enter your full name to be displayed on your booking page, and confirm the Timezone that you’re in.
Connect a calendar
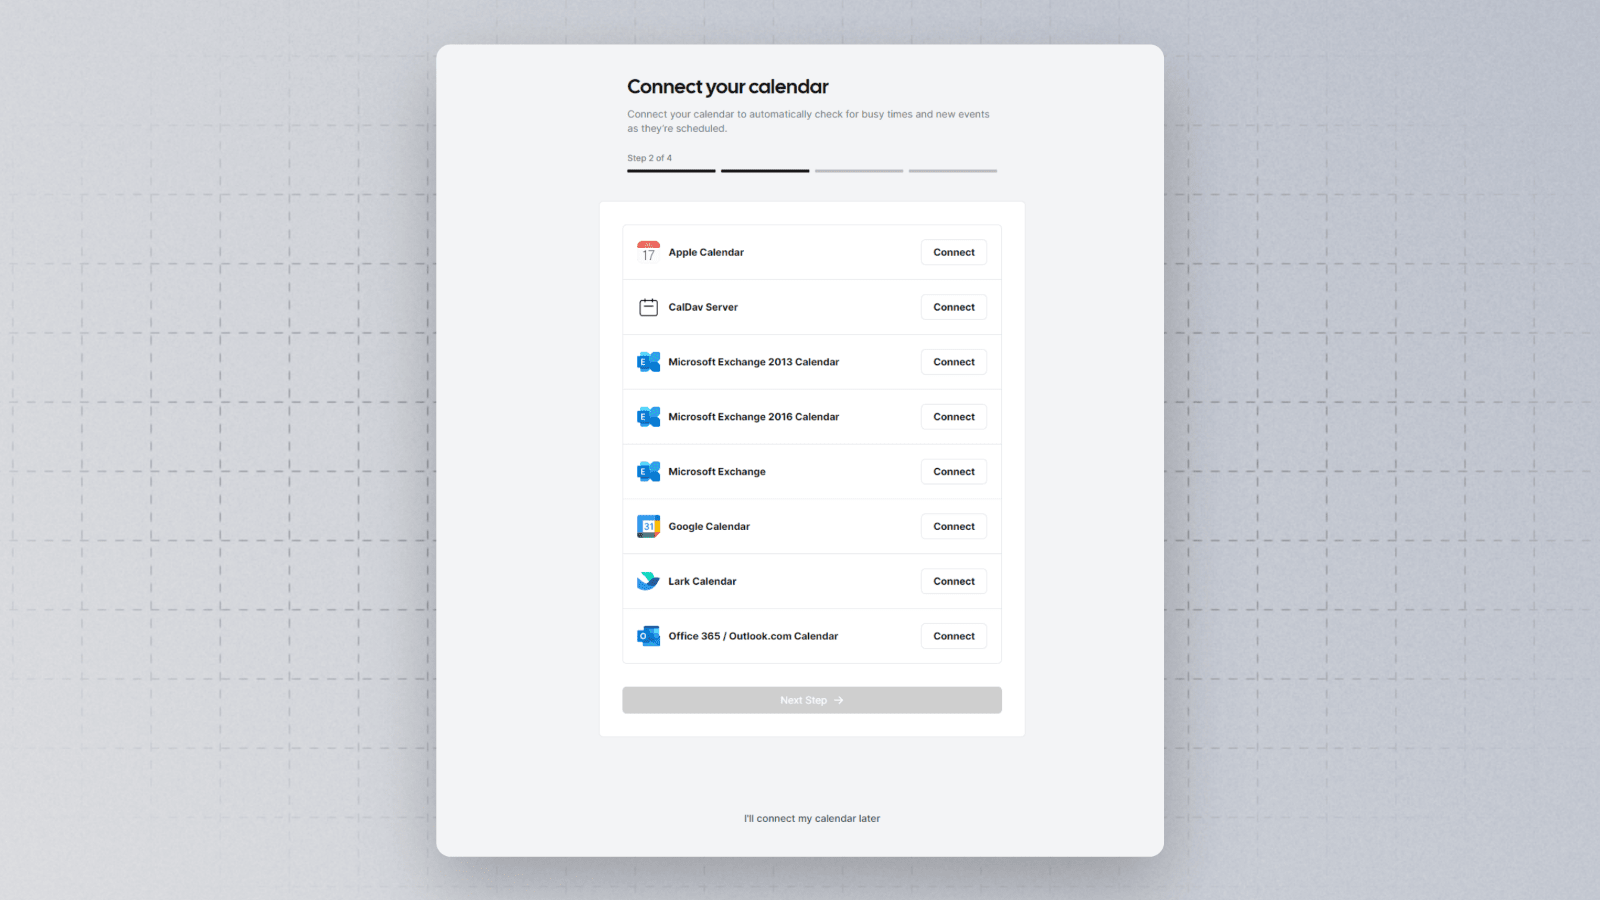
You can connect your Cal.com account with any of your calendars to automatically check for busy times and create new events as they are scheduled. If you wish to connect a calendar at a later stage, you can always click on I’ll connect my calendar later and it’ll skip to the next step.
Set up your availability
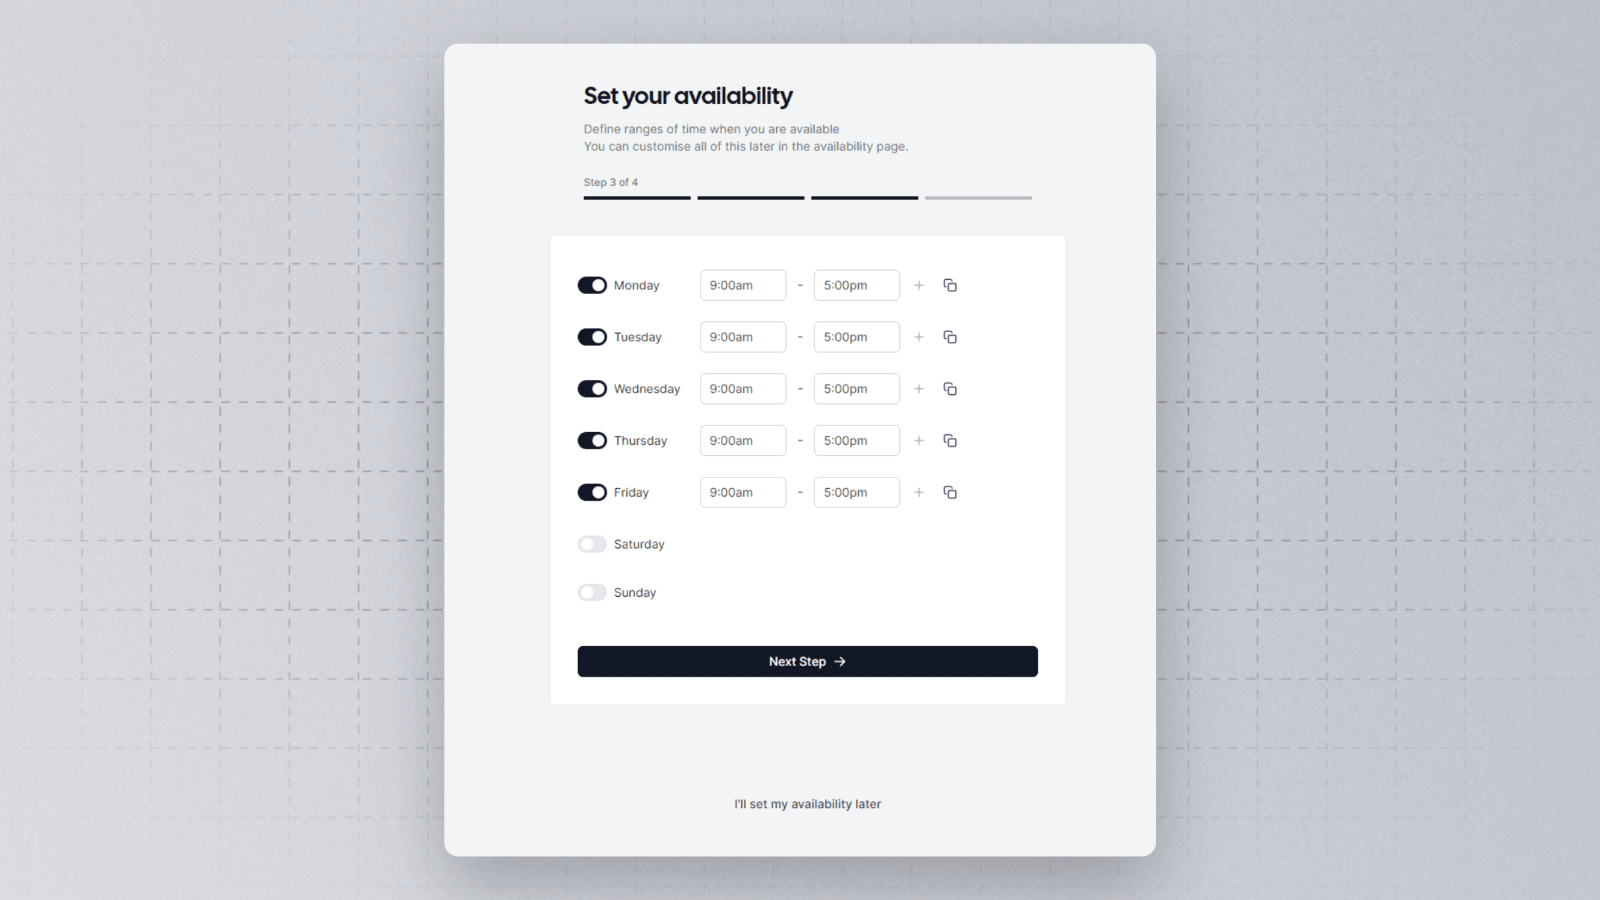
You can set your availability schedule in this step. You can always create or modify your availability at a later stage in the application as well. If you wish you can learn more about Setting up your availability or check out the deep dive into the Availability feature.
Final profile details
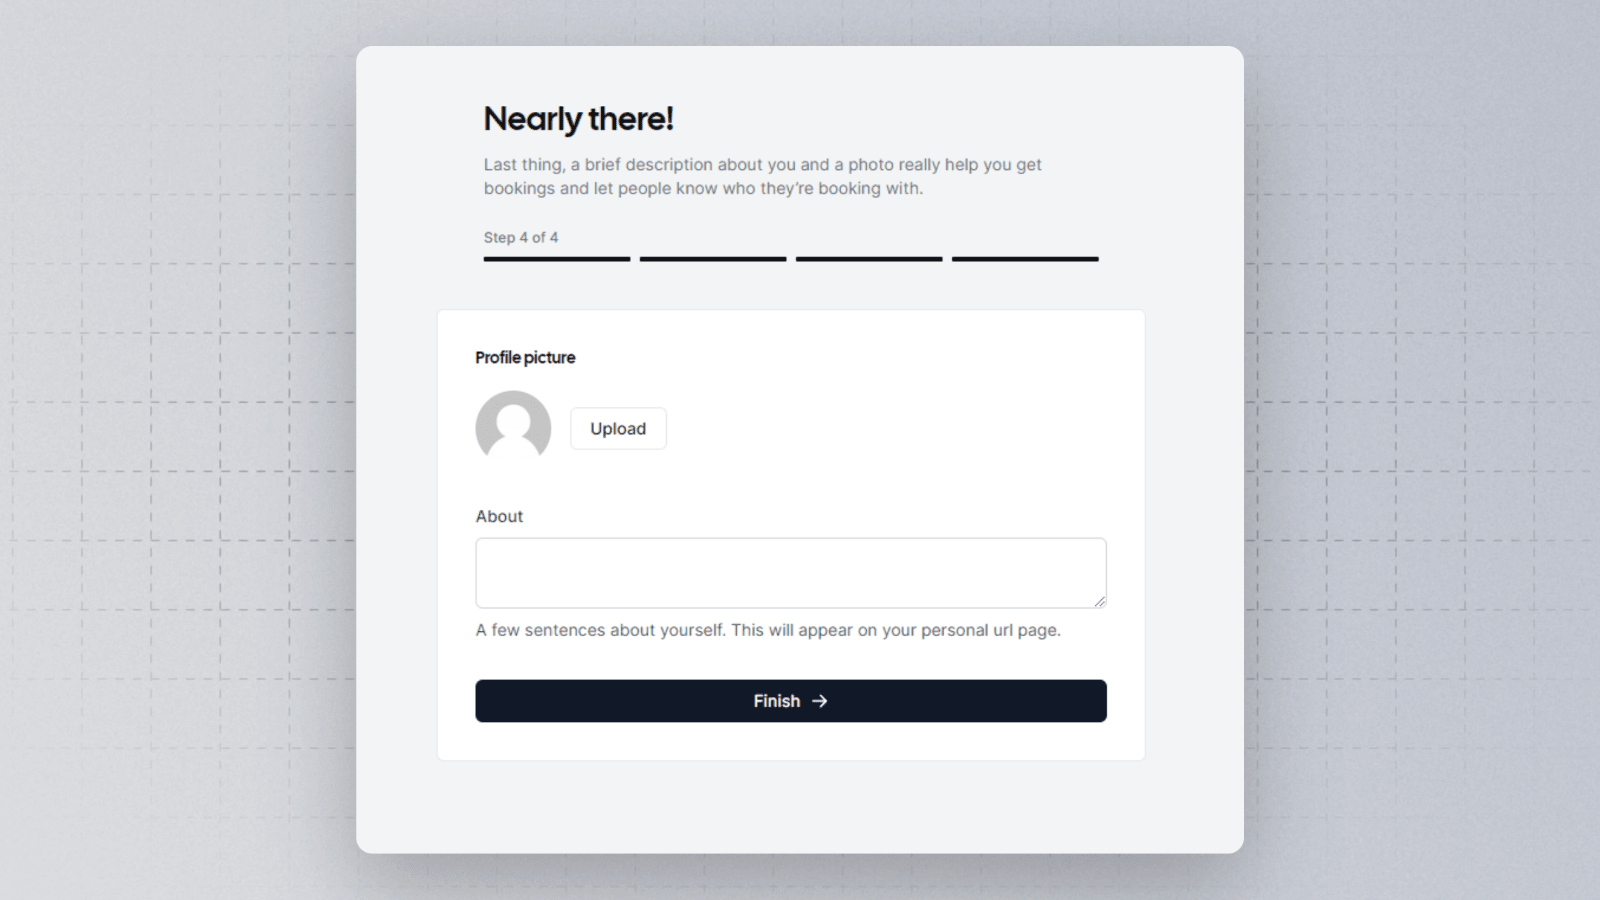
Finally, you can personalize your Cal.com booking link by providing a brief description about yourself and uploading a photograph so the people know who they’re booking with. That’s it. You’re fully onboarded and all set to start your scheduling journey!