

What Are Workflows?
Workflows in Cal.com allow you to automate actions when a specific event happens, such as when a booking is created, canceled, or about to start. This makes it easy to stay on top of communication, send reminders, and reduce manual work. Each workflow follows a simple logic:Trigger → Action
- Trigger: When something happens (e.g., a new booking)
- Action: What should be done (e.g., send an email)
Example Use Cases
- Send a reminder email and SMS to the attendee 1 hour before the meeting
- Send a post-event follow-up email with a feedback link
- Notify your internal teammate of the meeting details
- Email the organizer if the attendee cancels
How to Set Up a Workflow
1
Go to your Cal.com dashboard
2
Navigate to Workflows
3
Click `New`button
4
Give it a name
5
Select a Trigger (e.g., booking created, event canceled, 1 hour before start)
6
Add one or more Actions
7
Customize message content using dynamic text variables (see table below)
8
Choose which event types this workflow should apply to
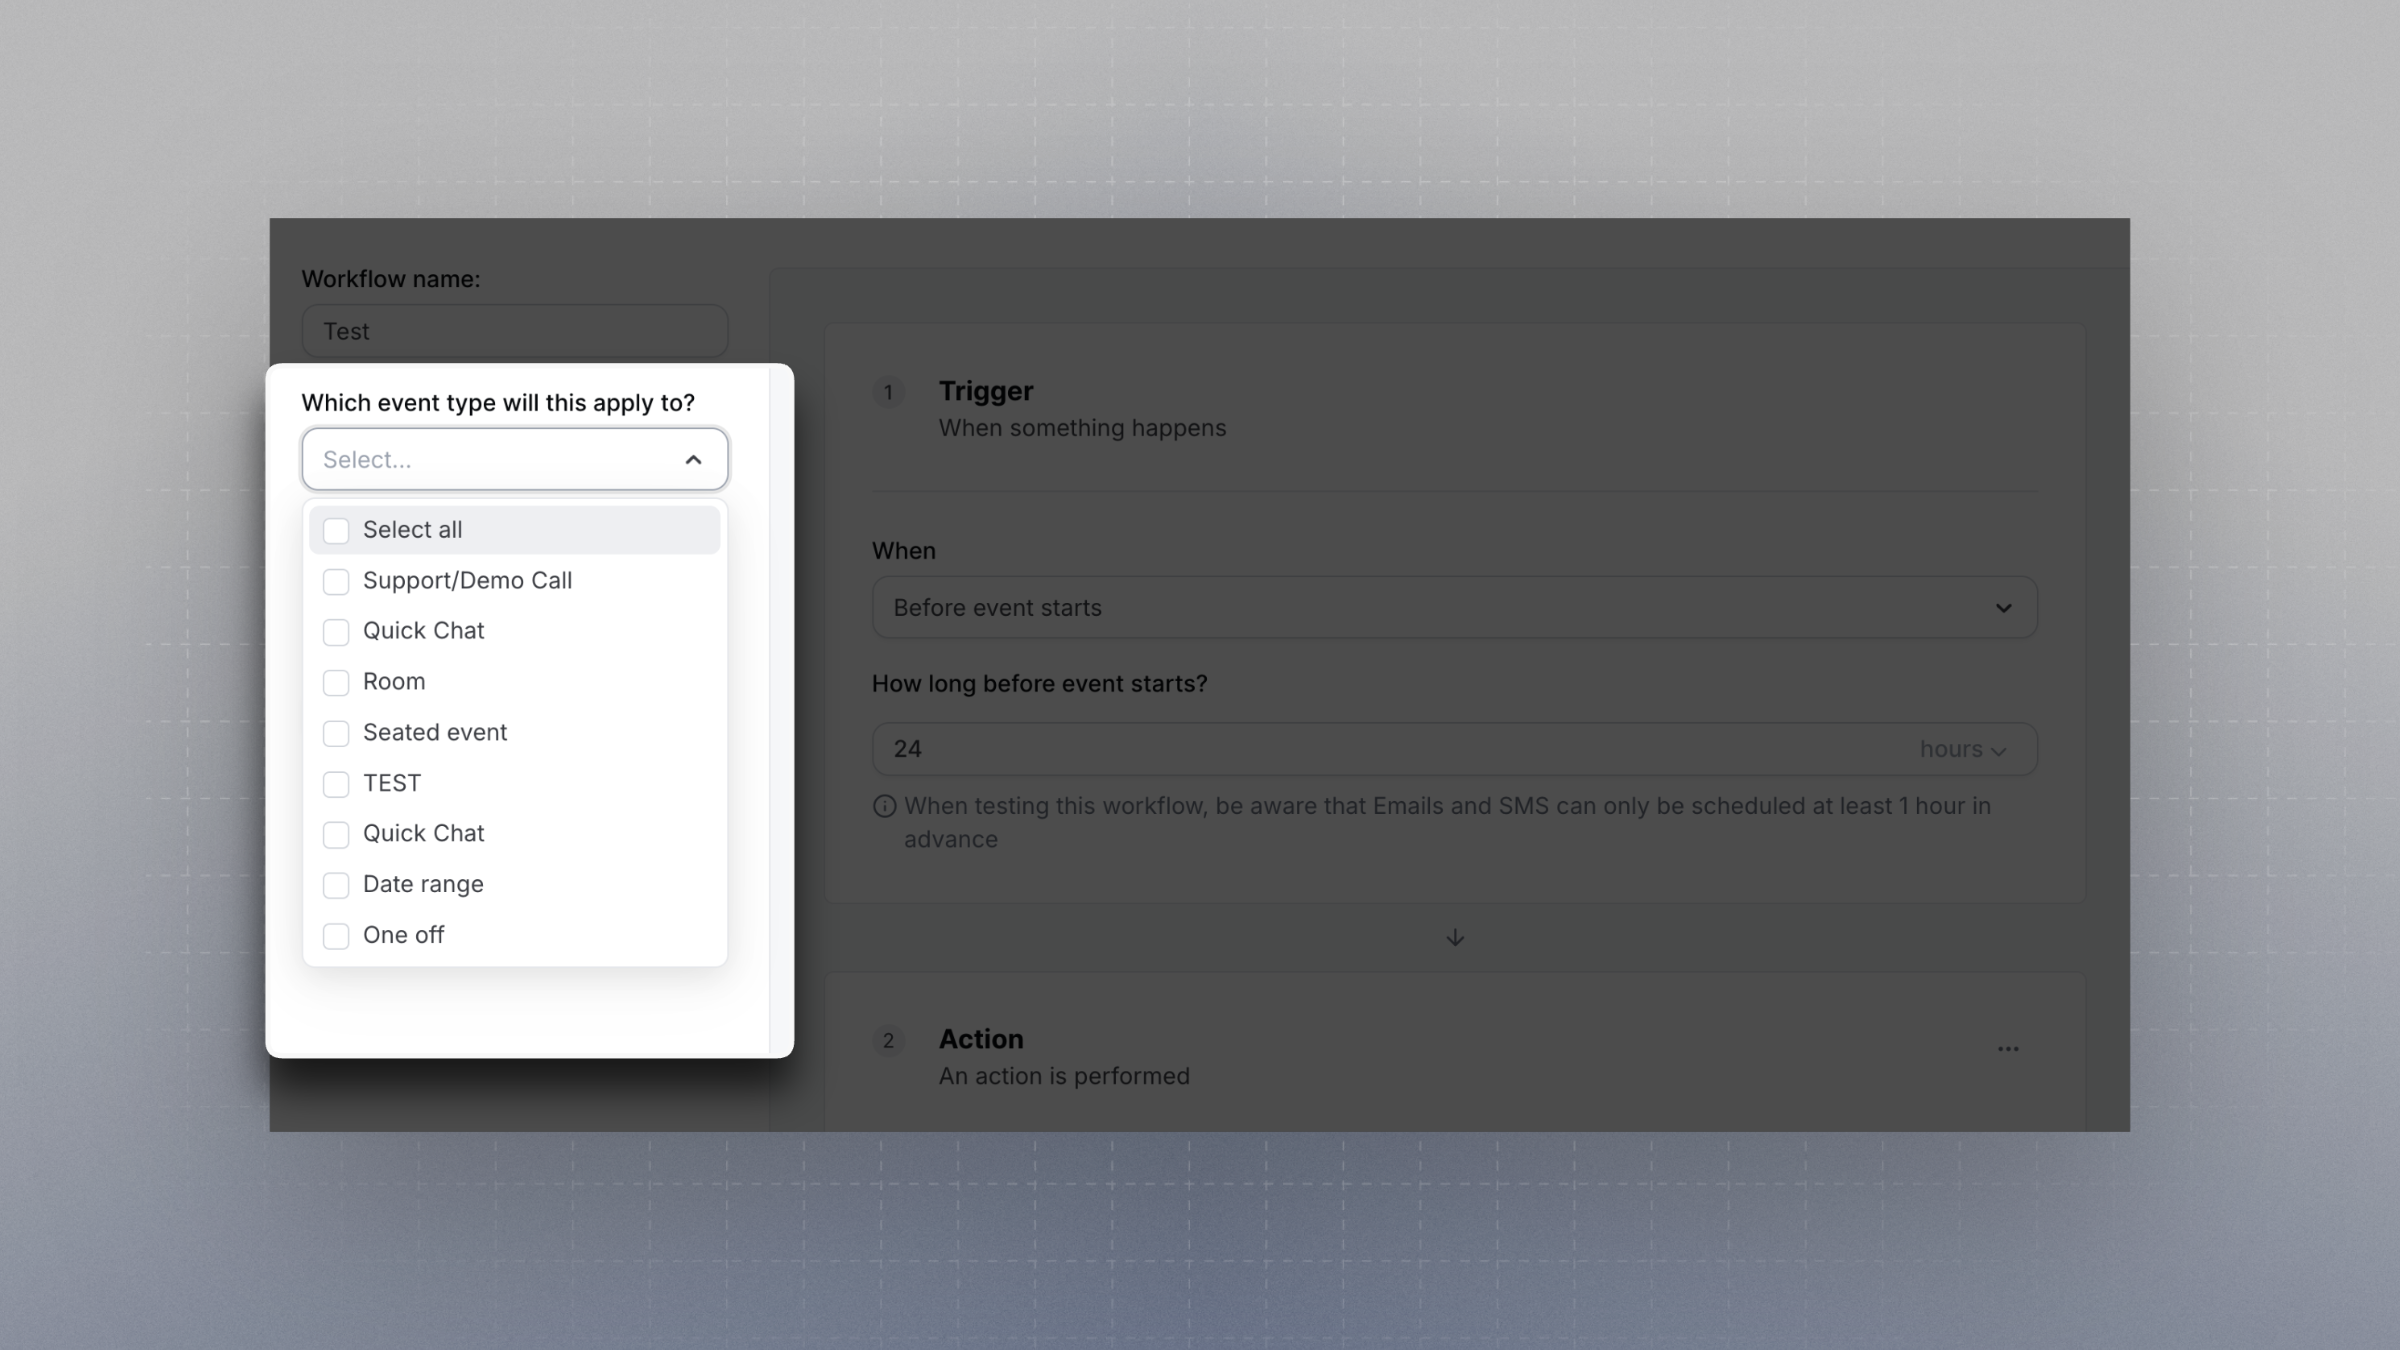
9
Click Save
Available Triggers
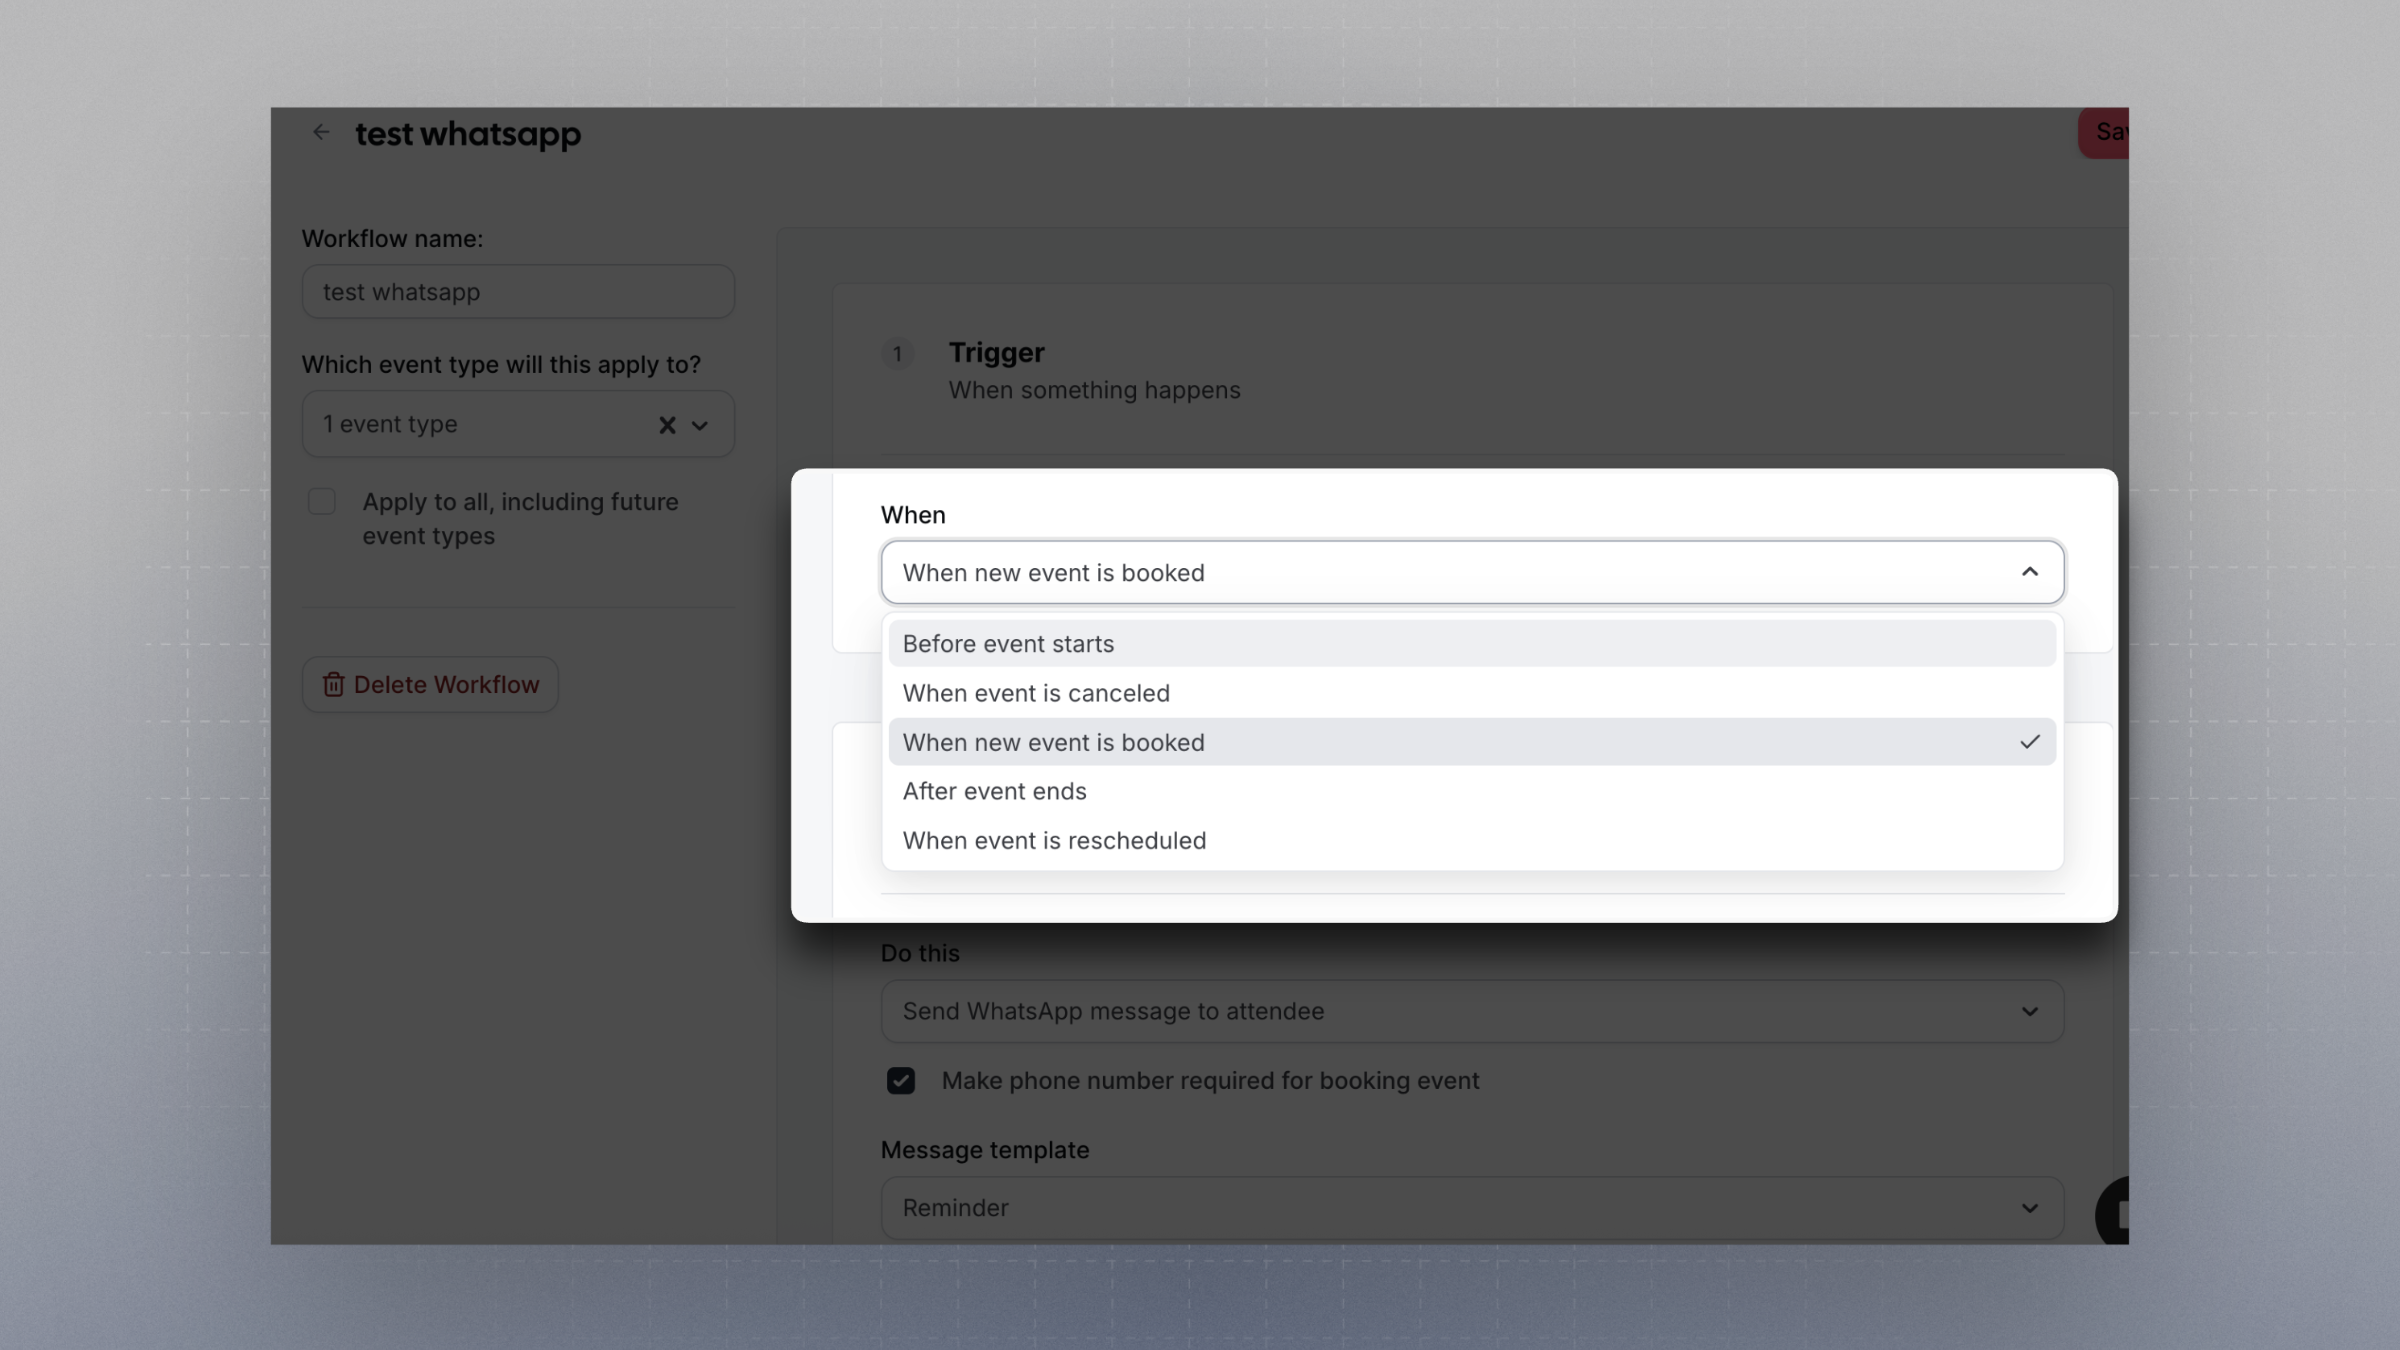
- Before the event starts
- When the event is canceled
- When a new event is booked
- After the event ends
- When event is rescheduled
- When the routing form is submitted
- When the routing form is submitted and no booking is created
- When a booking is rejected (events that require confirmation)
- When booking is requested (events that require confirmatoin)
- When booking payment is initiated
- When booking payment is successful
- When booking no-show is updated
Available Actions
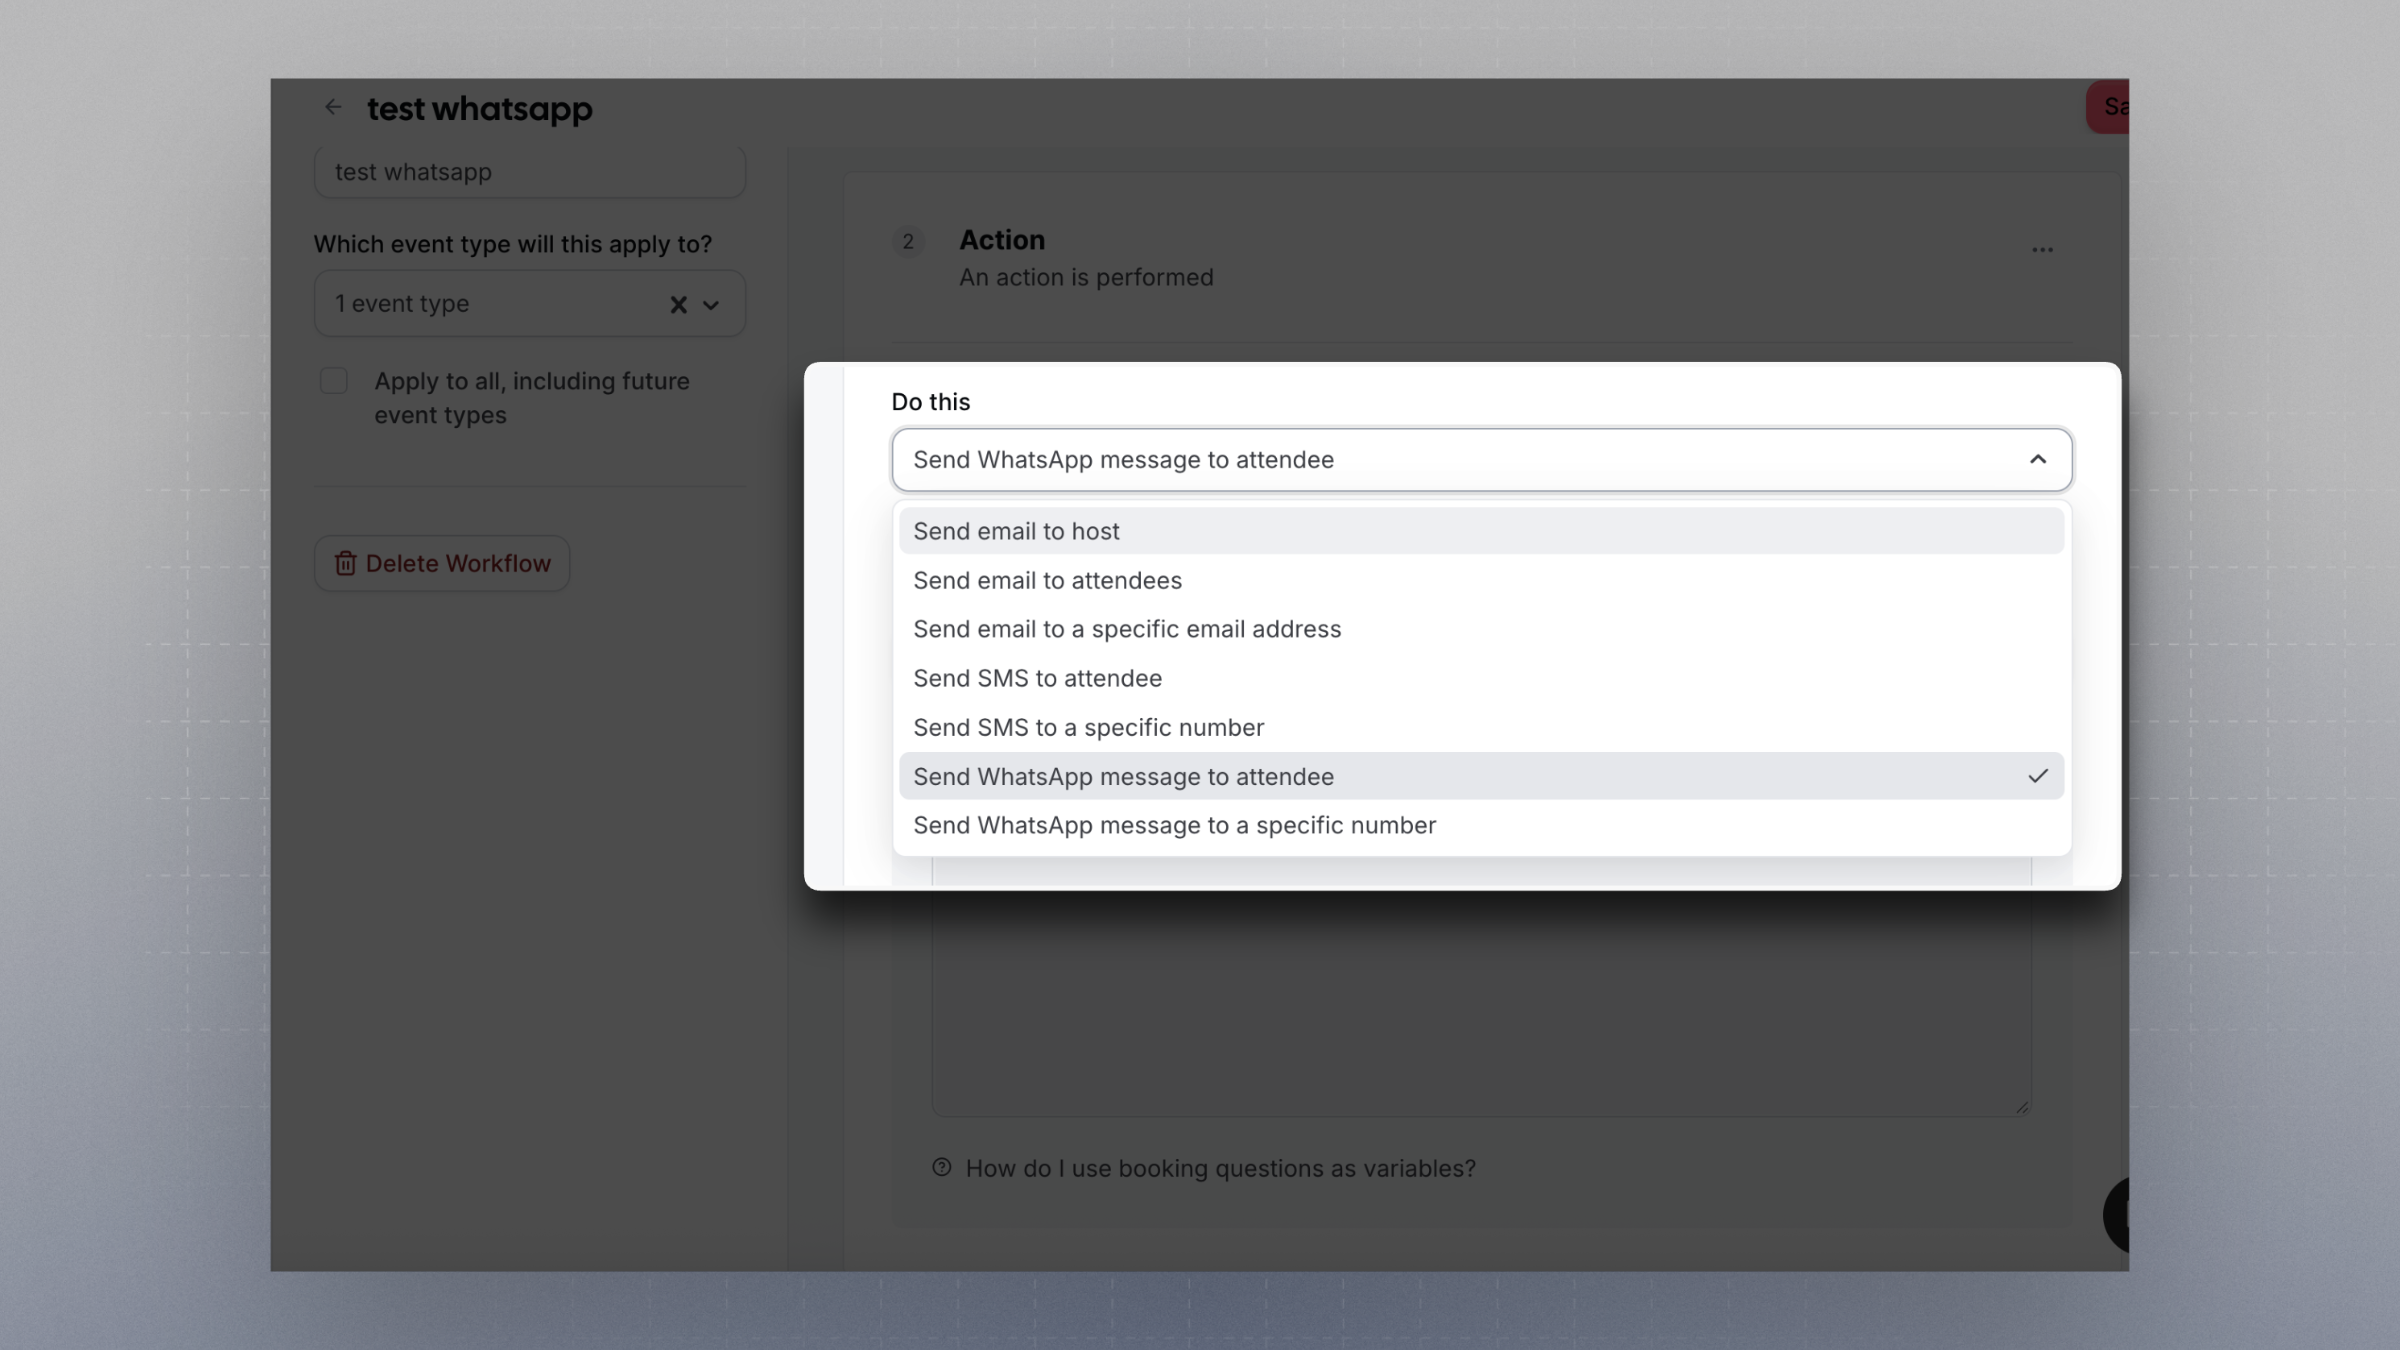
- Sending an email to host
- Sending an email to attendees
- Sending an email to a specific email address
- Sending SMS to attendee
- Sending SMS to a specific number
- Send WhatsApp message to attendee
- Send WhatsApp message to a specific number
- Cal.ai - Call attendee using cal.ai voice agent (requires credits)
Dynamic Text Variables
You can insert dynamic text into your messages using variables. These variables will be replaced with real booking data when the message is sent.Auto-translate for attendees
If you’re on an Organization plan, you can enable auto-translation for workflow steps that send messages to attendees. When enabled, Cal.com automatically translates your workflow message into the attendee’s preferred language before sending. This works with:- Email to attendee actions
- SMS to attendee actions
How to enable auto-translate
- Open a workflow and add or edit a step that sends a message to an attendee.
- Below the message editor, check the Auto-translate for attendees checkbox.
- Once enabled, a note confirms which language your message is written in (your account’s default language). This is the source language used for translation.
- Save the workflow.
Auto-translate is only available on Organization plans. If you’re on a different plan, you’ll see an upgrade prompt instead of the checkbox.
Plan Limitations
- Free Plan: Can only use the default reminder email (no customization)
- Team, Organization, and Enterprise Plans: Full access to create custom workflows with multiple actions and dynamic content
- Self-hosted Instances: No restrictions on workflow usage
Note: WhatsApp workflows cannot be customized on any plan at the moment. They are currently limited to sending a predetermined default message only.