

What are workflows?
Workflows send messages and run actions automatically when something happens with a booking, for example when a meeting is booked, cancelled or about to start. You build each workflow on a canvas, from the top down:- Trigger: when the workflow starts (for example, 24 hours before the event).
- Steps: what happens next. A step can send an email, SMS or WhatsApp message, call the attendee with Cal.ai, wait, or check a condition.
Example use cases
- Email and text the attendee 24 hours before the meeting, then again 1 hour before
- Send a follow-up email with a feedback link 1 hour after the meeting ends
- Notify a teammate when a new meeting is booked
- Email the host when an attendee cancels
- Send a different message depending on the attendee, using Paths
Create a workflow
1
Go to Workflows
Click Workflows in the sidebar, or go to app.cal.com/workflows.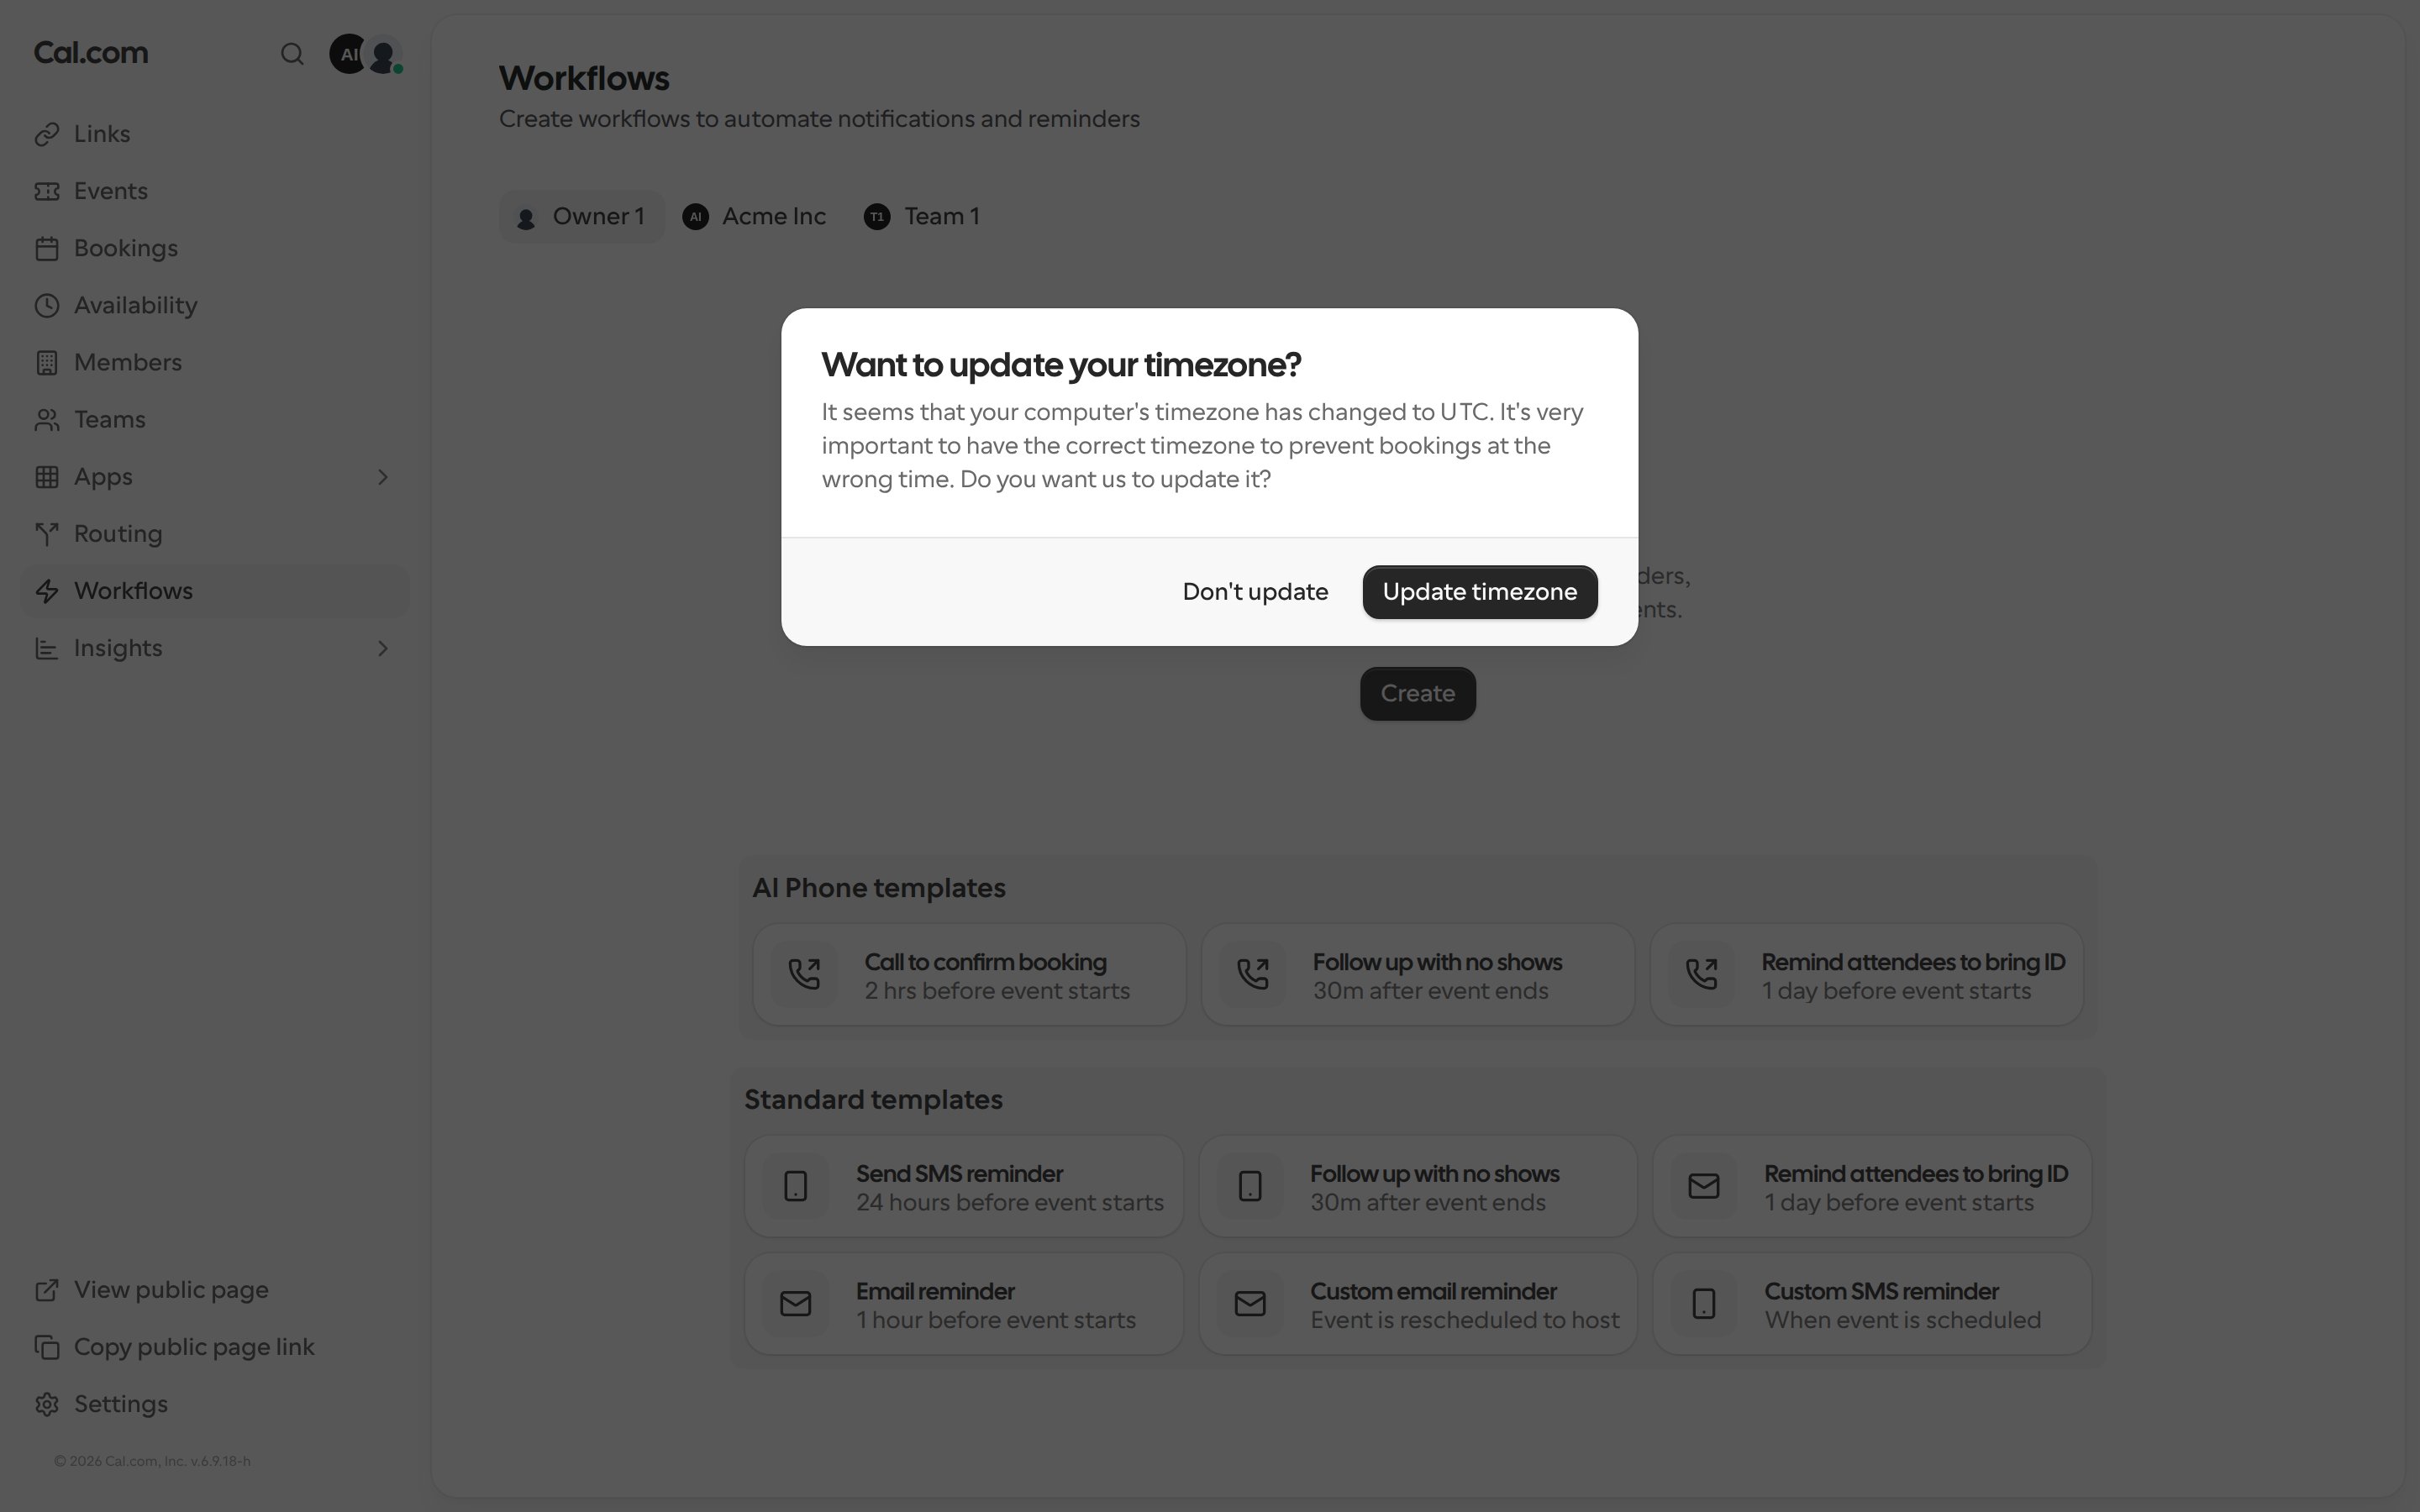
2
Click Create
If you belong to a team, choose whether the workflow belongs to you or to one of your teams. Then pick Start from scratch, or AI Phone template to start with a Cal.ai phone call.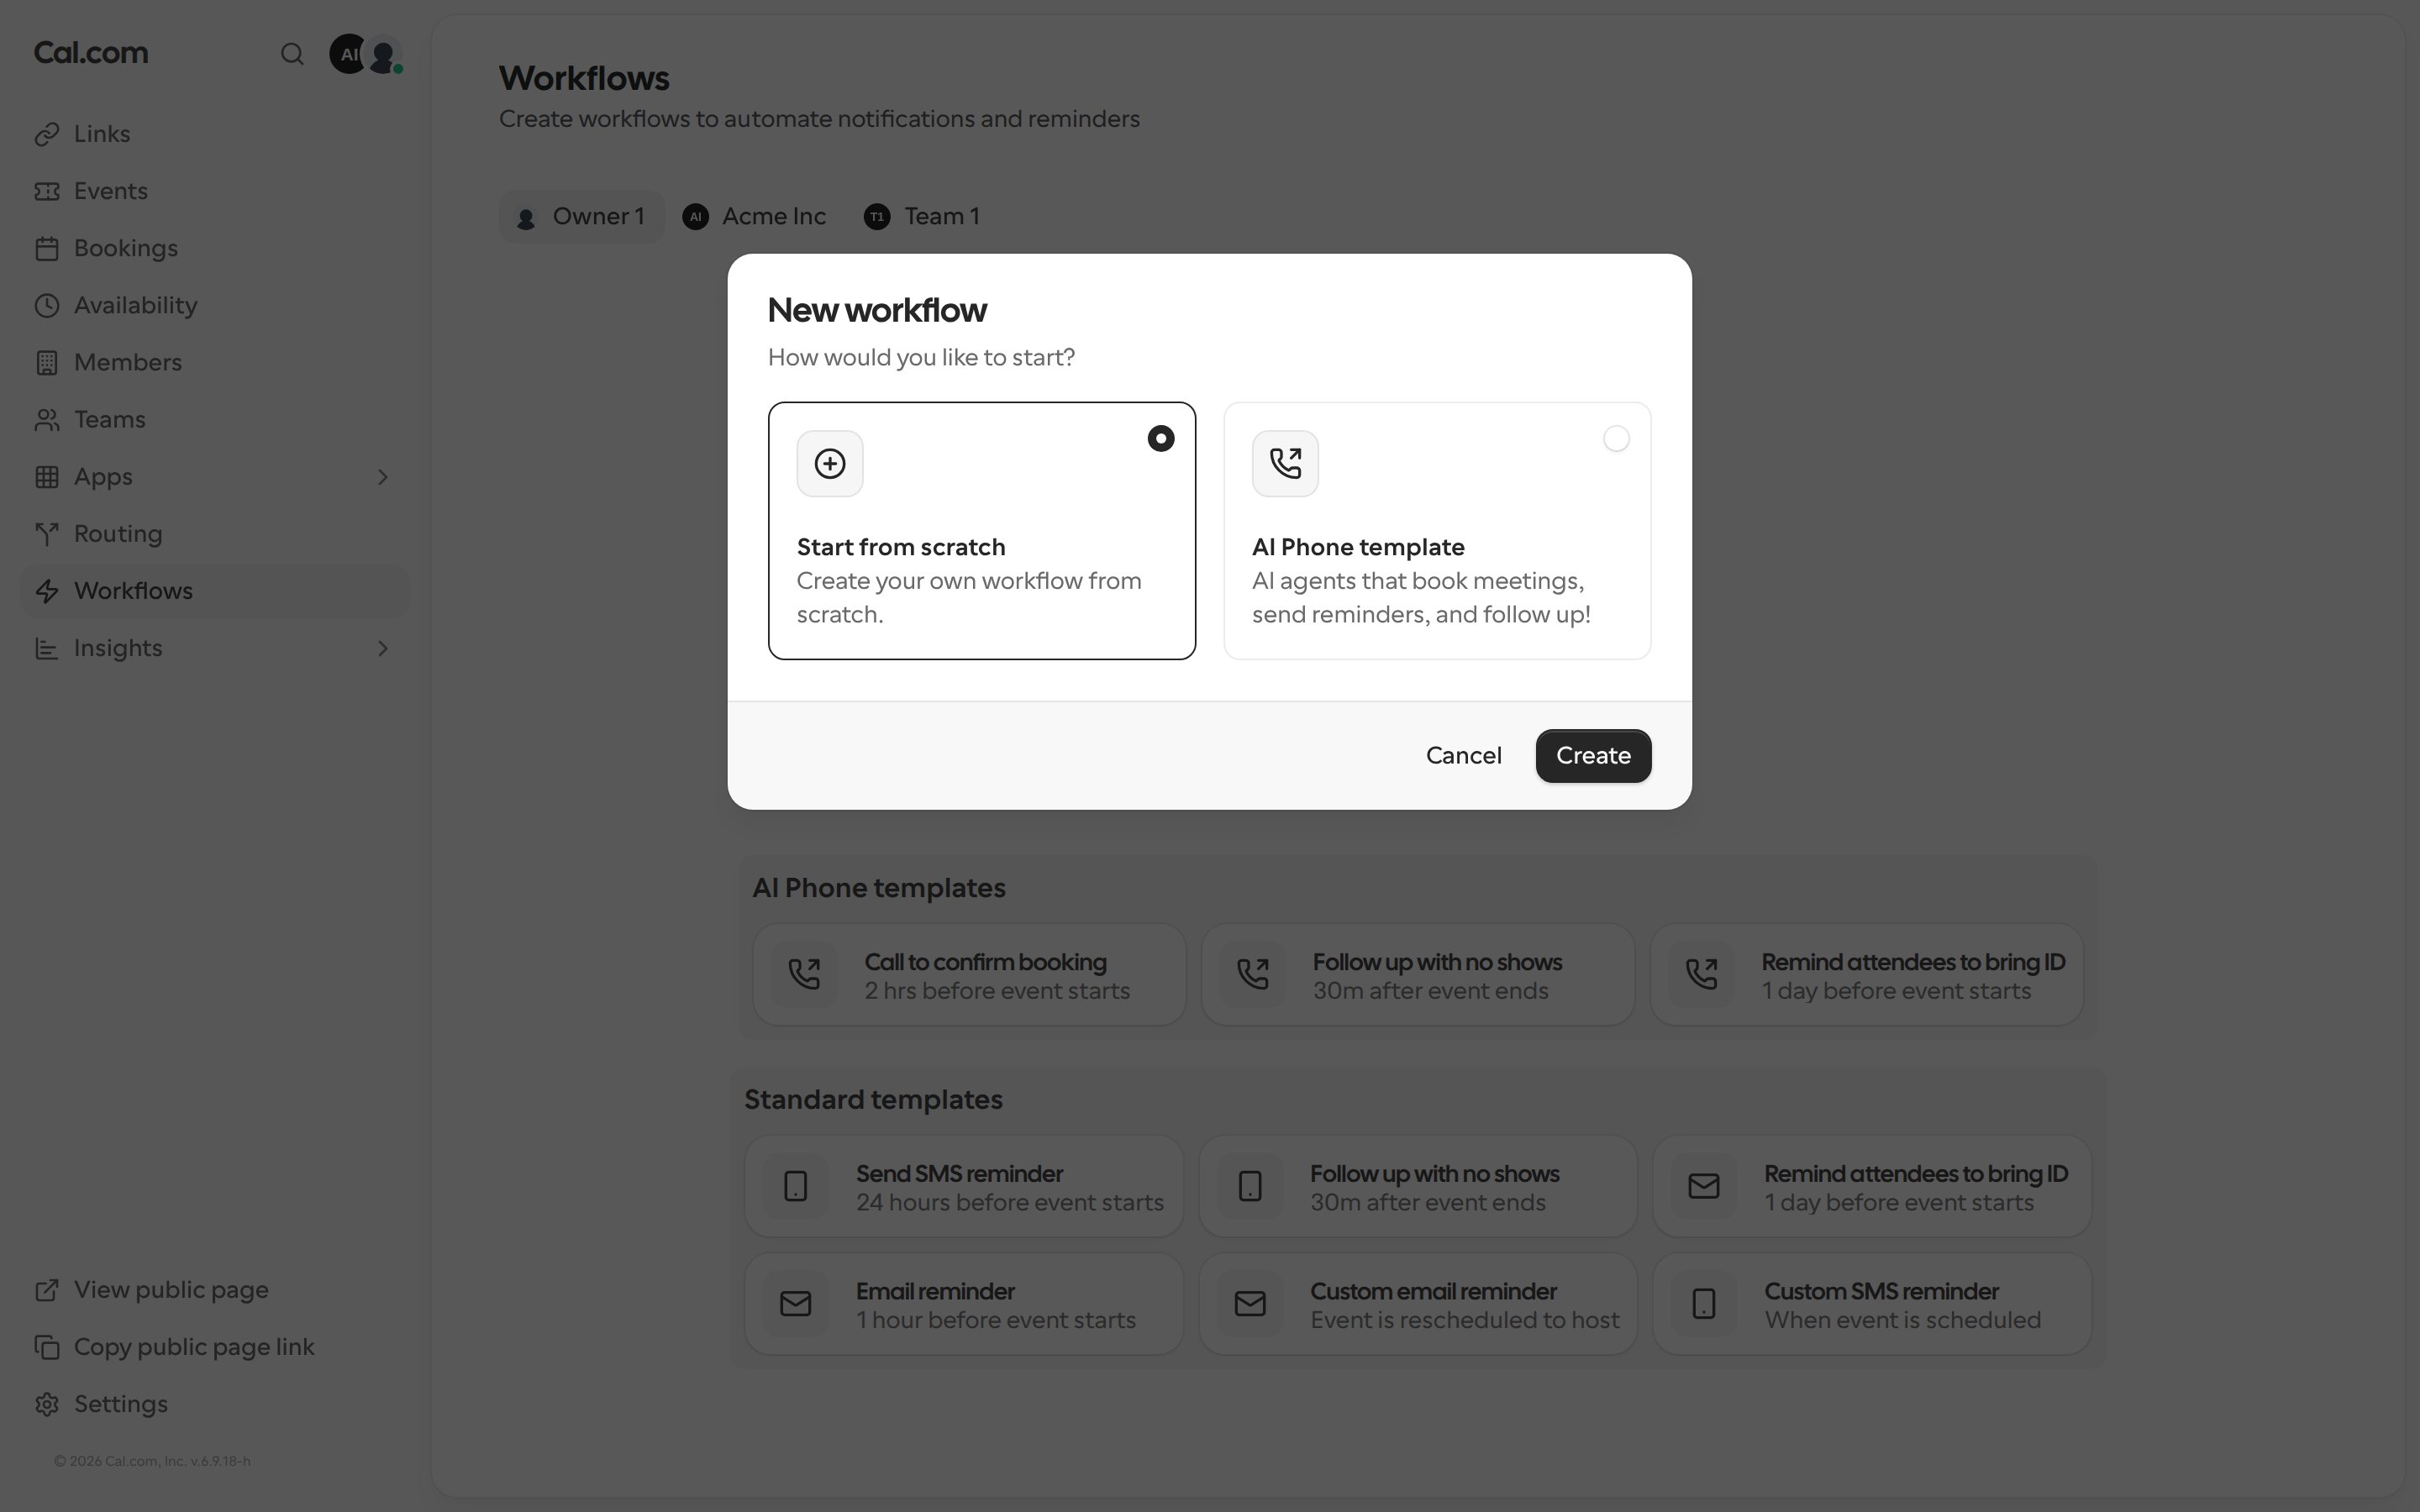
3
Name the workflow
Click the pencil icon next to Untitled at the top of the canvas and type a name.
4
Set up the trigger
Click the trigger at the top of the canvas. Choose when the workflow starts and, for timed triggers, how long before or after the event. Then choose which links it runs on. Turn on Apply to all to include every link, including ones you create later. Click Done.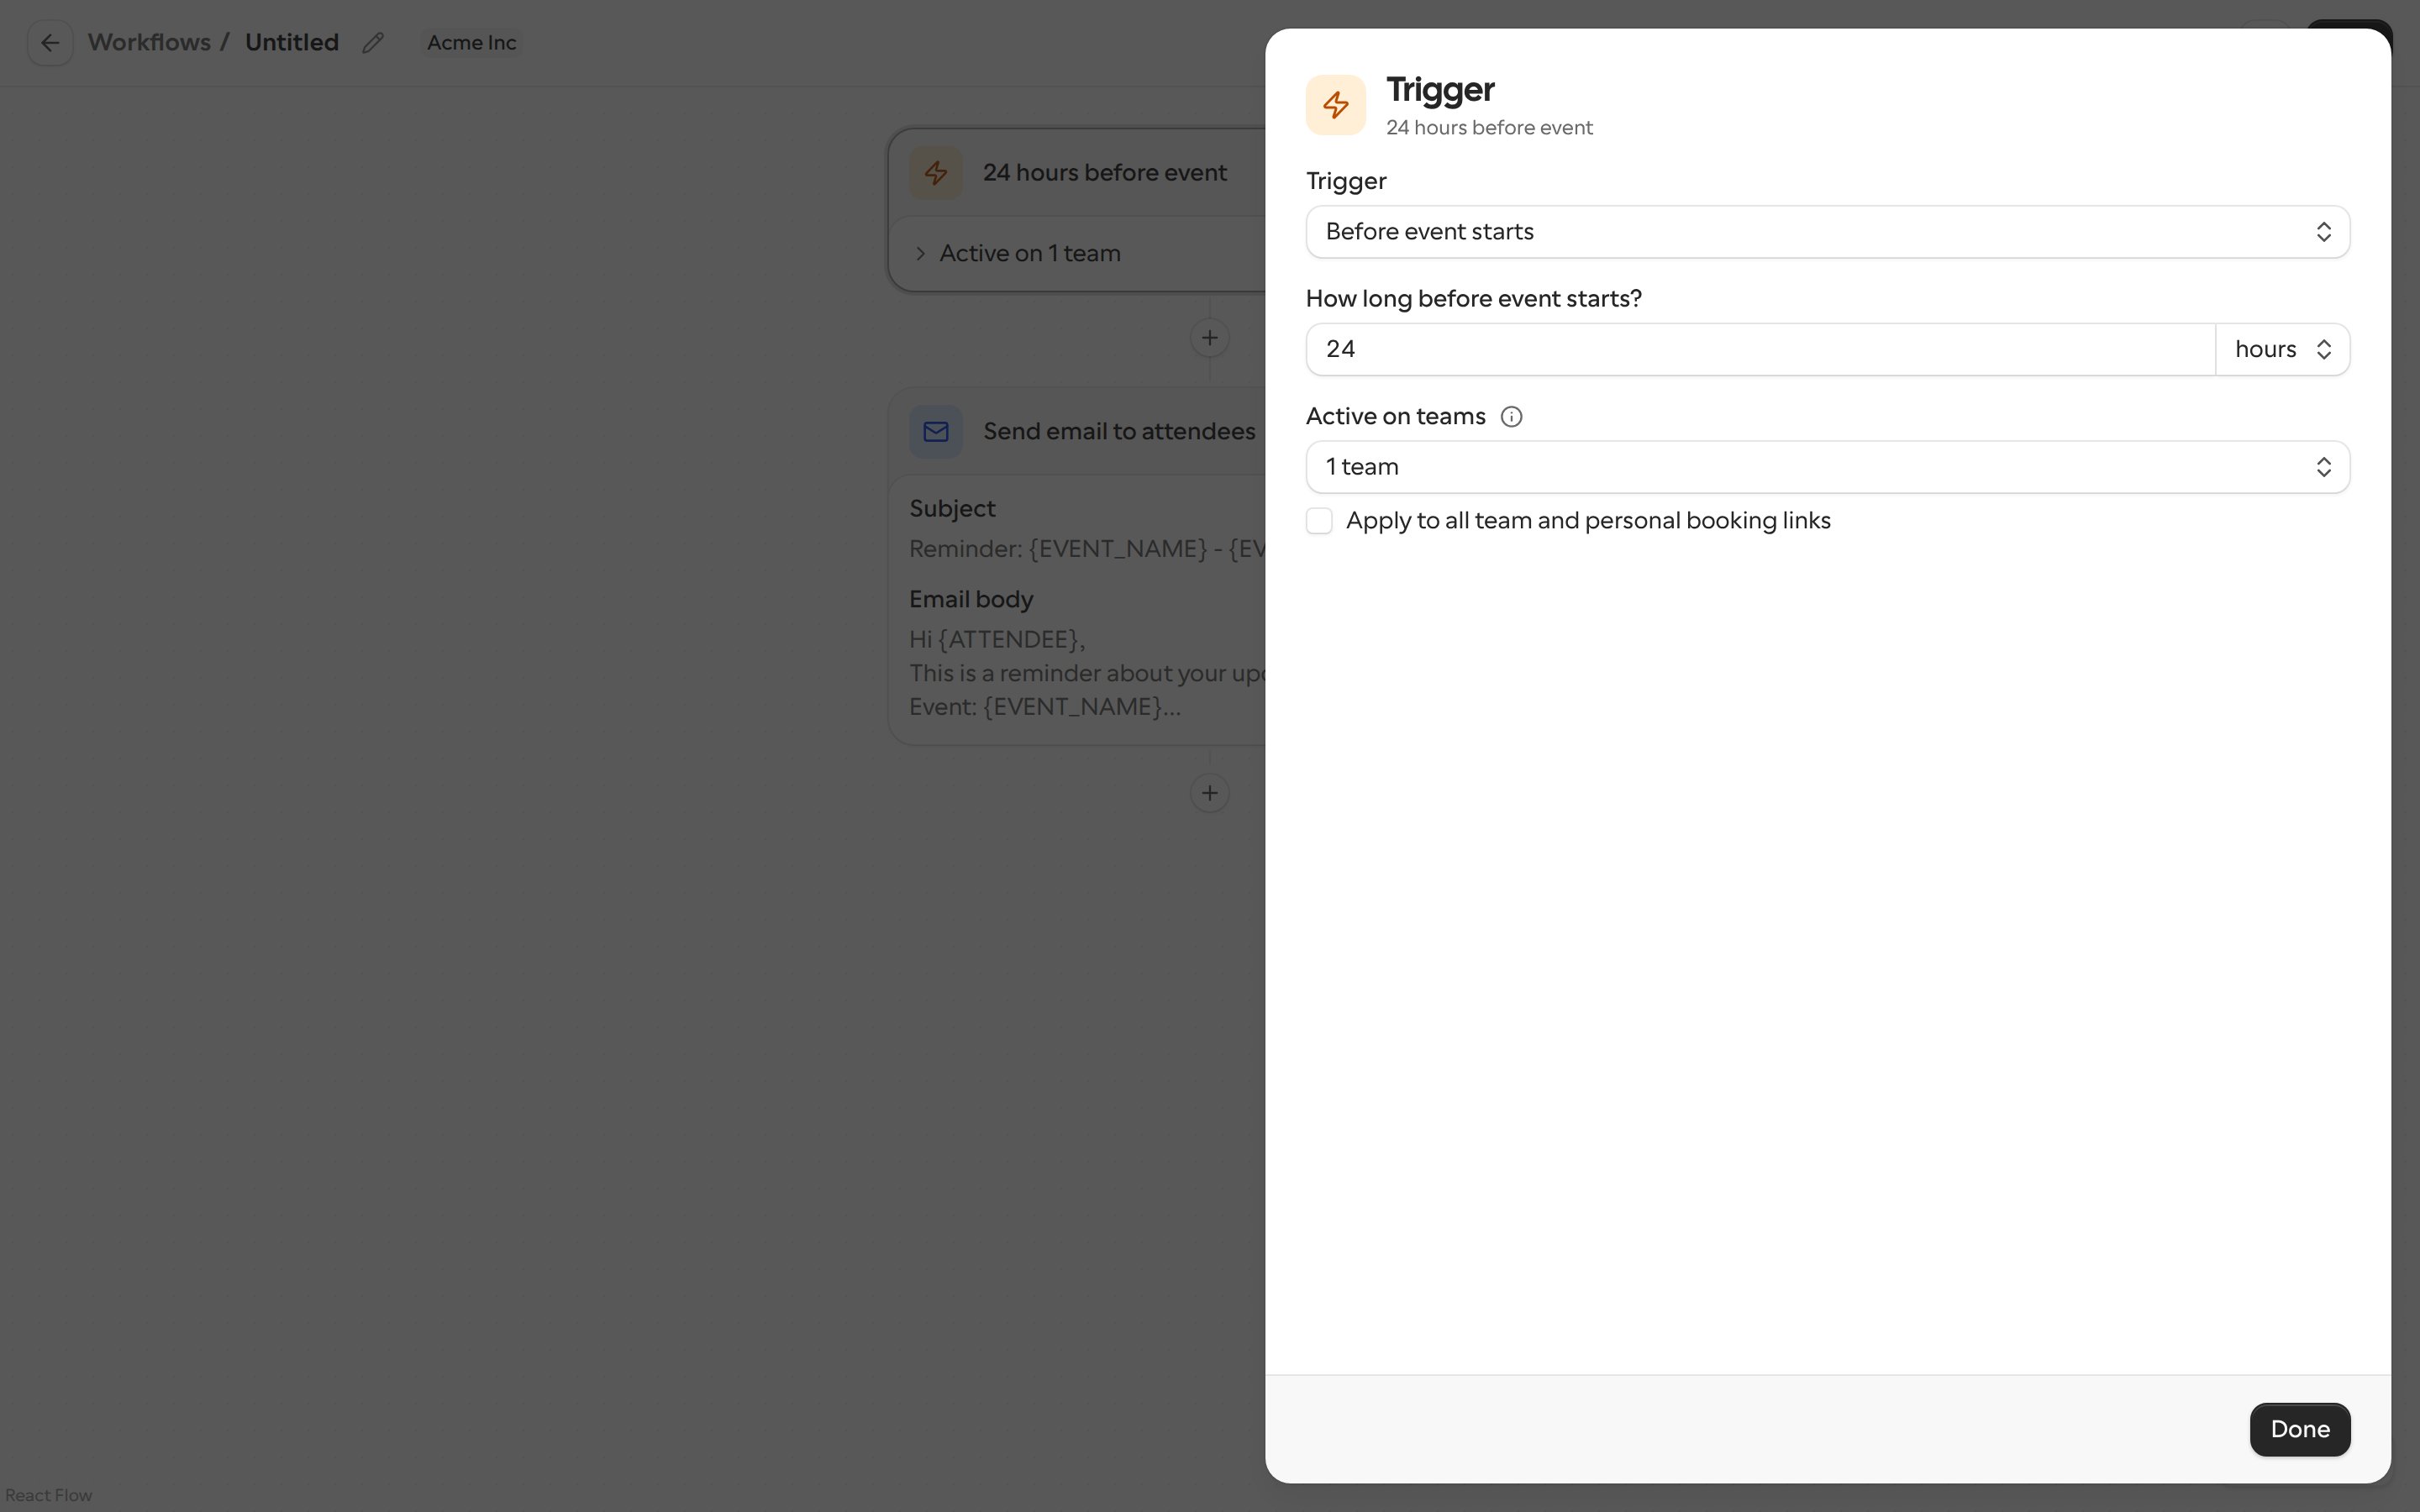
5
Add and edit steps
New workflows start with an email step. Click any step to edit it, or click + between two steps to add a new one there. See Steps you can add.
6
Click Save
The workflow only runs once it’s saved. If you leave the canvas with unsaved changes, Cal.com asks before discarding them.
Triggers
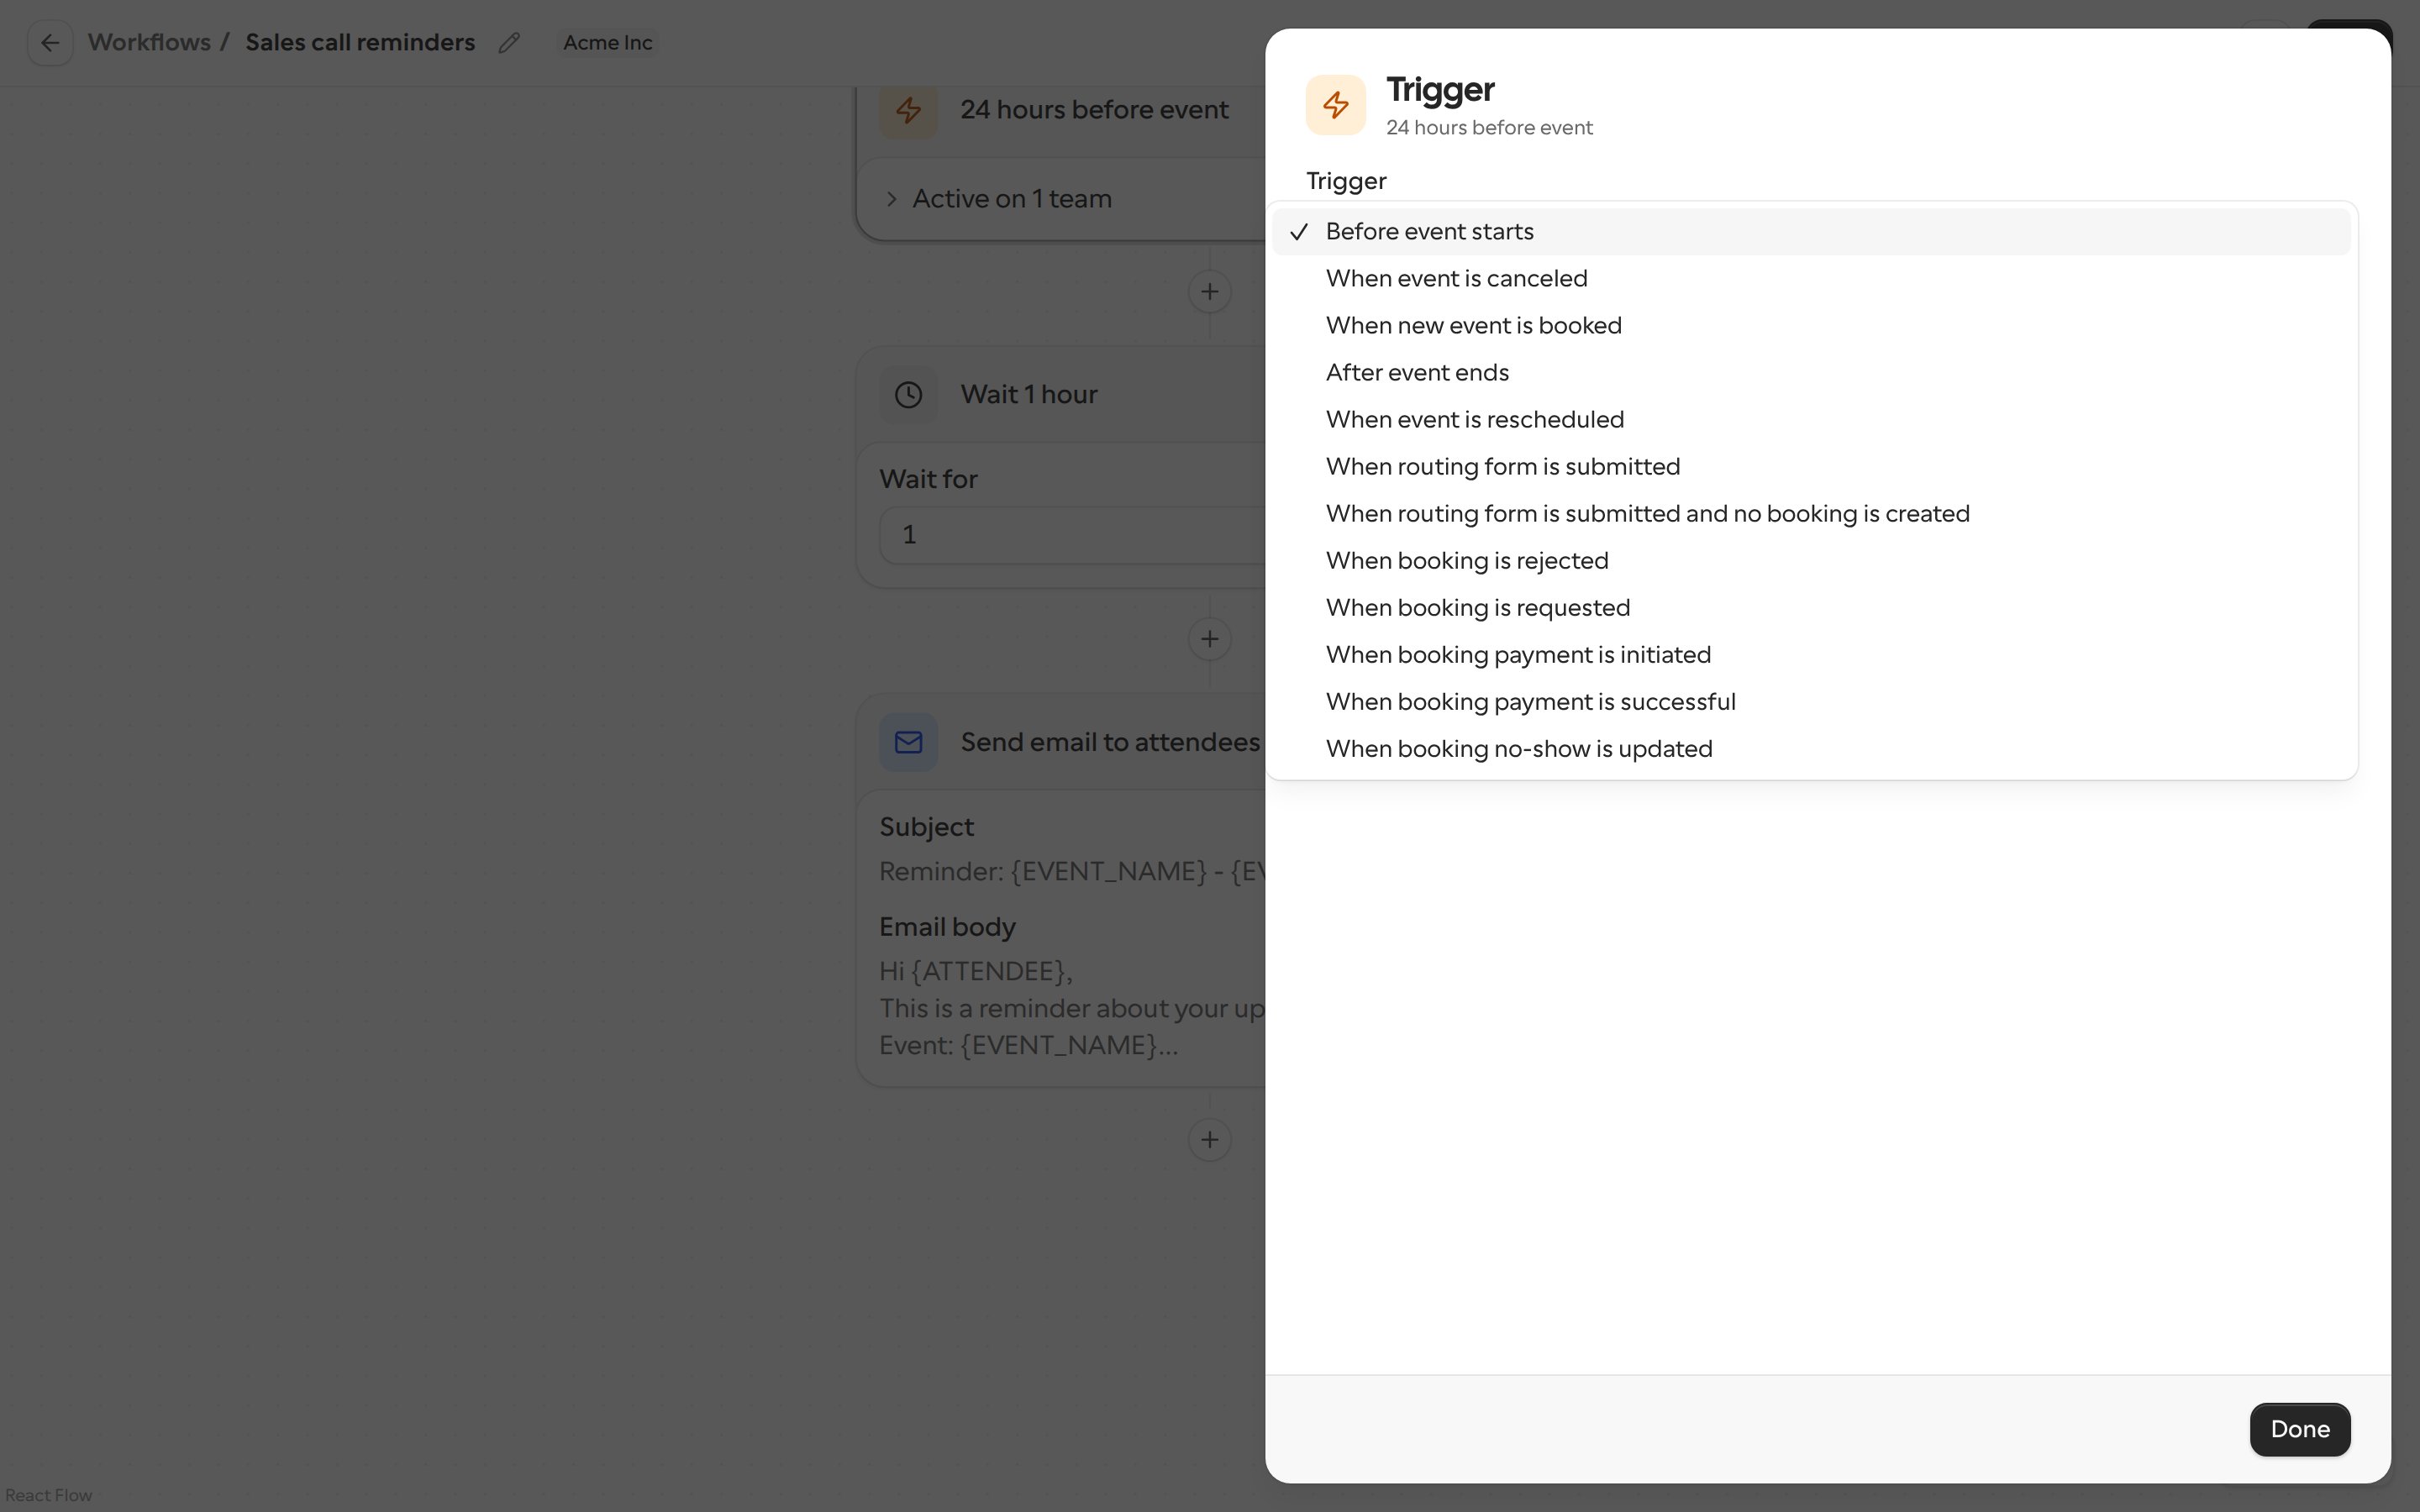
- Before event starts
- When event is canceled
- When new event is booked
- After event ends
- When event is rescheduled
- When routing form is submitted
- When routing form is submitted and no booking is created
- When booking is rejected (for links that require confirmation)
- When booking is requested (for links that require confirmation)
- When booking payment is initiated
- When booking payment is successful
- When booking no-show is updated
Steps you can add
Click + on the canvas to open the step menu.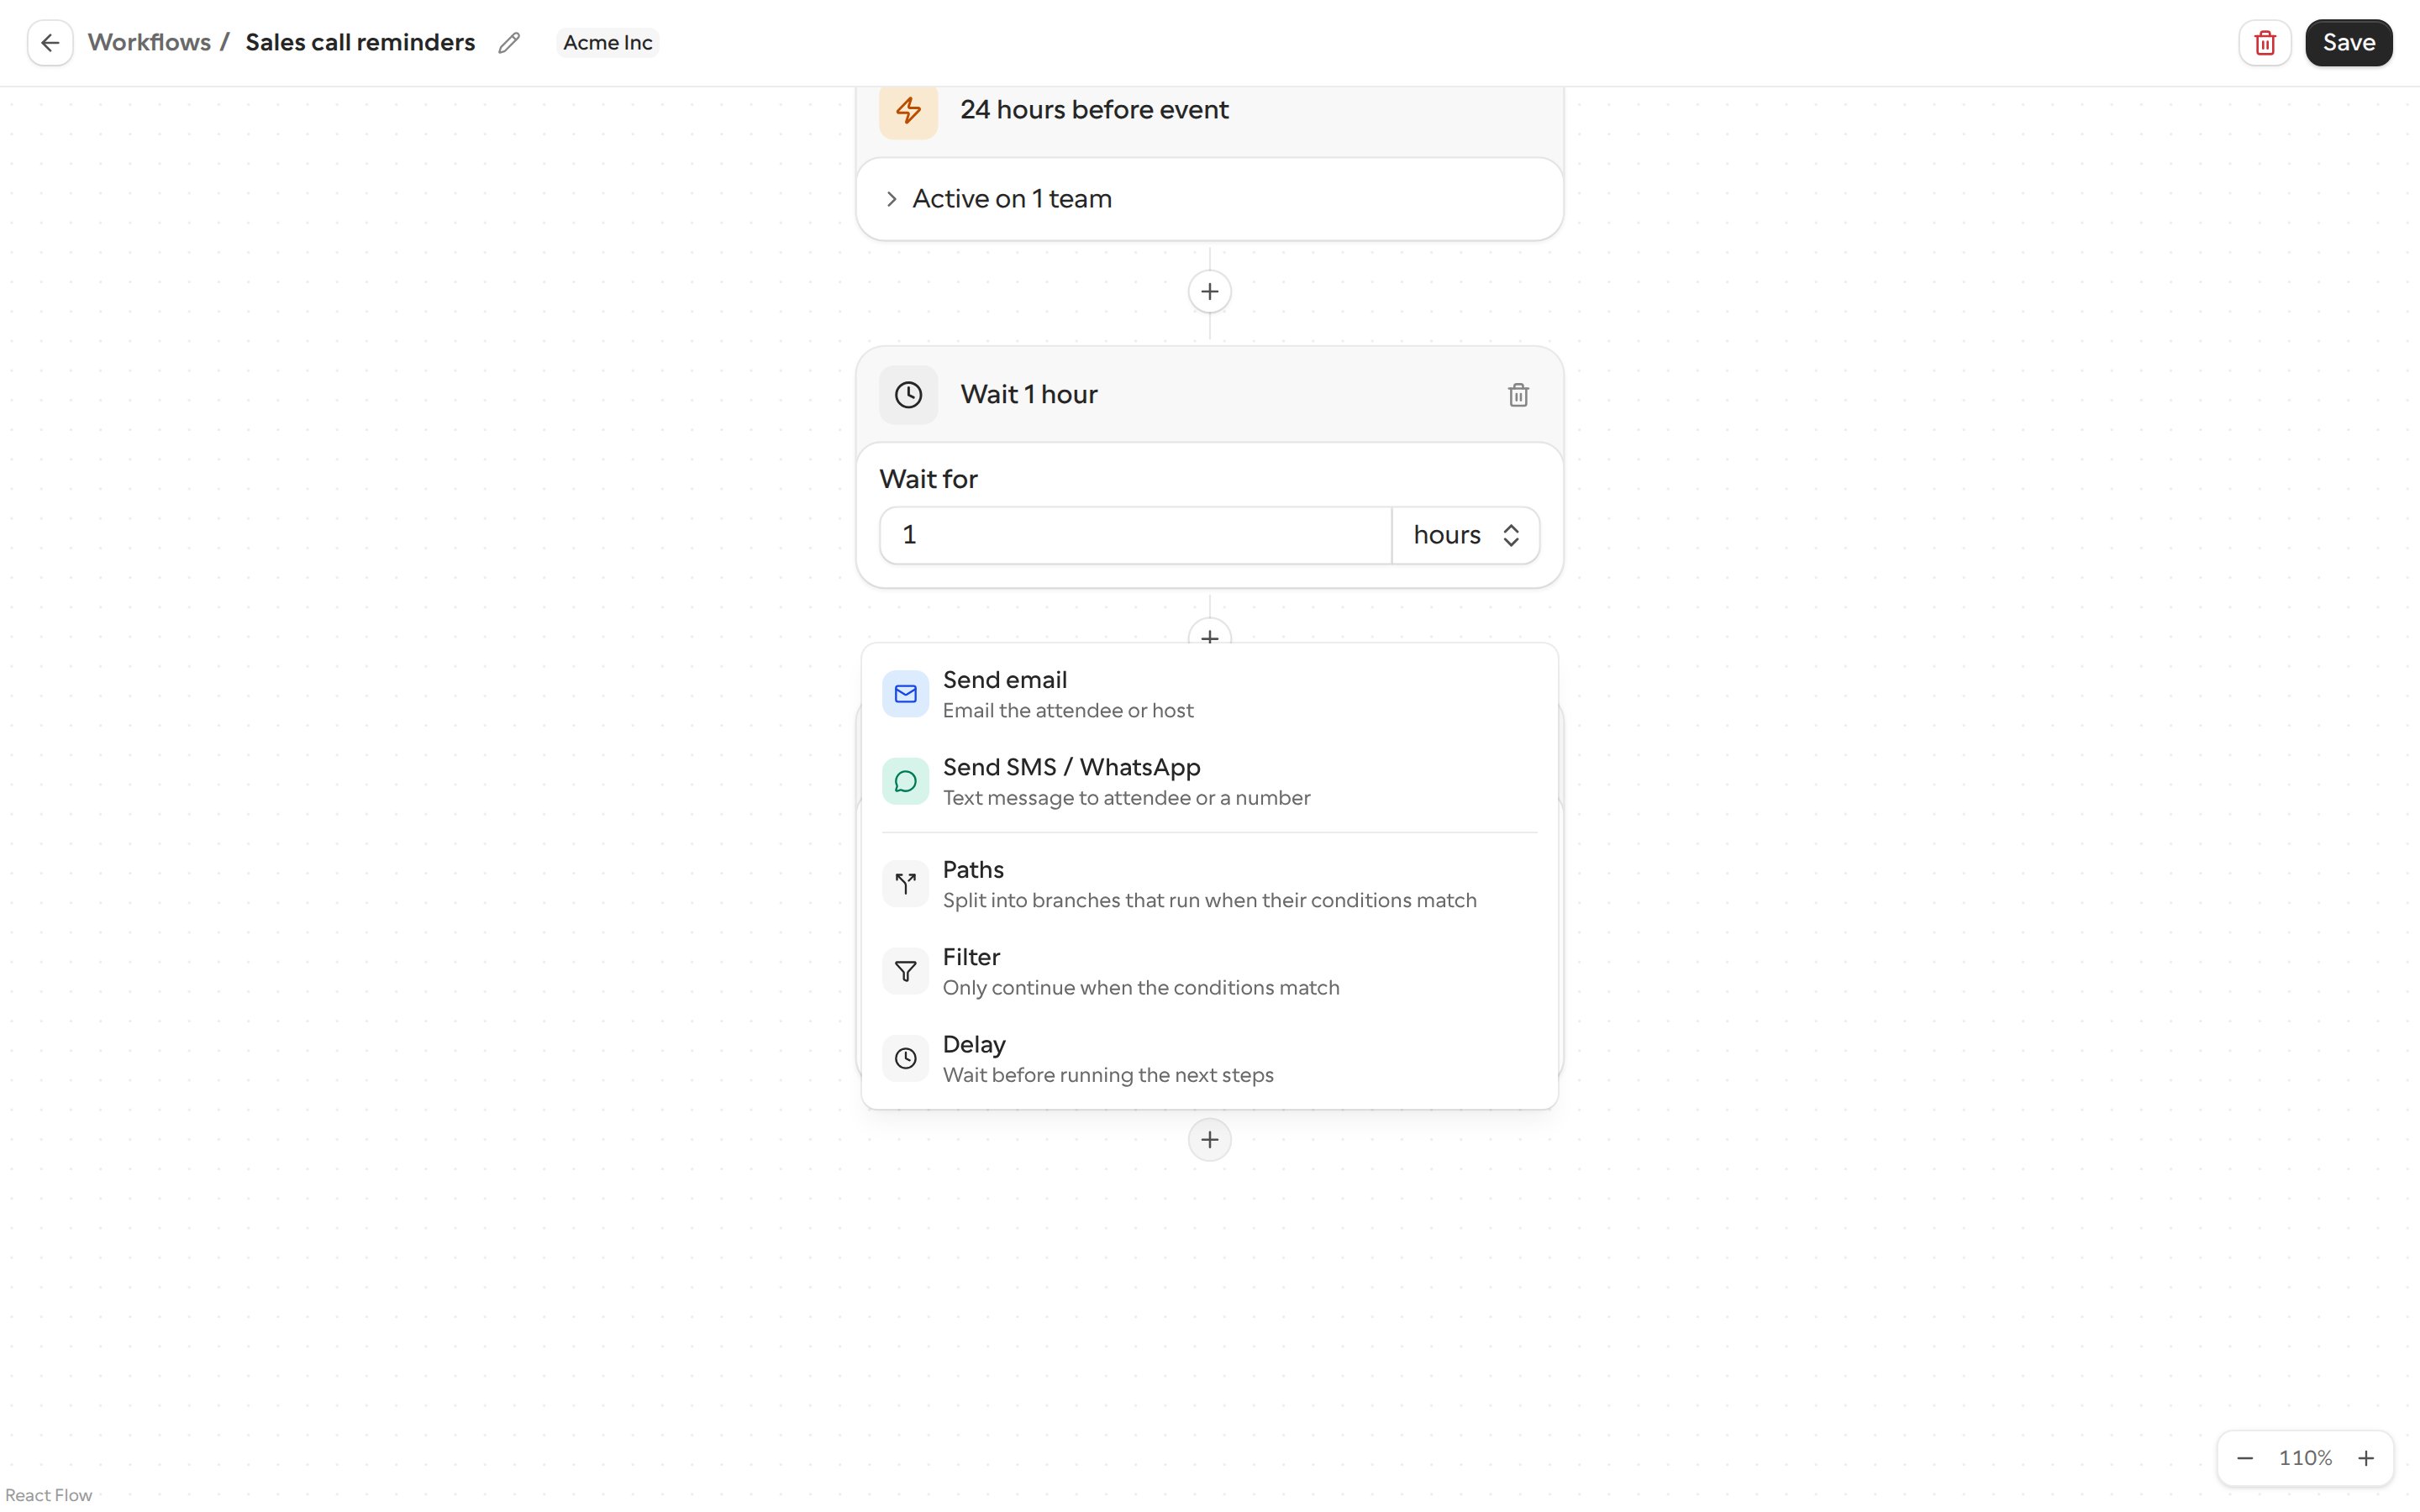
Send email
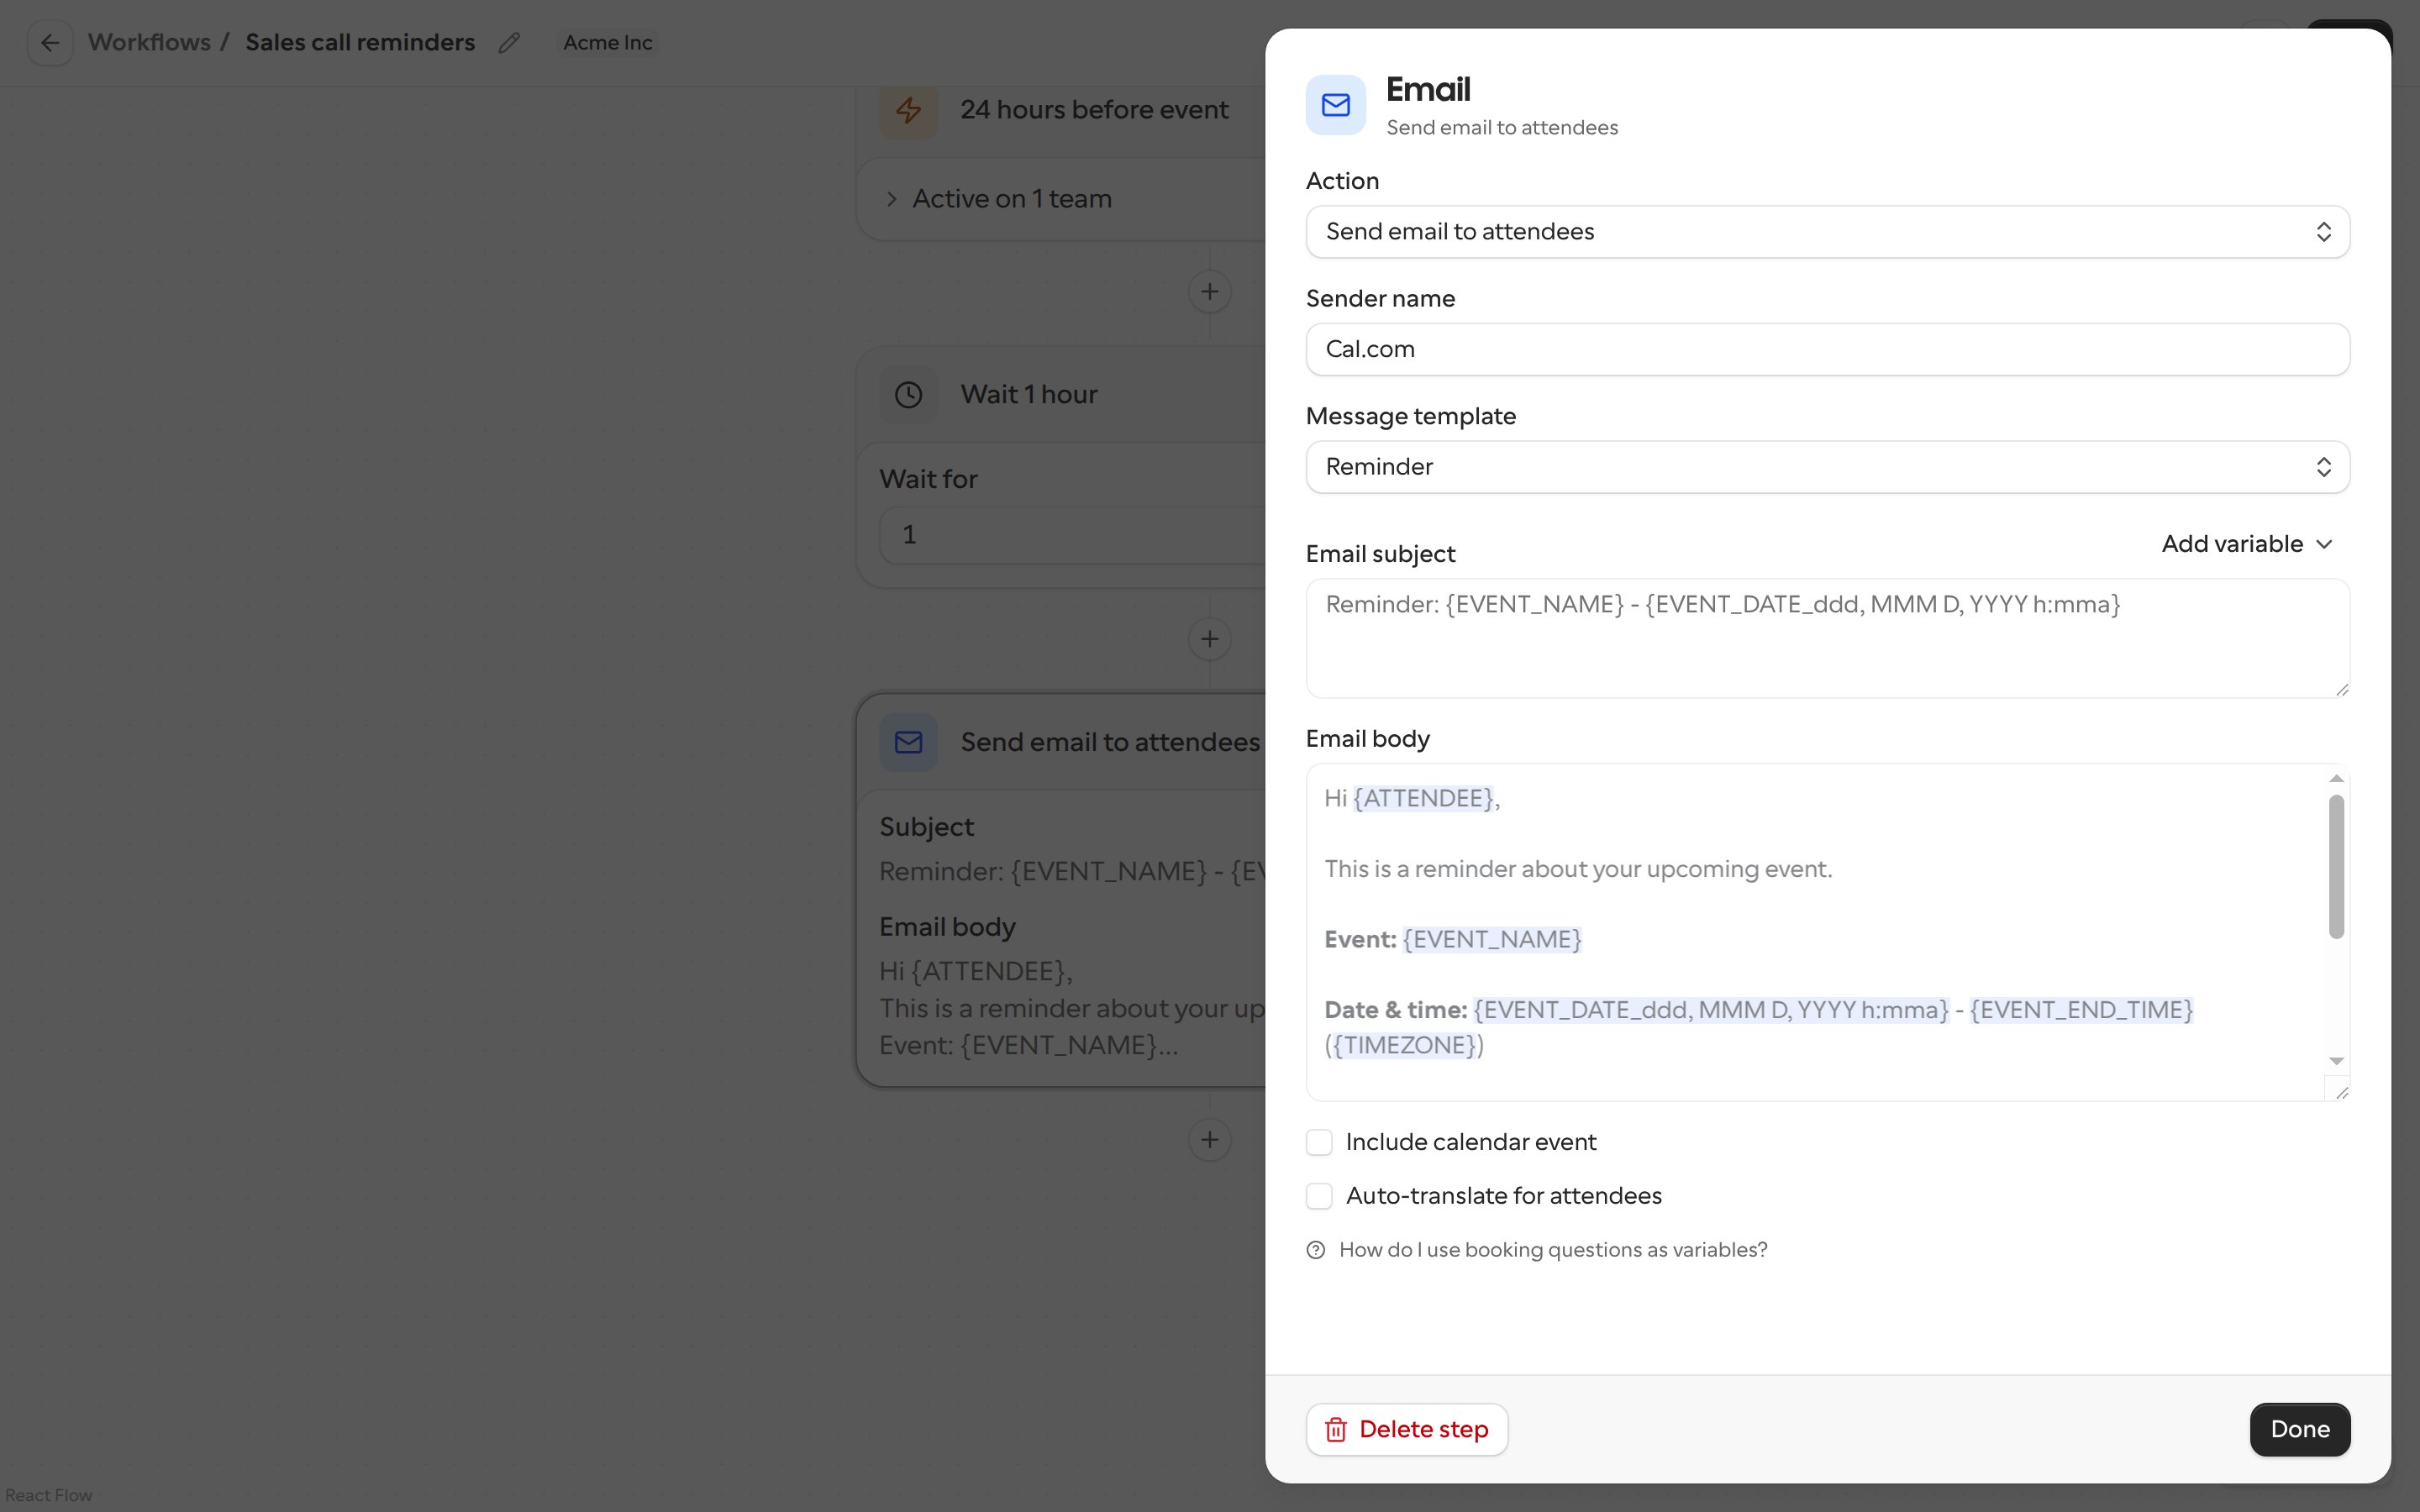
Email the attendees, the host, or a specific email address. You can pick a message template (for example Reminder or Thank you), set the sender name, and write your own subject and body with variables. Other options:- Include calendar event: attach the event as a calendar invite.
- Auto-translate for attendees: see Auto-translate for attendees.
Send SMS / WhatsApp
Text the attendee or a specific phone number, by SMS or WhatsApp. Messages to a specific number need that number to be verified first. SMS messages use credits.Cal.ai phone call
Cal.ai calls the attendee with an AI voice agent. Start from the AI Phone template, or add the step from the step menu. Cal.ai phone calls use credits. See Cal.ai for setting up the agent.Cal.ai isn’t available on organization workflows, or on workflows that apply to all links.
Delay
Waits before running the steps below it. Set Wait for to a number of minutes, hours or days. The step’s title shows the wait, for example Wait 1 hour.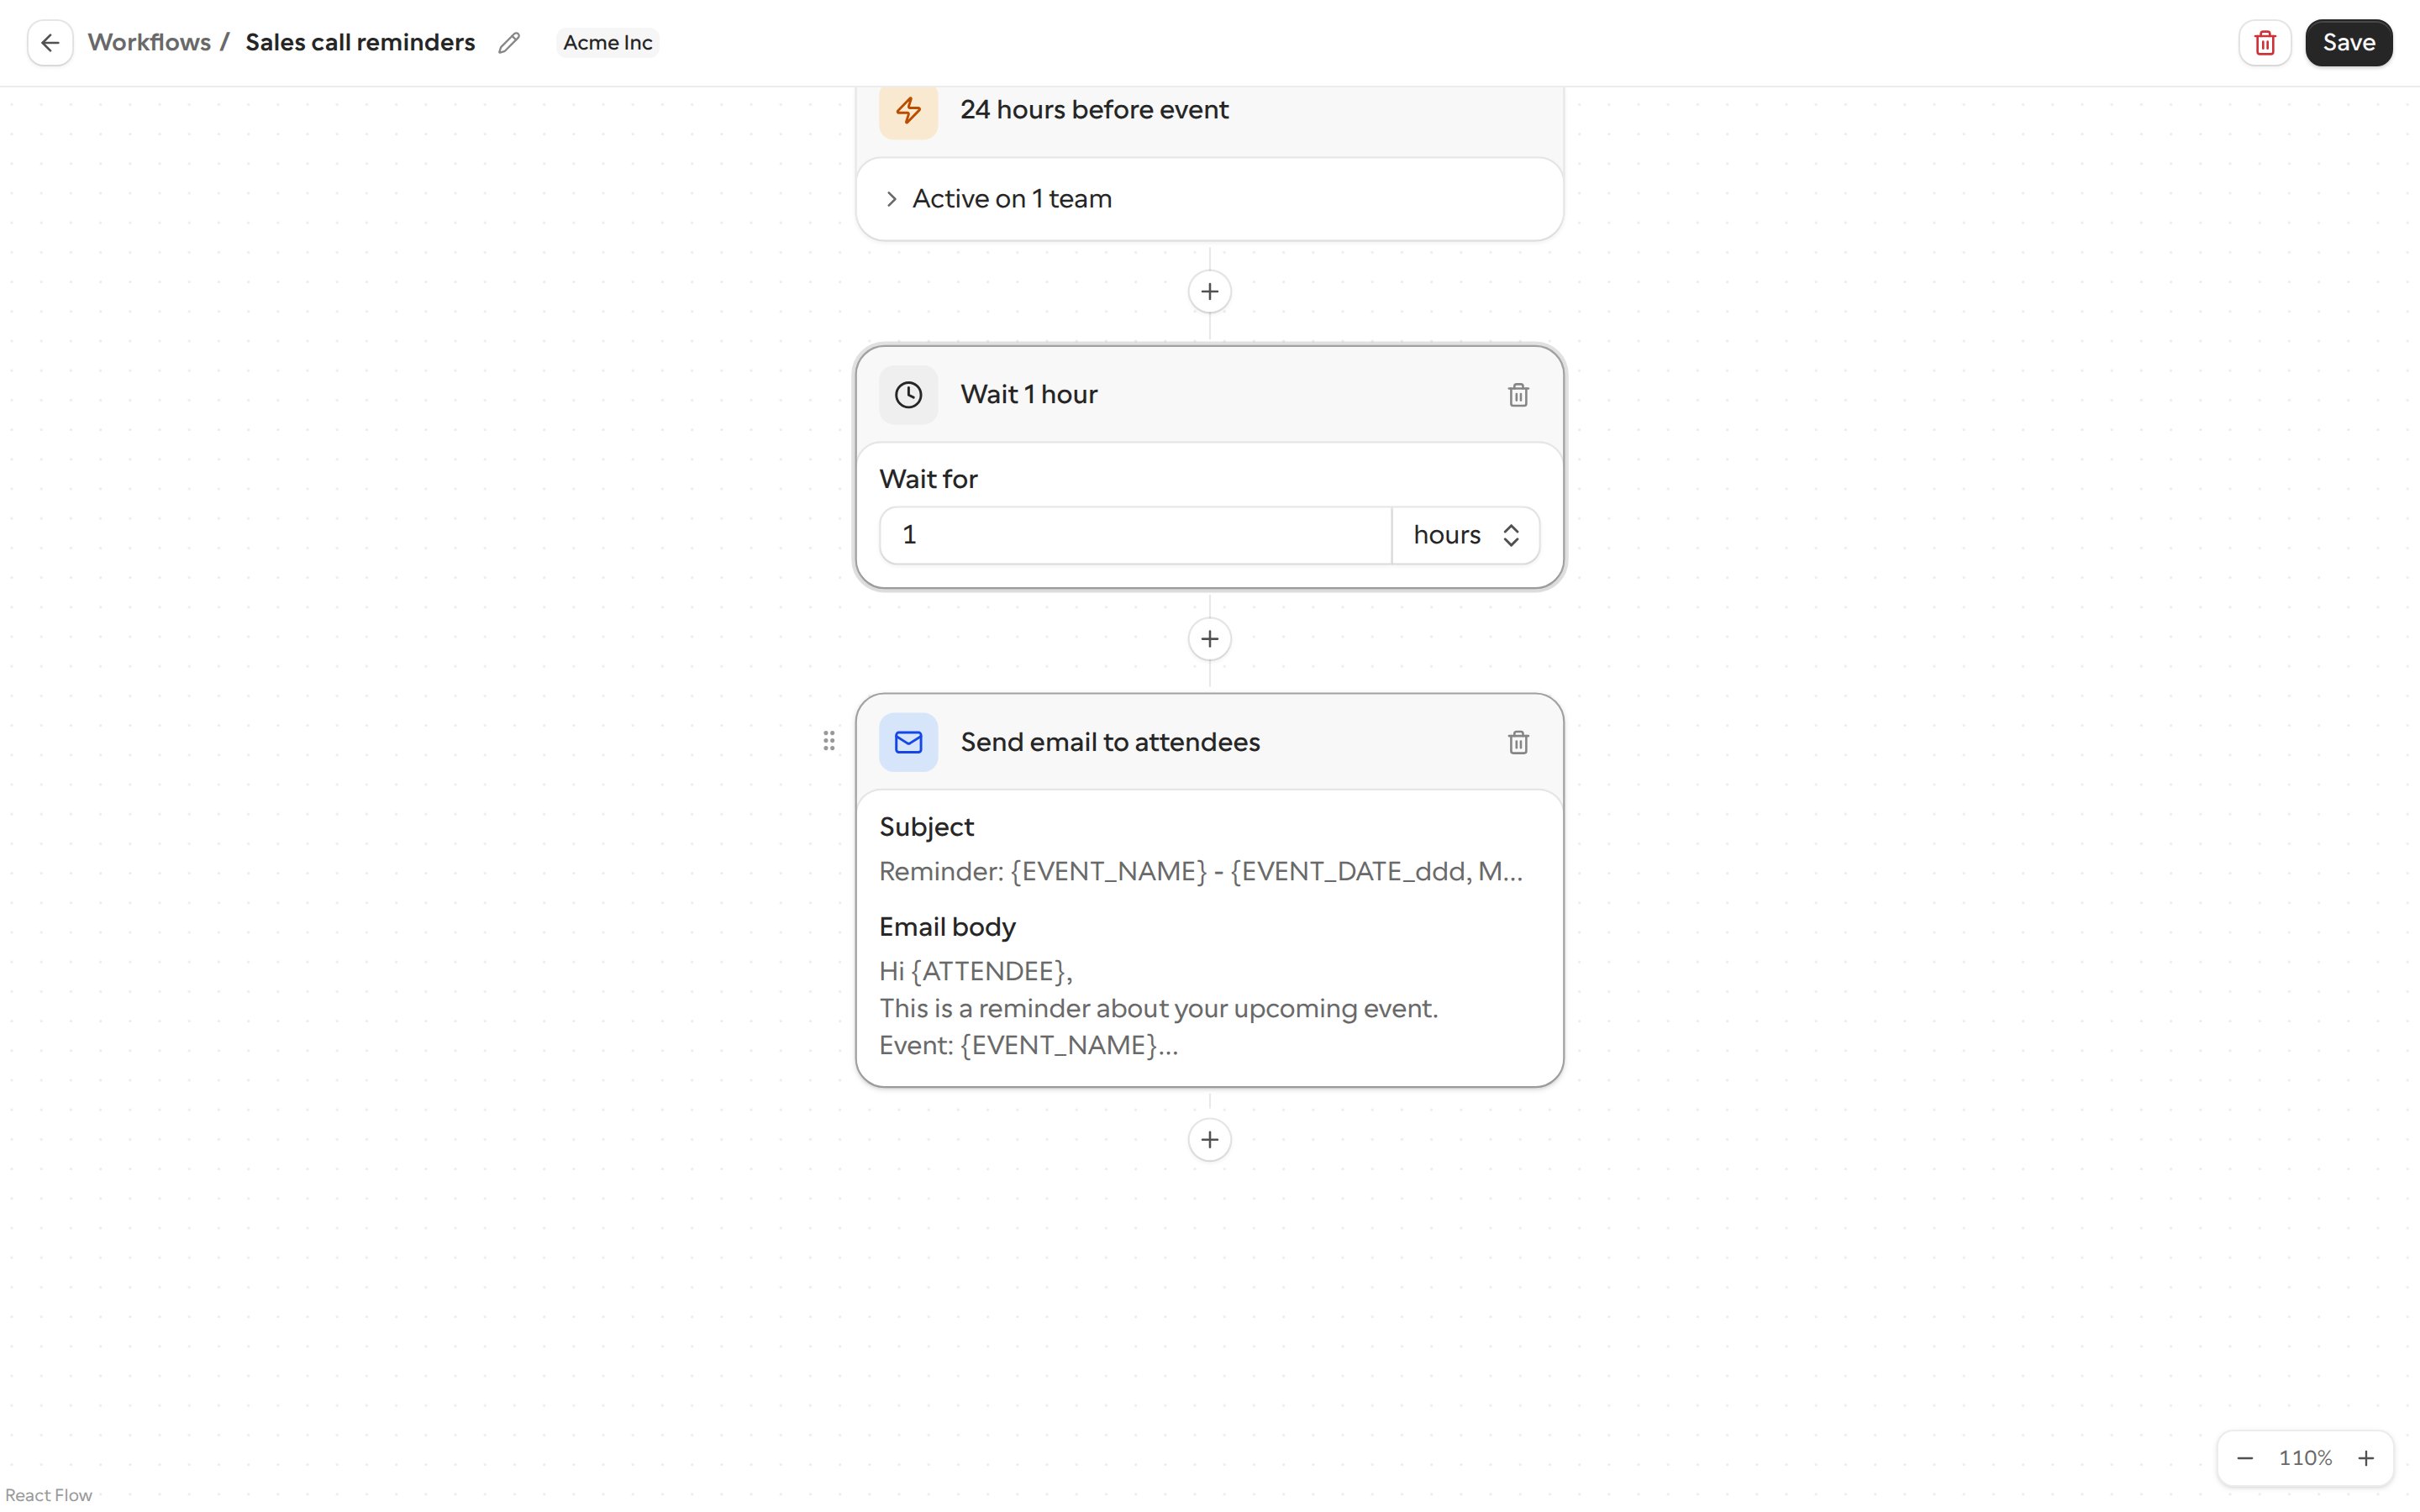
Filter
Only continues when its conditions match. If they don’t match, none of the steps below the filter run. For example, filter on the attendee’s email or location so the next steps only run for some attendees.Paths
Splits the workflow into branches. Each path has its own conditions and its own steps, and runs when its conditions match. Use paths when different attendees should get different messages. Paths are added at the end of a branch, so the step menu only shows Paths when you click the + below the last step.Dynamic text variables
Click Add variable above a message to insert one. Variables are replaced with the booking’s details when the message is sent.
You can also format dates and times, for example
{EVENT_DATE_ddd, MMM D, YYYY h:mma}, and use answers to your booking questions as variables.
Auto-translate for attendees
If you’re on an Organization plan, you can turn on auto-translation for steps that message attendees. Cal.com translates the message into the attendee’s preferred language before sending it. This works with:- Email to attendee steps
- SMS to attendee steps
How to turn on auto-translate
- Open a workflow and click a step that sends a message to an attendee.
- Below the message editor, check Auto-translate for attendees.
- A note confirms which language your message is written in (your account’s default language). This is the language it’s translated from.
- Click Save.
Auto-translate is only available on Organization plans. On other plans, you’ll see an upgrade prompt instead of the checkbox.
Plan limitations
- Free plan: you can build workflows, but email steps use the default template text and can’t be edited. SMS text can still be edited.
- Teams, Organization and Enterprise plans: full access, including custom email content and routing form workflows.
- Self-hosted instances: no restrictions on workflow usage.
WhatsApp messages can’t be customized on any plan at the moment. They always send a predetermined default message.