

Before provisioning users, your organization must have a verified domain configured. Cal.com only provisions users whose email domain matches (or is a subdomain of) your organization’s verified domain. Provisioning requests for other domains are rejected to prevent account capture. Verify your domain under
Settings → Organization before enabling SCIM.1
Create an application with your OIDC provider
For example, in Okta, once you create an account, you can click on Applications on the sidebar menu: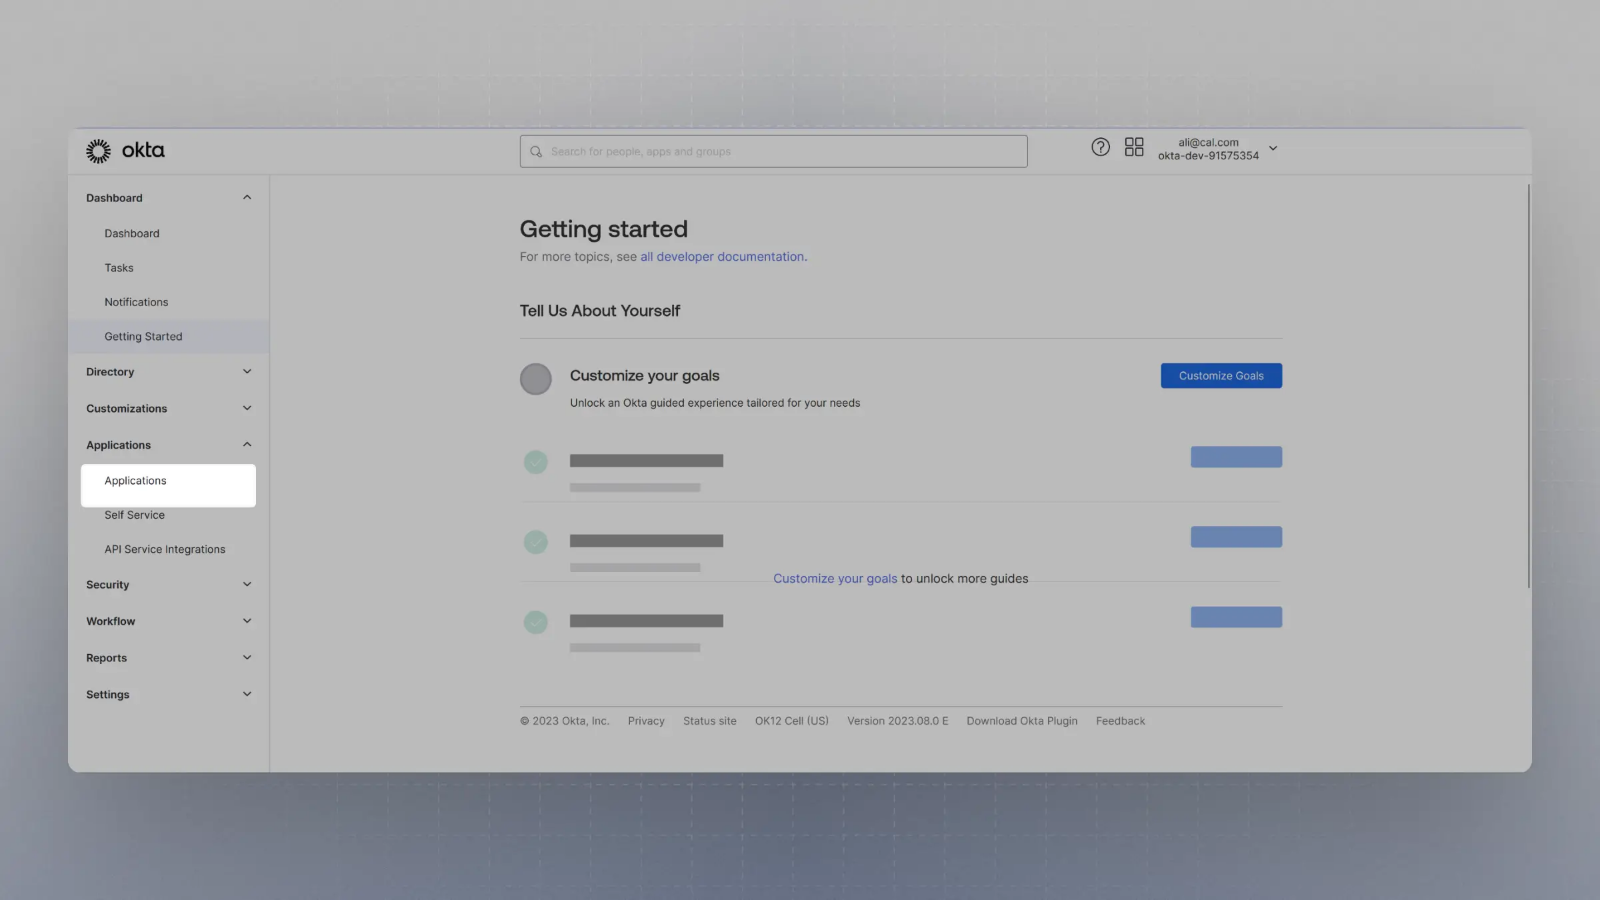
2
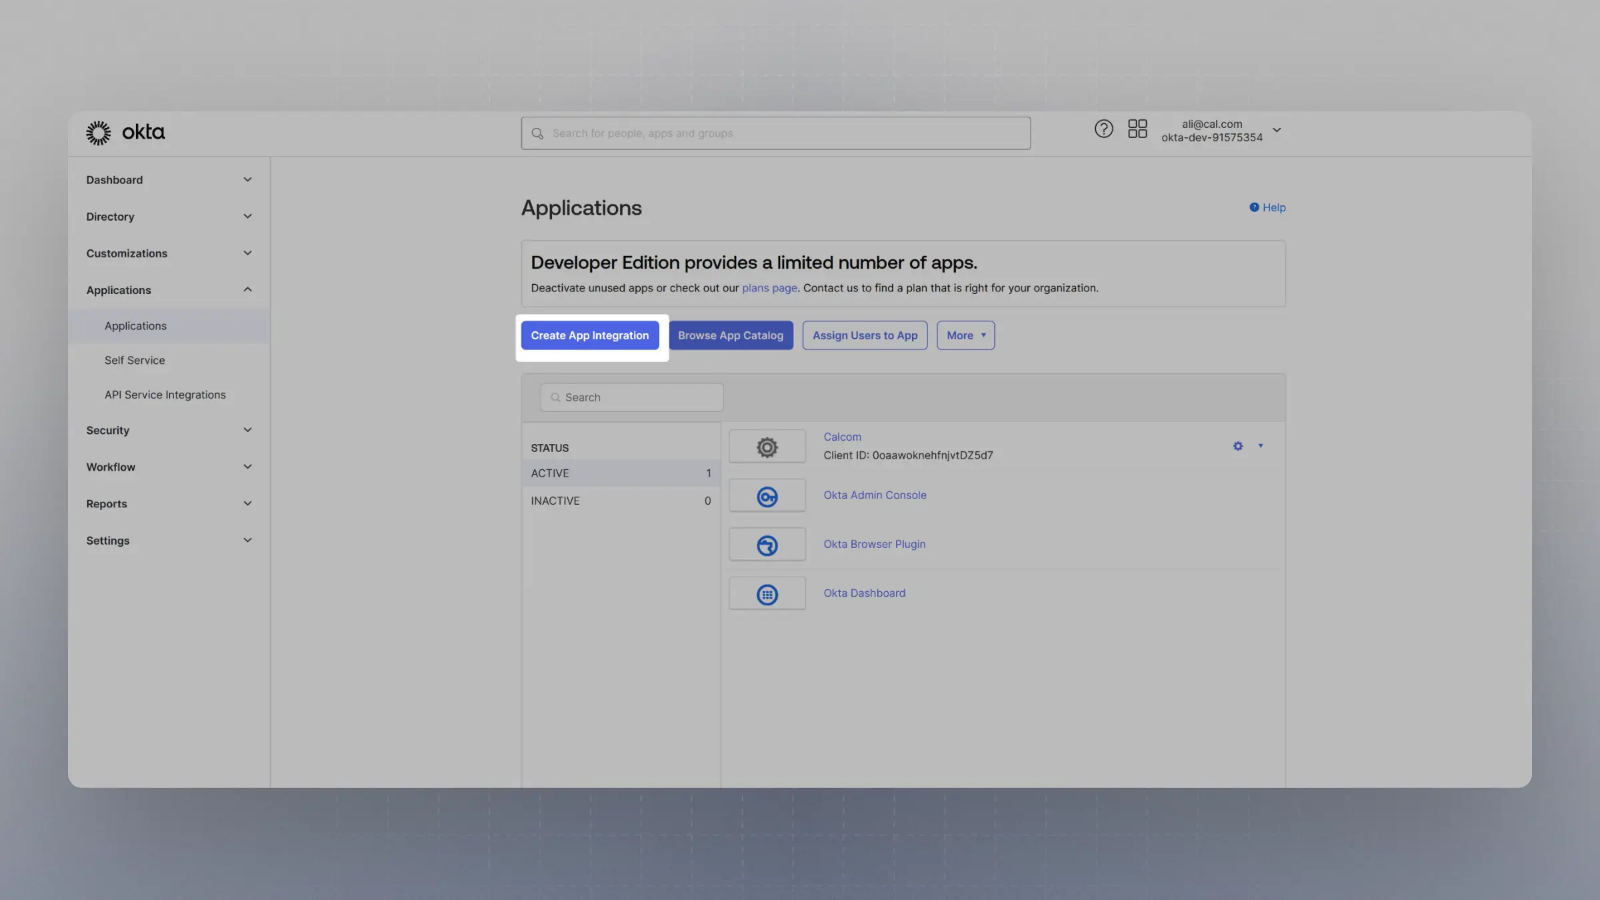
Click on Create App Integration
3
Select SAML or OIDC and Web App, then click Next
Note you will have to fill in the appropriate fields for the SAML or OIDC setup to continue.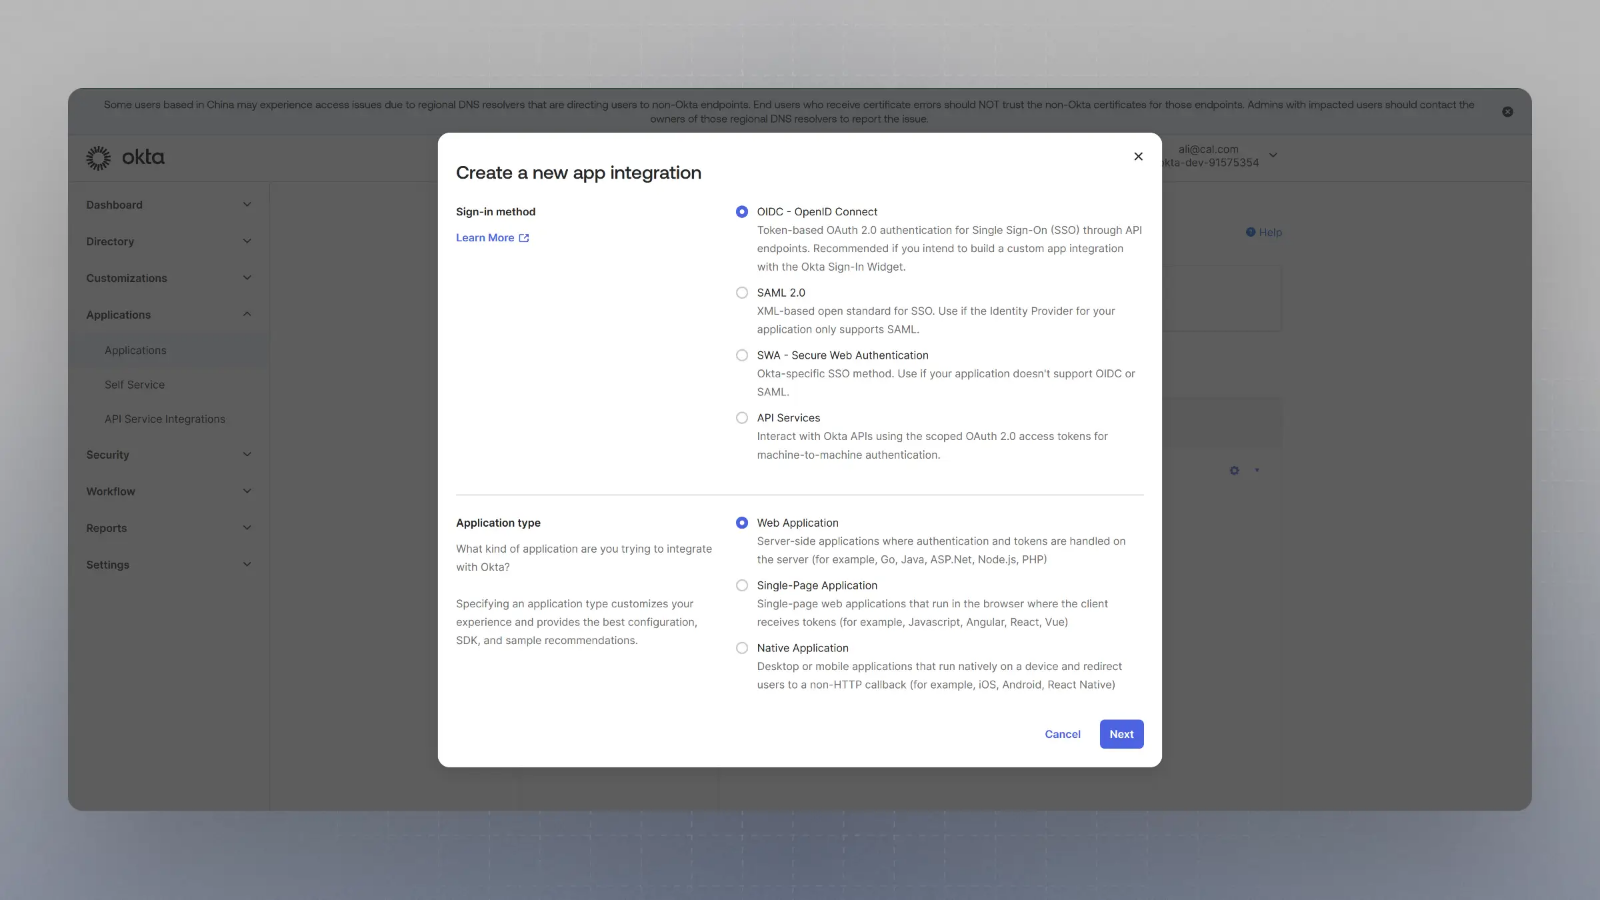
4
Enable SCIM provisioning
Once the application is created, under General -> App Settings, click “Edit” and then the checkbox “Enable SCIM provisioning”.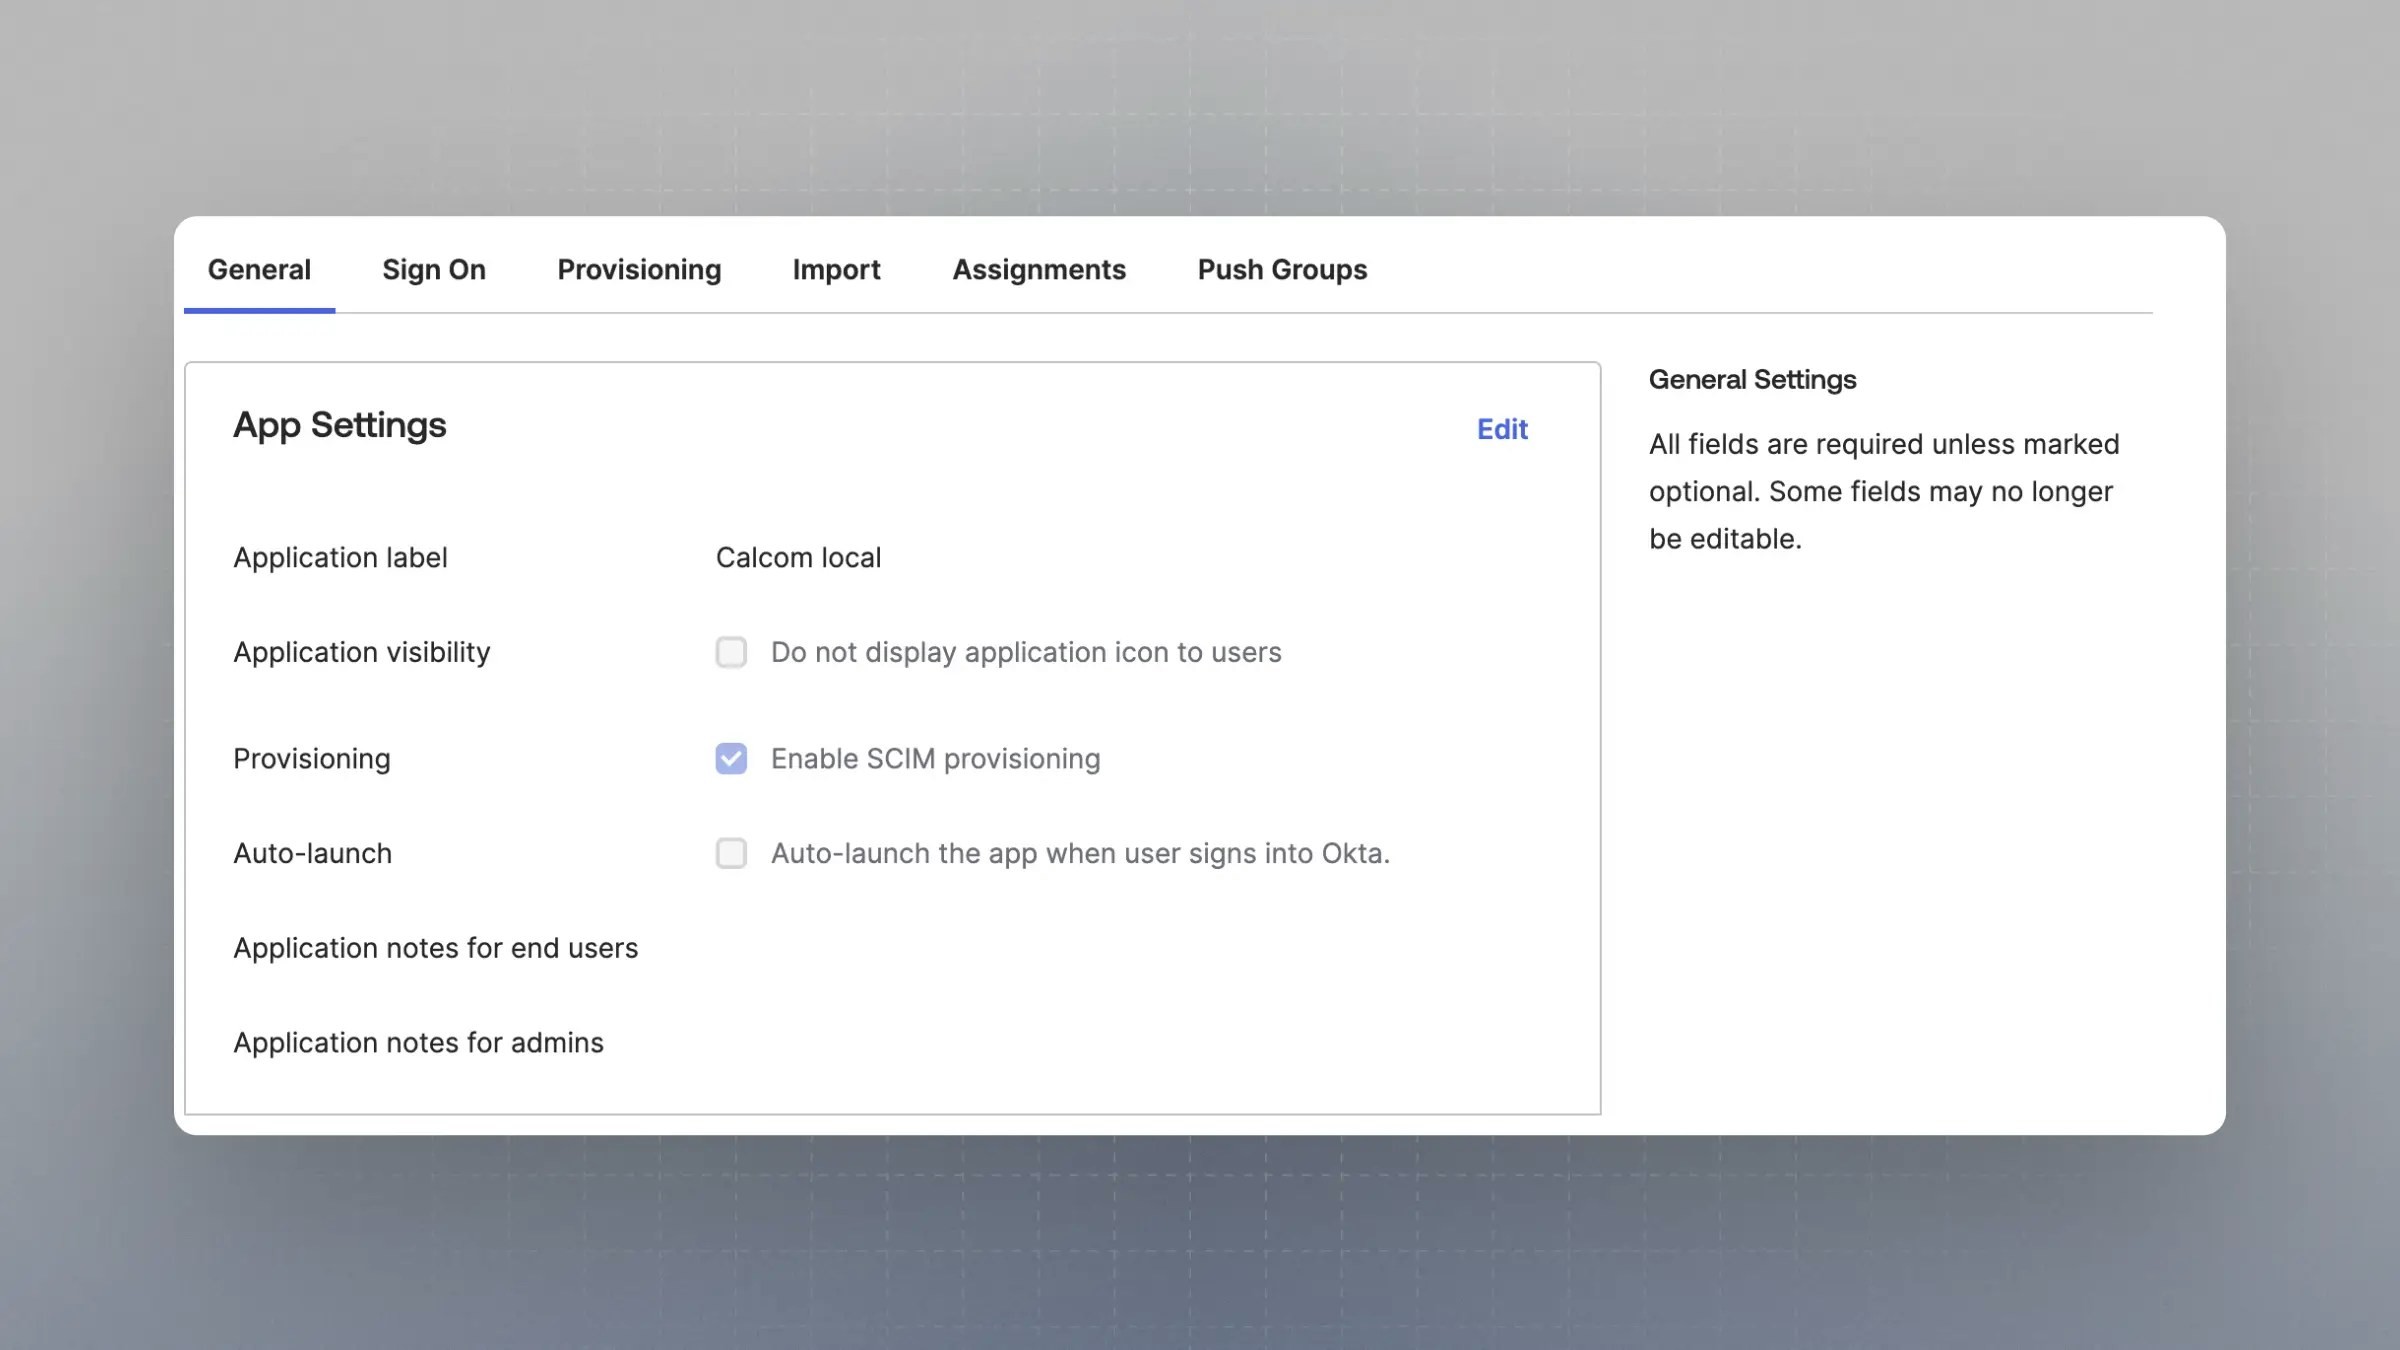
5
Go to Directory Sync in Cal.com
Next, go to your instance of Cal.com and navigate to 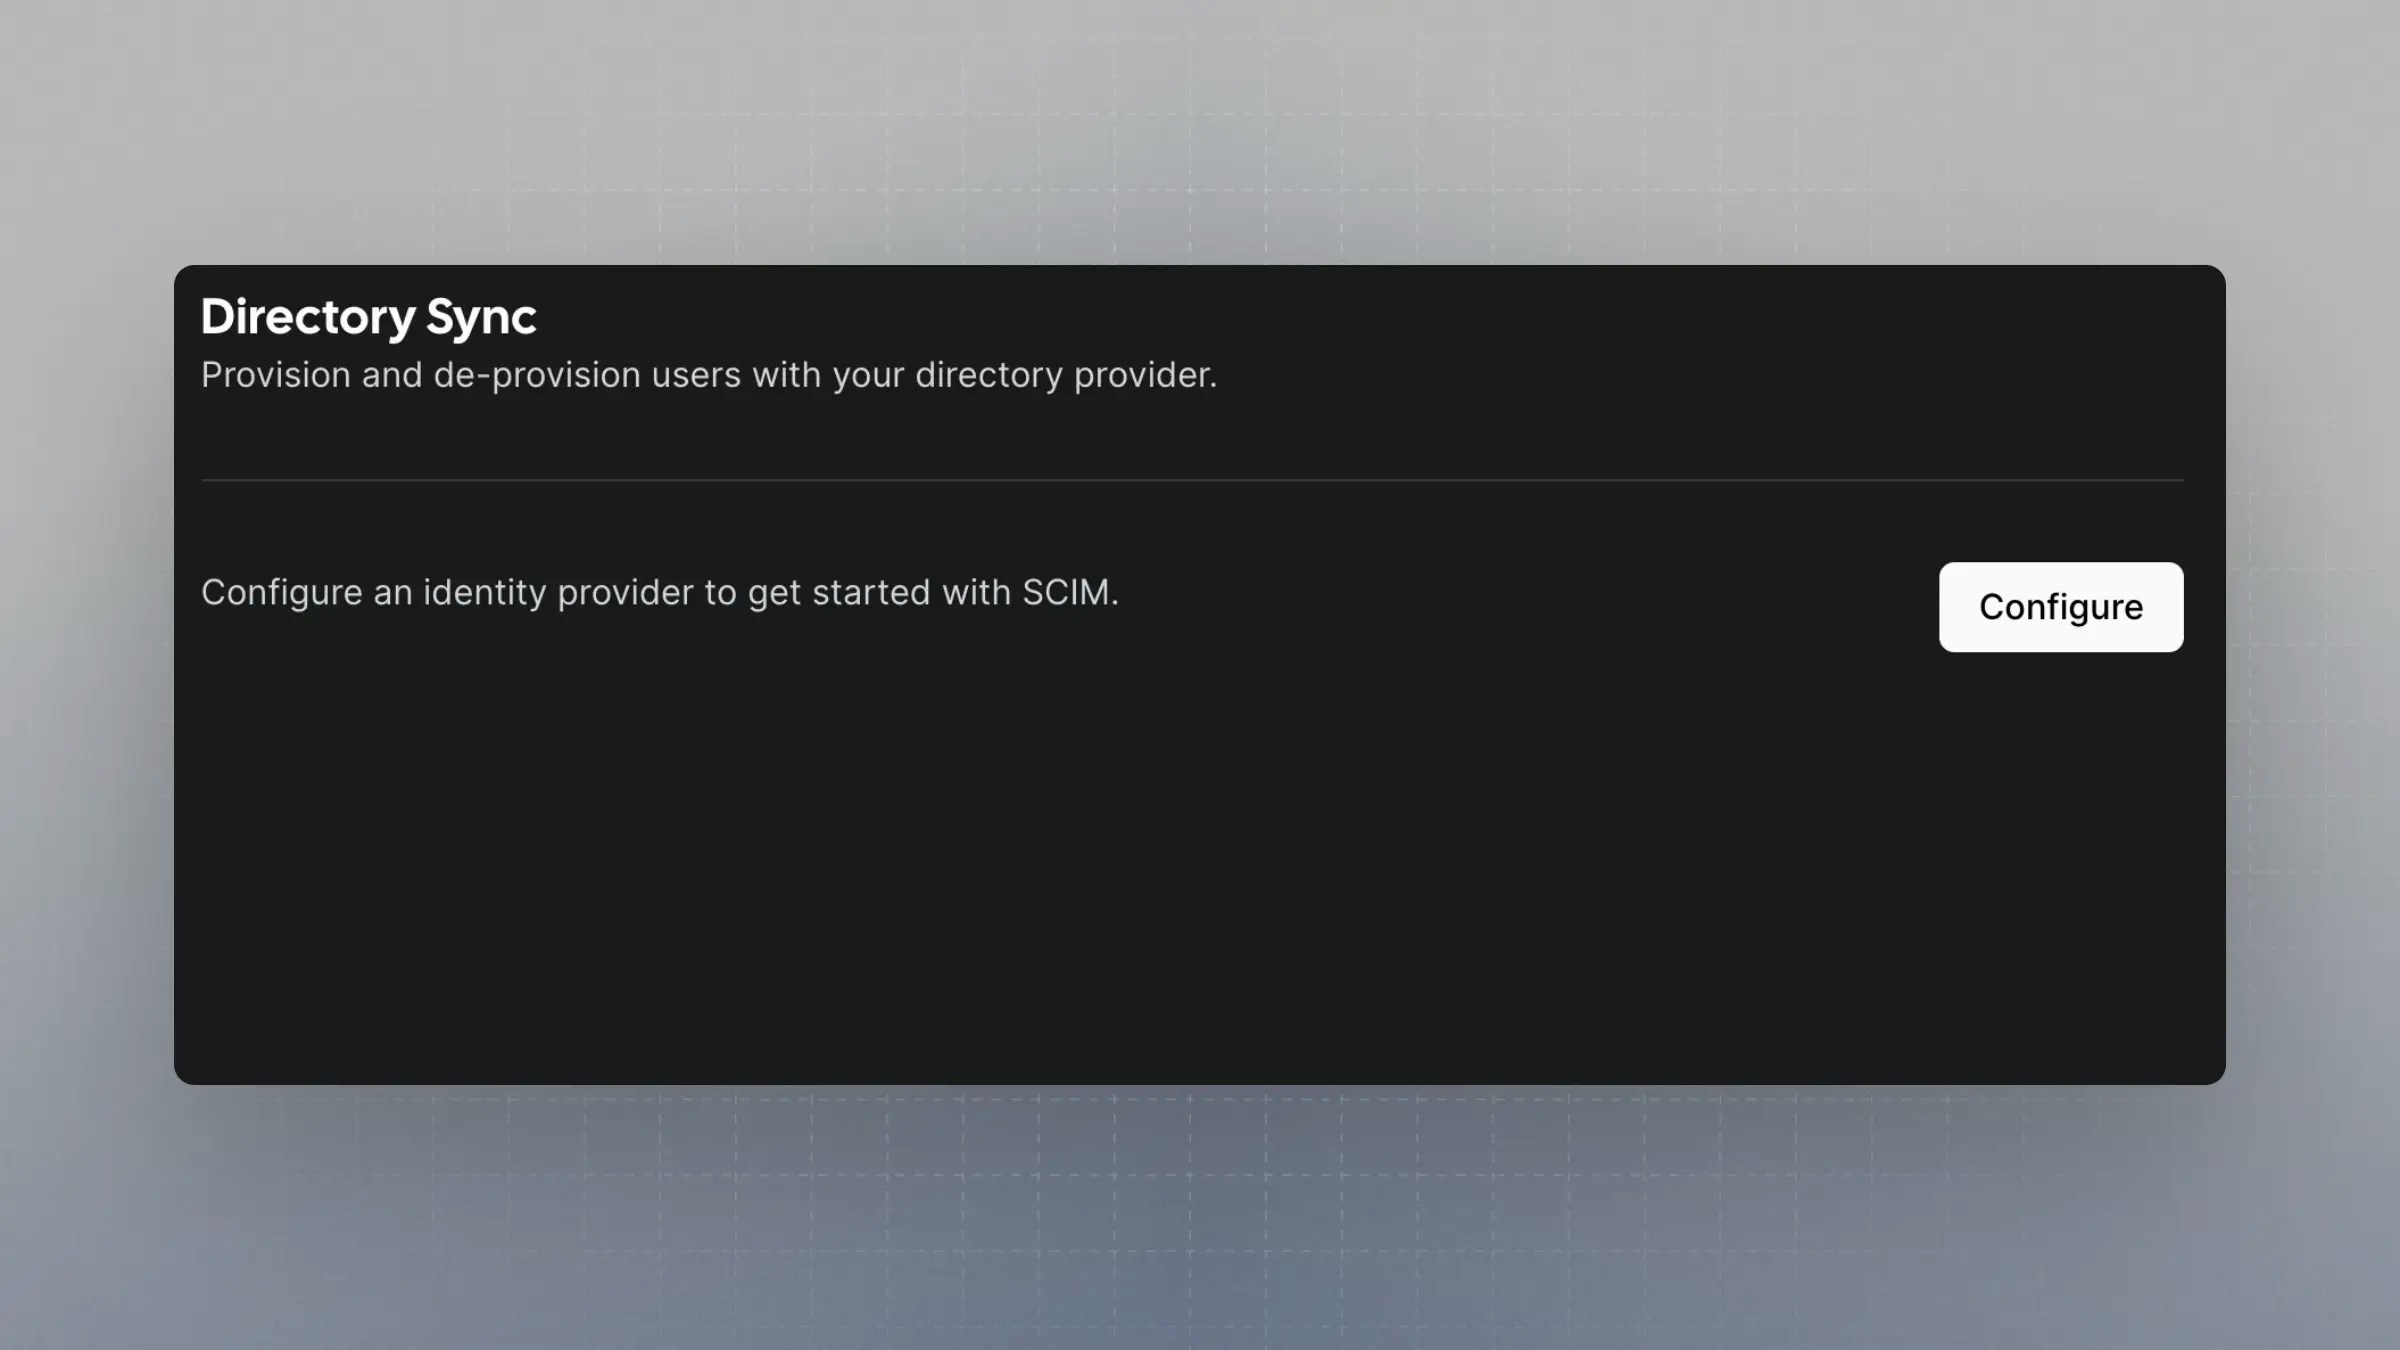
https://app.cal.com/settings/organization/dsync and click configure.6
Configure Directory Sync
In the “Configure Directory Sync” form, choose a directory sync name and select “Okta SCIM v2.0” as the “Directory Provider”.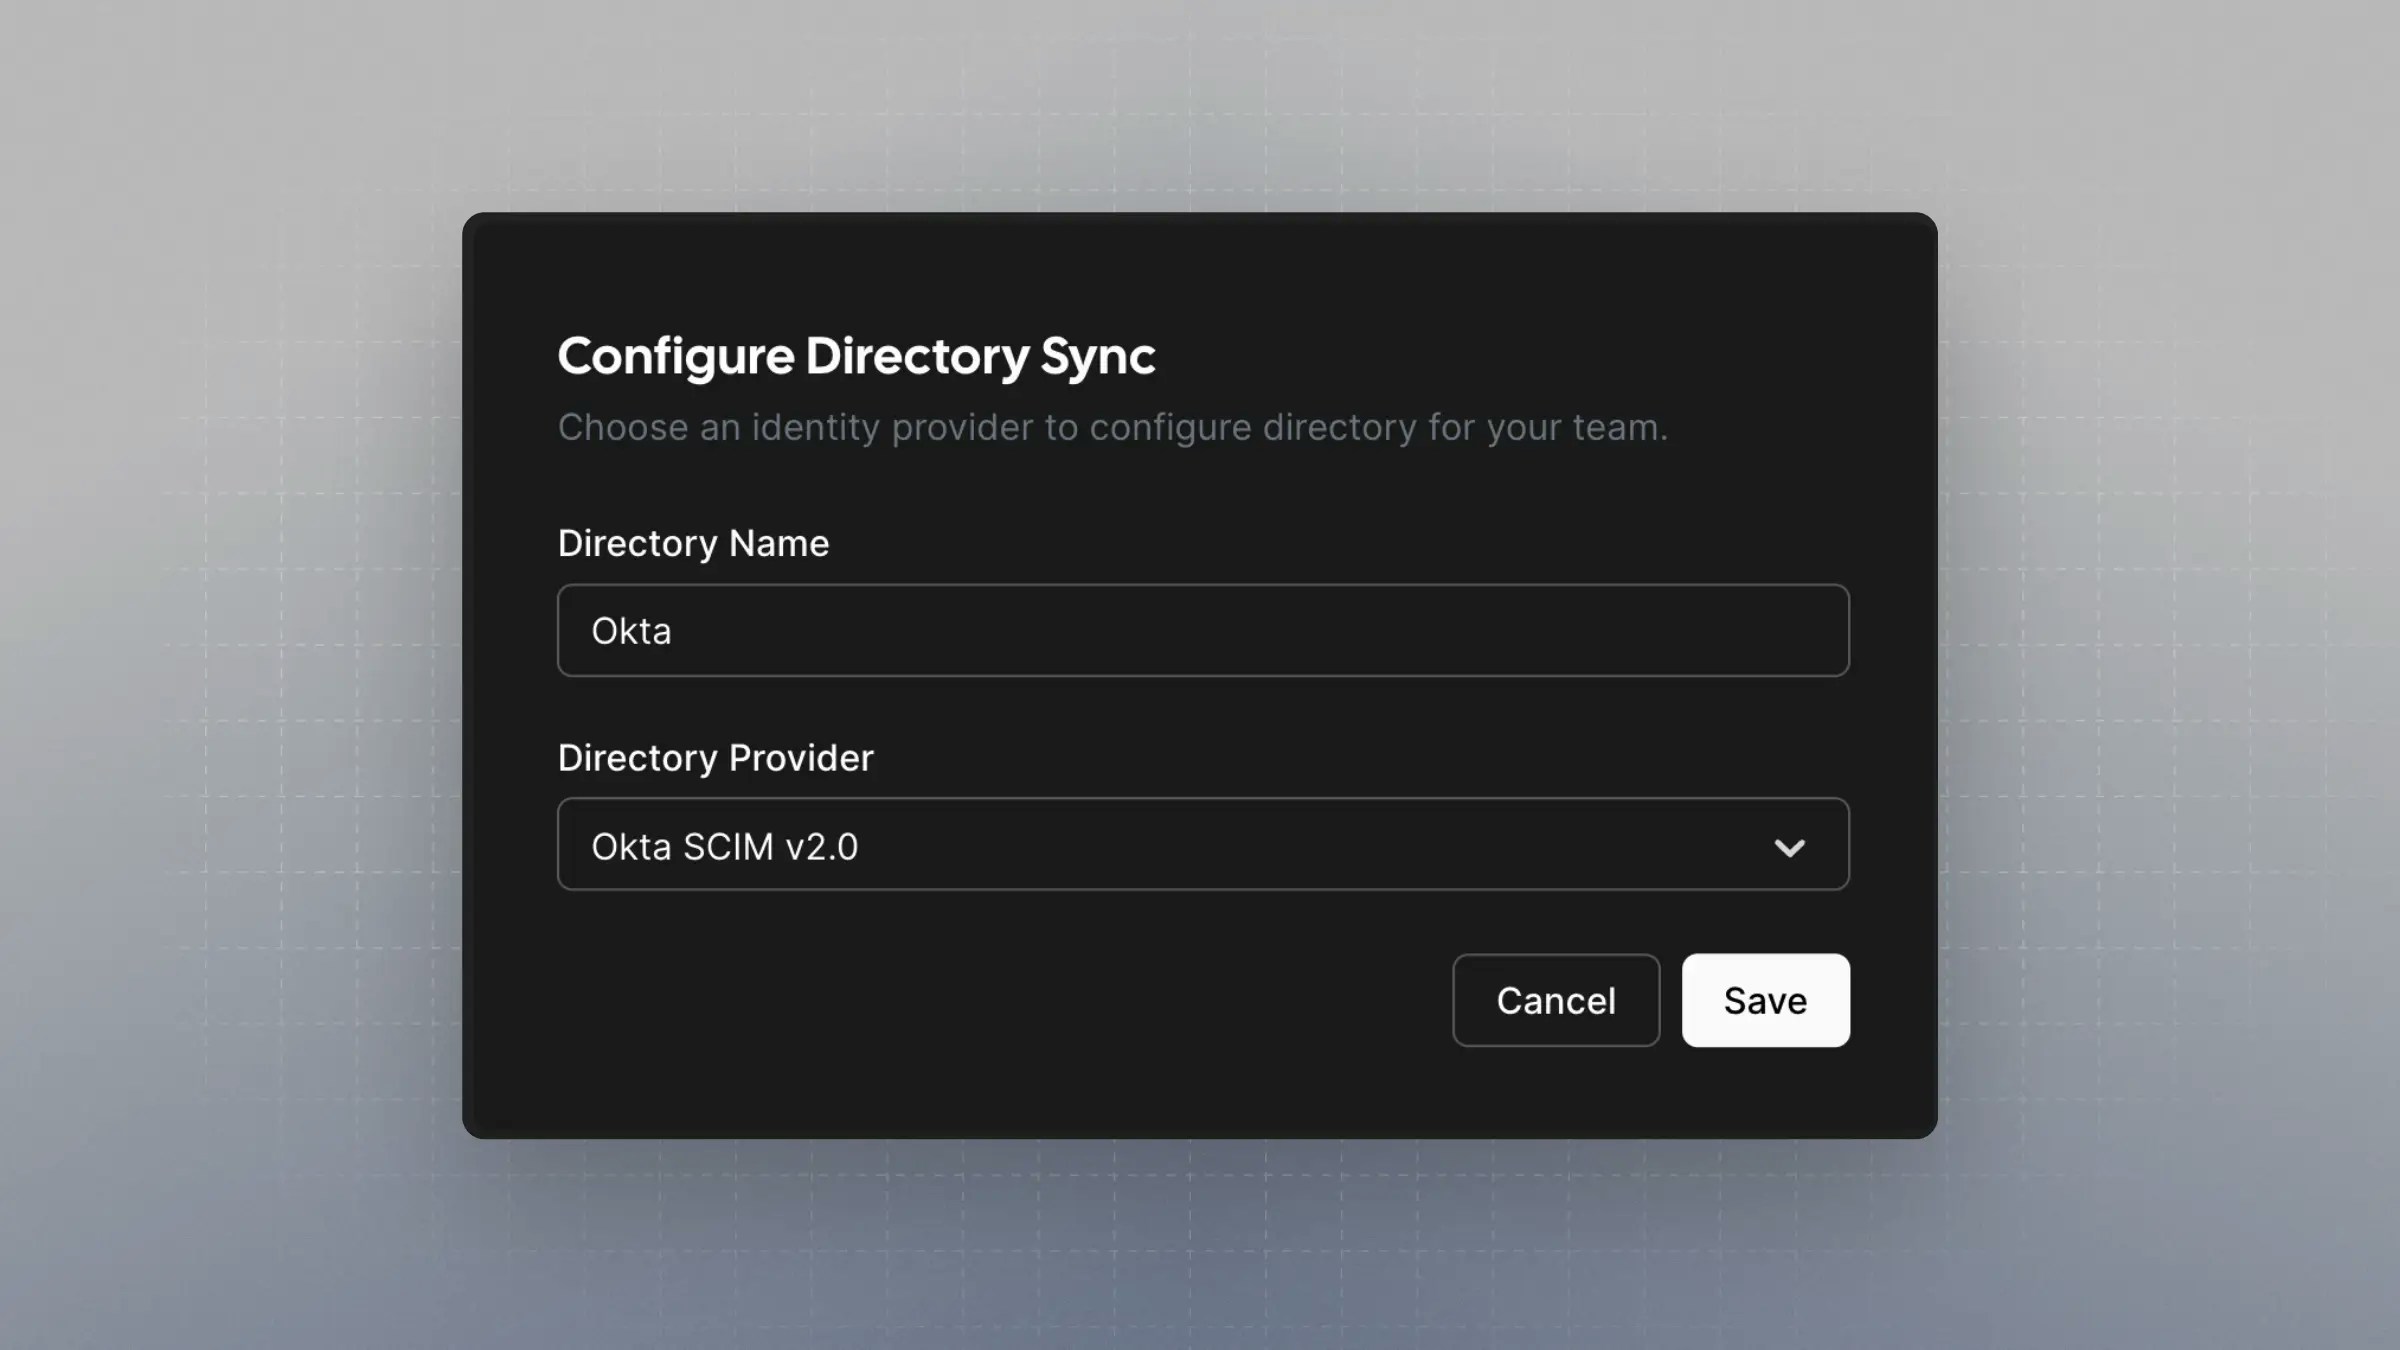
7
Take note of SCIM Base URL and SCIM Bearer Token
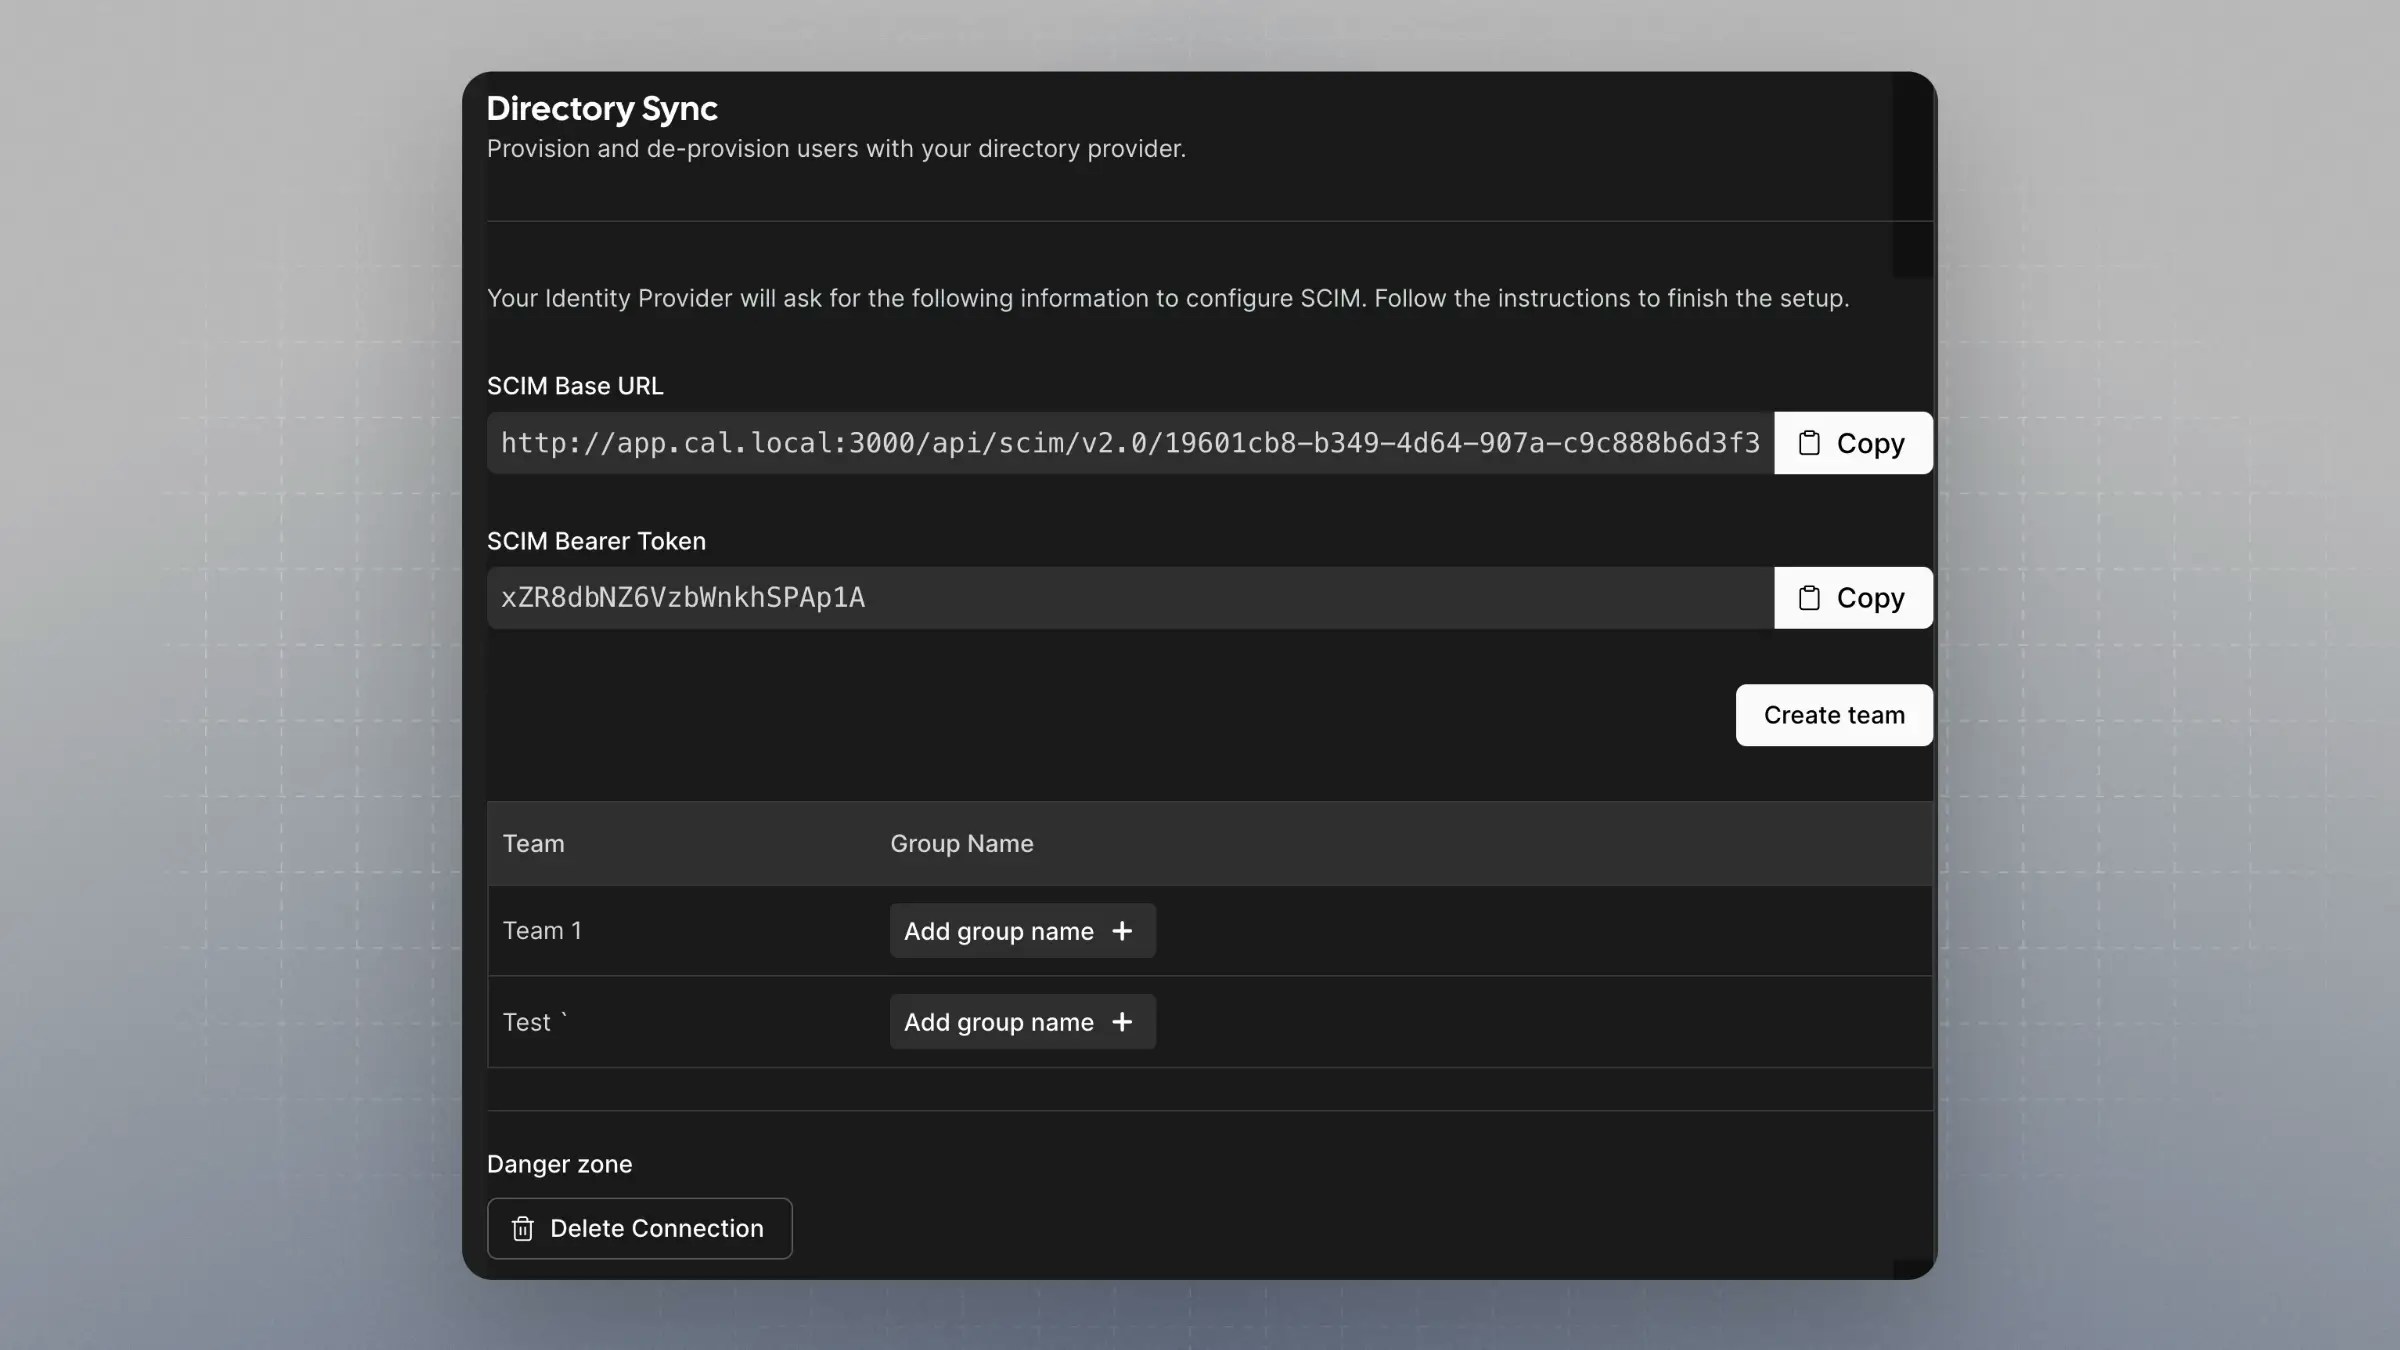
8
Setup Provisioning in Okta
In Okta, go to your application. Navigate to the “Provisioning” tab and click “Integration” under “Settings”.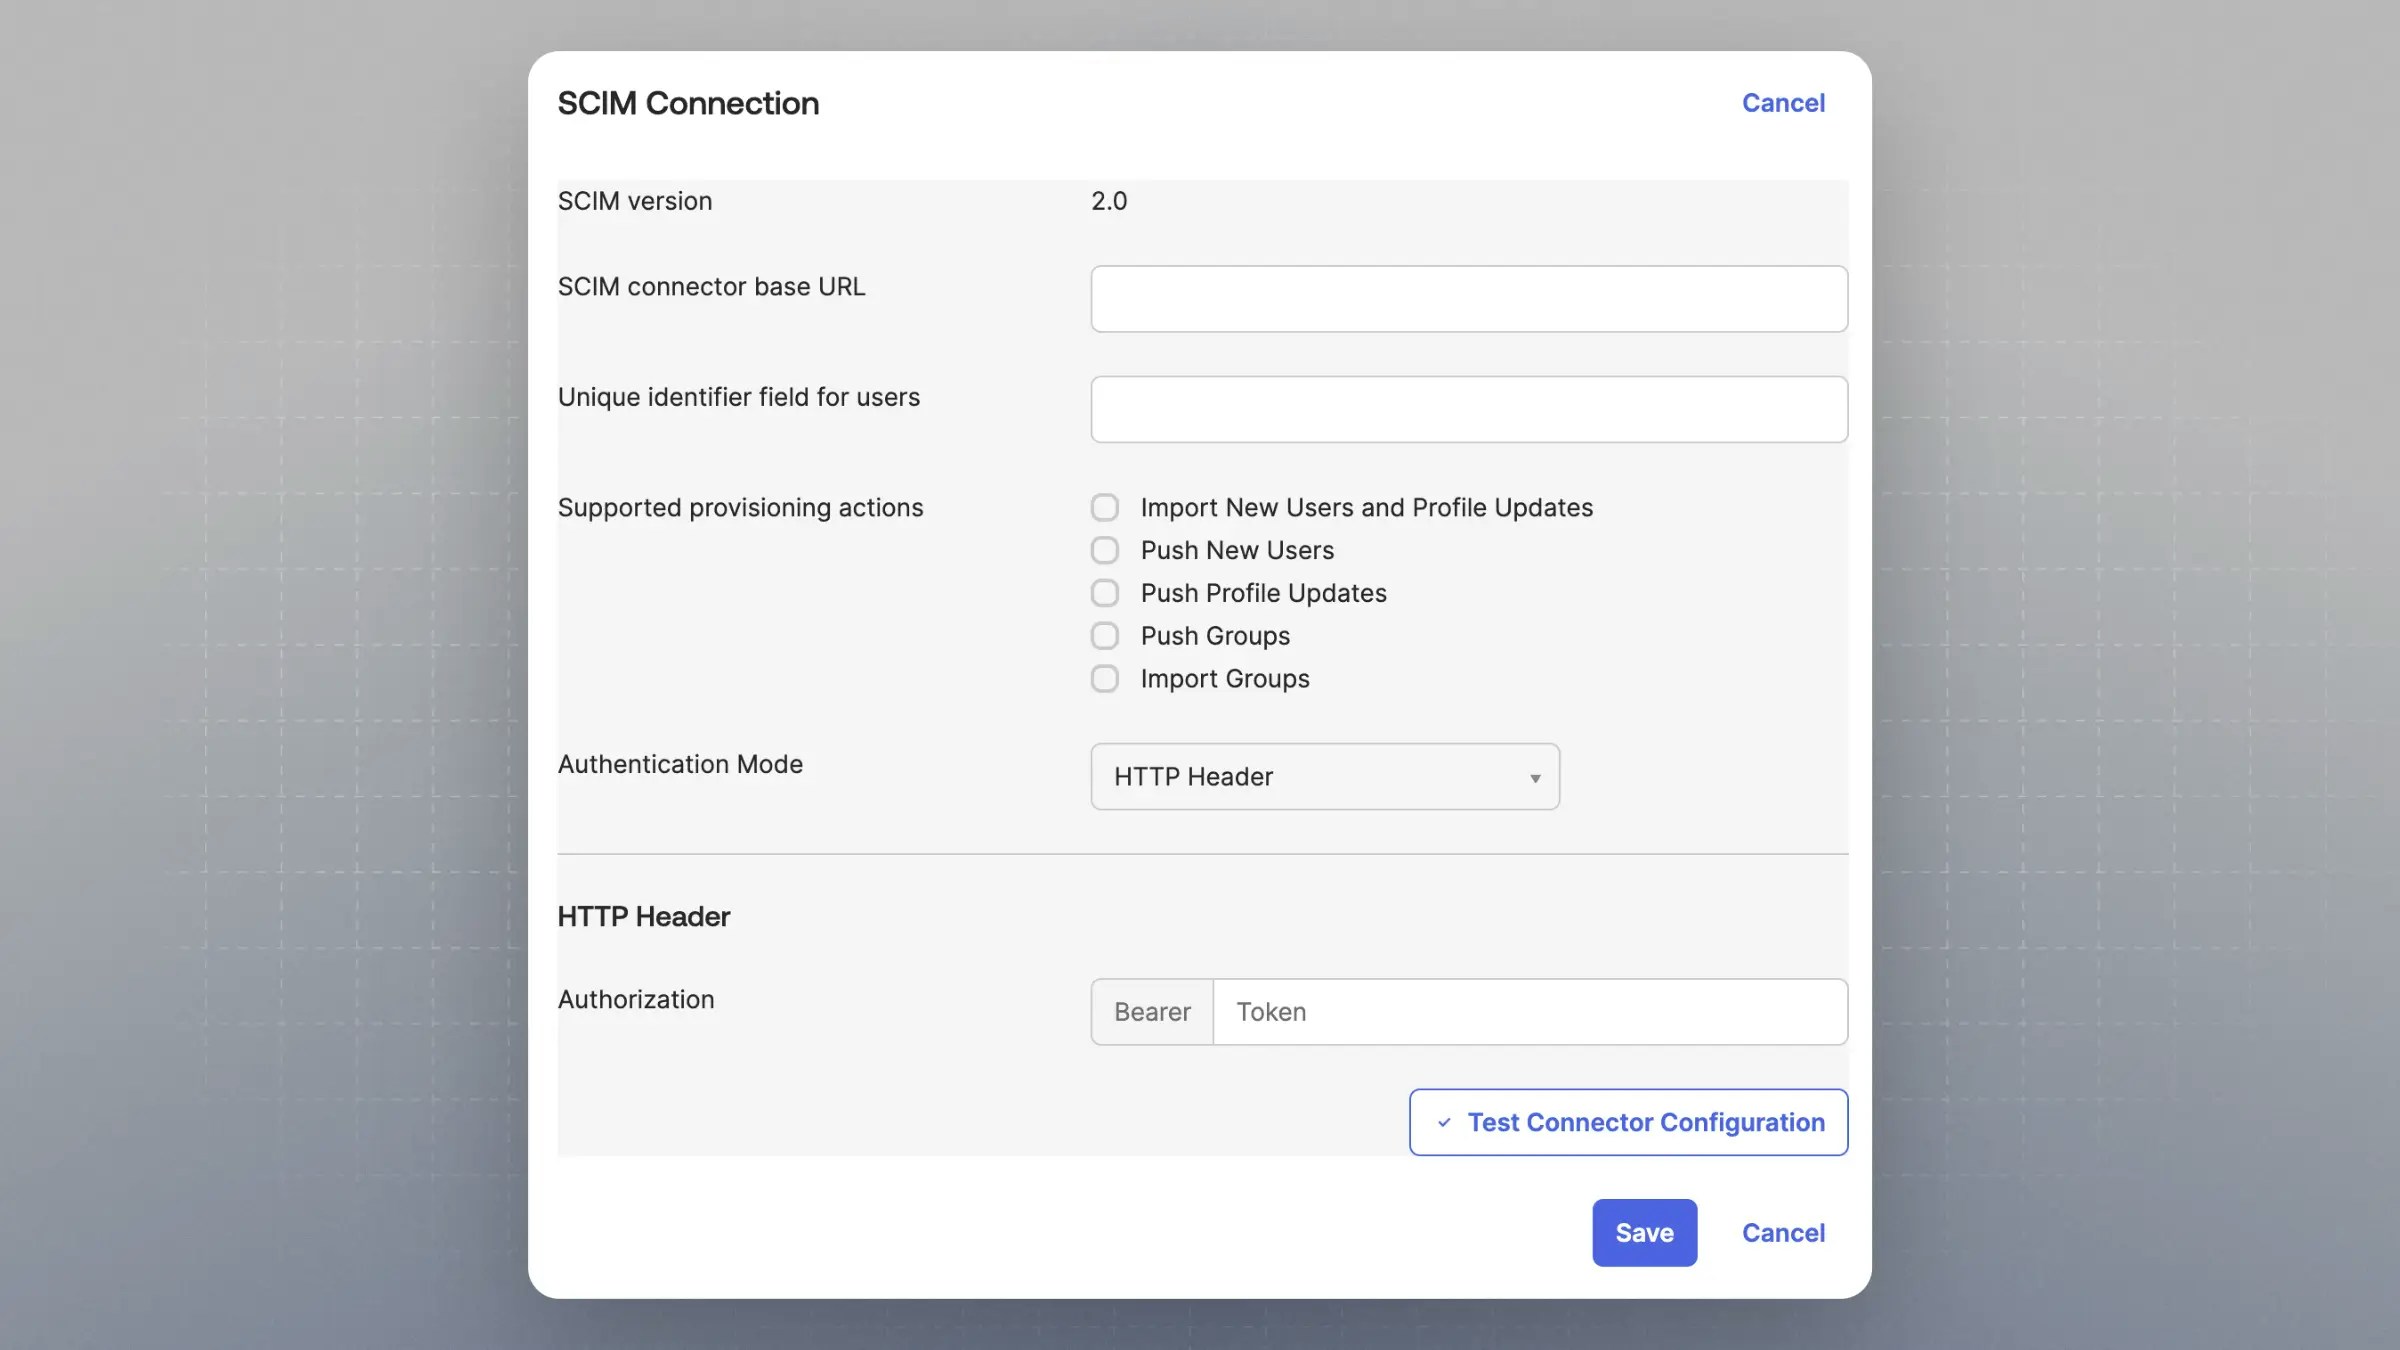
- Under “SCIM connector base URL” enter the “SCIM Base URL” from Cal.com
- Under “Unique identifier field for users” enter “email”
- Under “Supported provisioning actions” enable:
- “Import New Users and Profile Updates”
- “Push New Users”
- “Push Profile Updates”
- “Push Groups”
- Under “Authentication Mode” choose “HTTP Header”
- Under “Authentication” enter the “SCIM Bearer Token” from Cal.com
- When you hit save, it will make a test call to the “SCIM Base URL”
9
Go to the 'To App' settings
After saving, navigate to the “To App” settings, still under the “Provisioning” tab.
10
Enable Provisioning to App
Under “Provisioning to App”, click “Edit” and enable:
- “Create User”
- “Update User Attributes”
- “Deactivate User”
11
Update Attribute Mapping
Under “{Your application name} Attribute Mapping,” remove all fields except for:
- “username”
- “givenName”
- “familyName”
- “email”
- “displayName”
12
Map Attributes from Okta Profile
Set each of these properties to “Map from Okta Profile” and the related field. Under “Apply On” select “Create and Update”.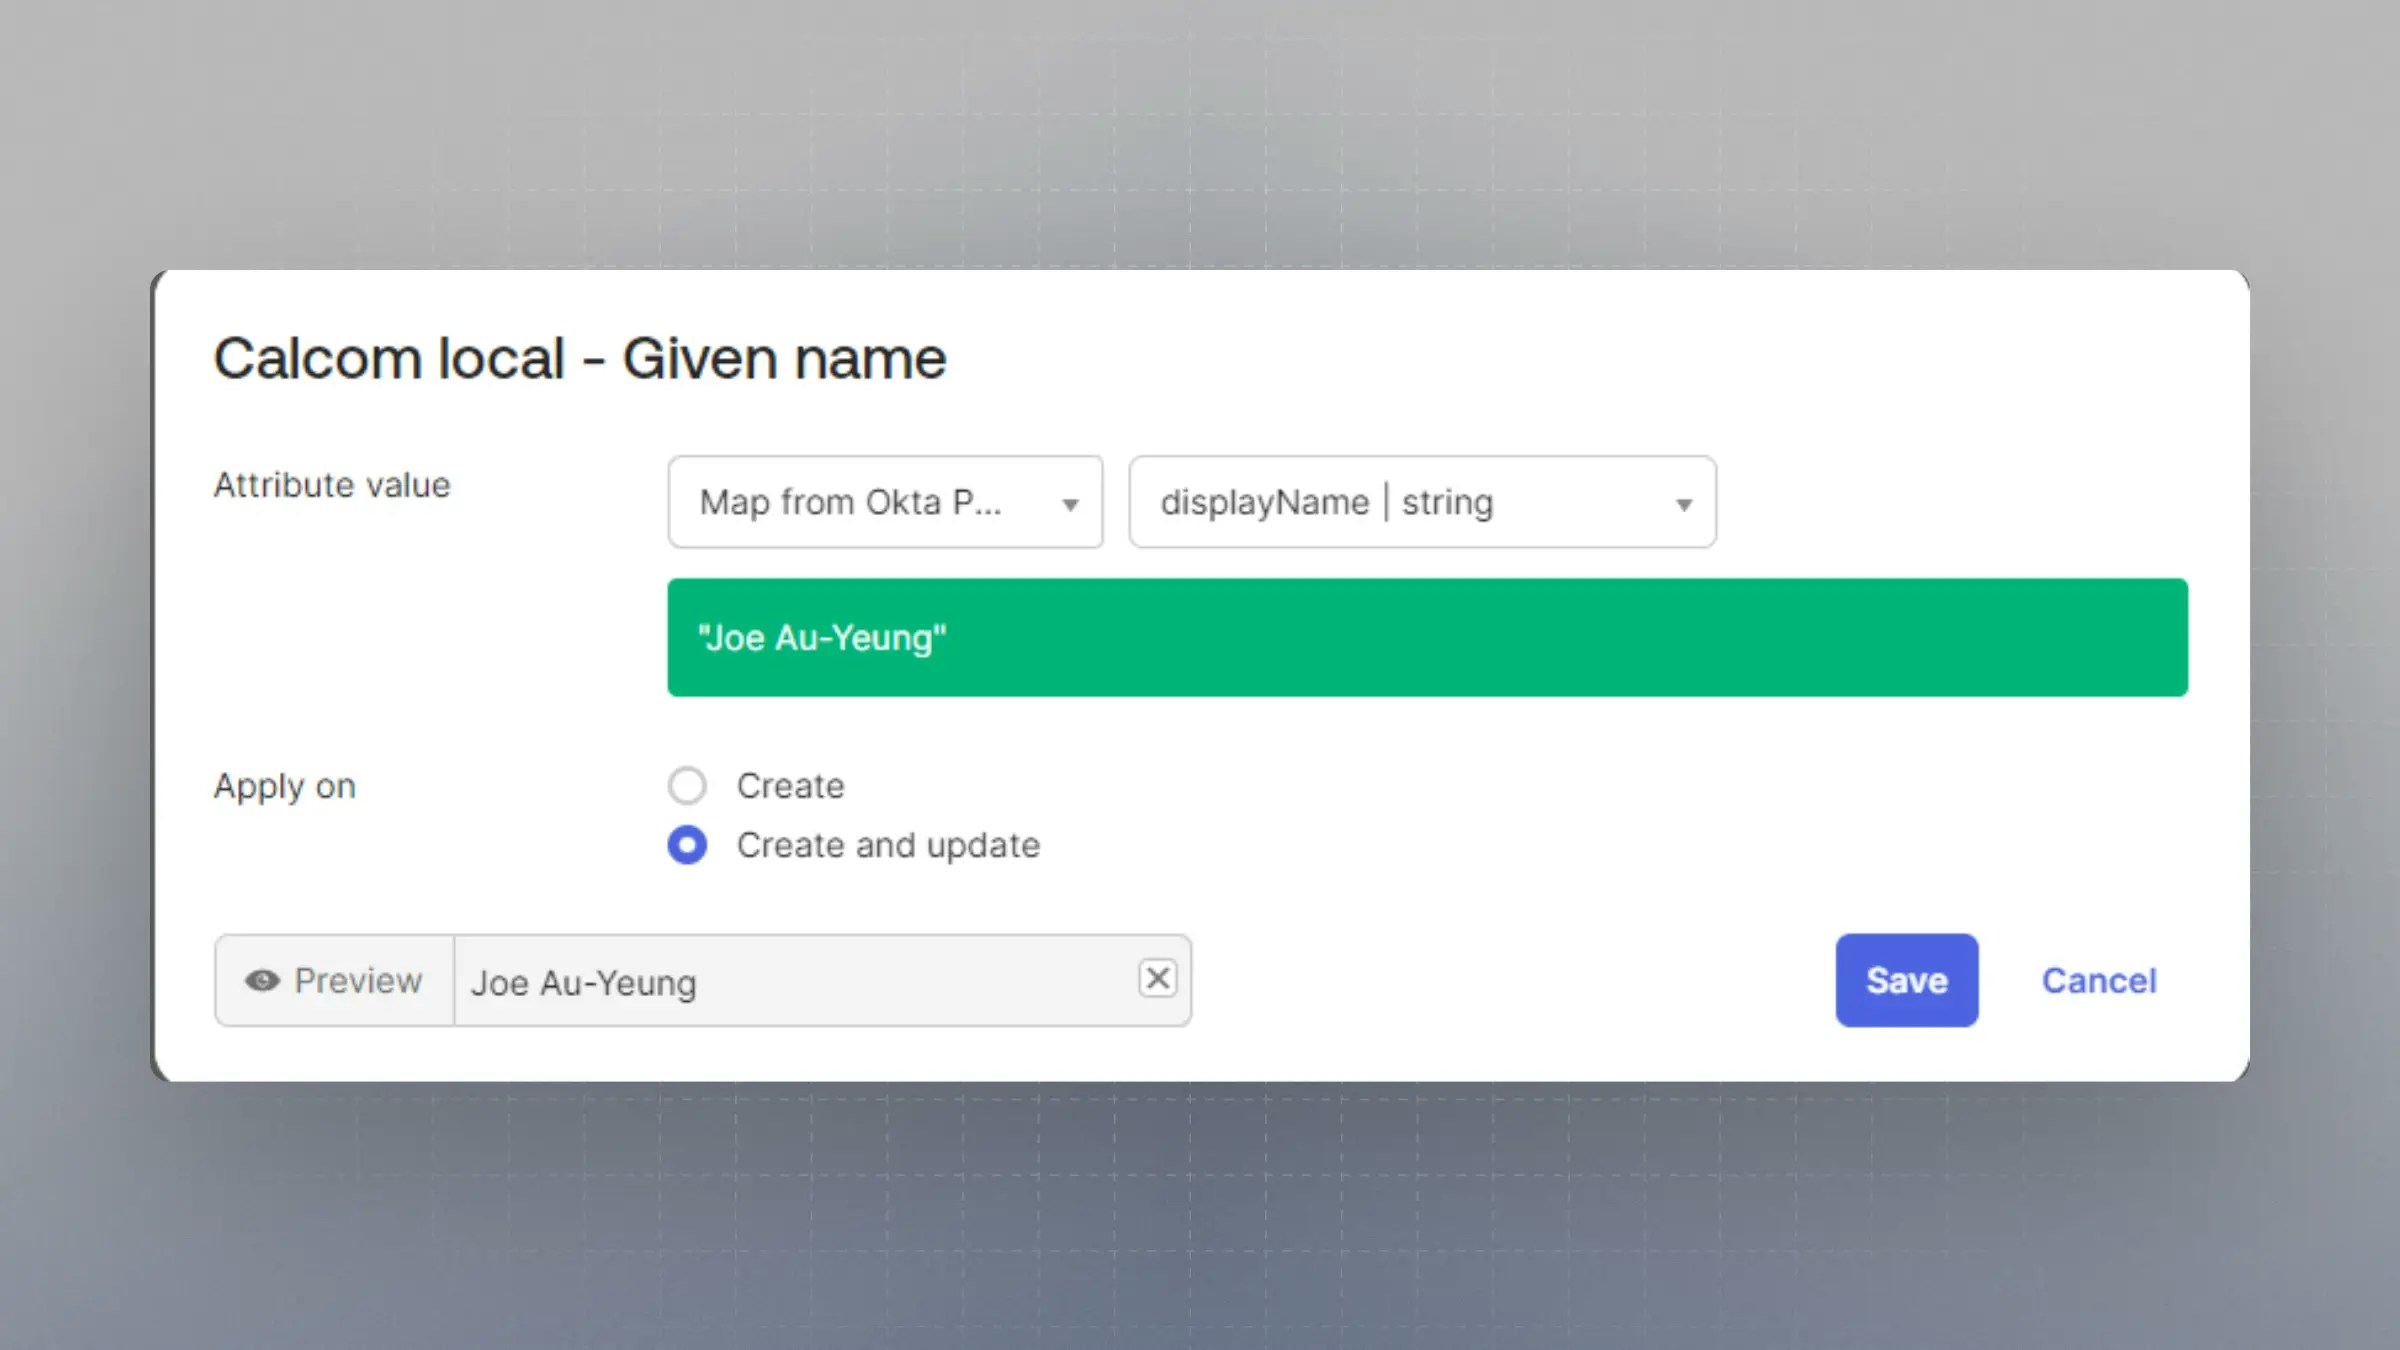
13
Assign users and groups to the app
You can now assign users and groups to the app.
Mapping Okta Groups to Cal.com Teams
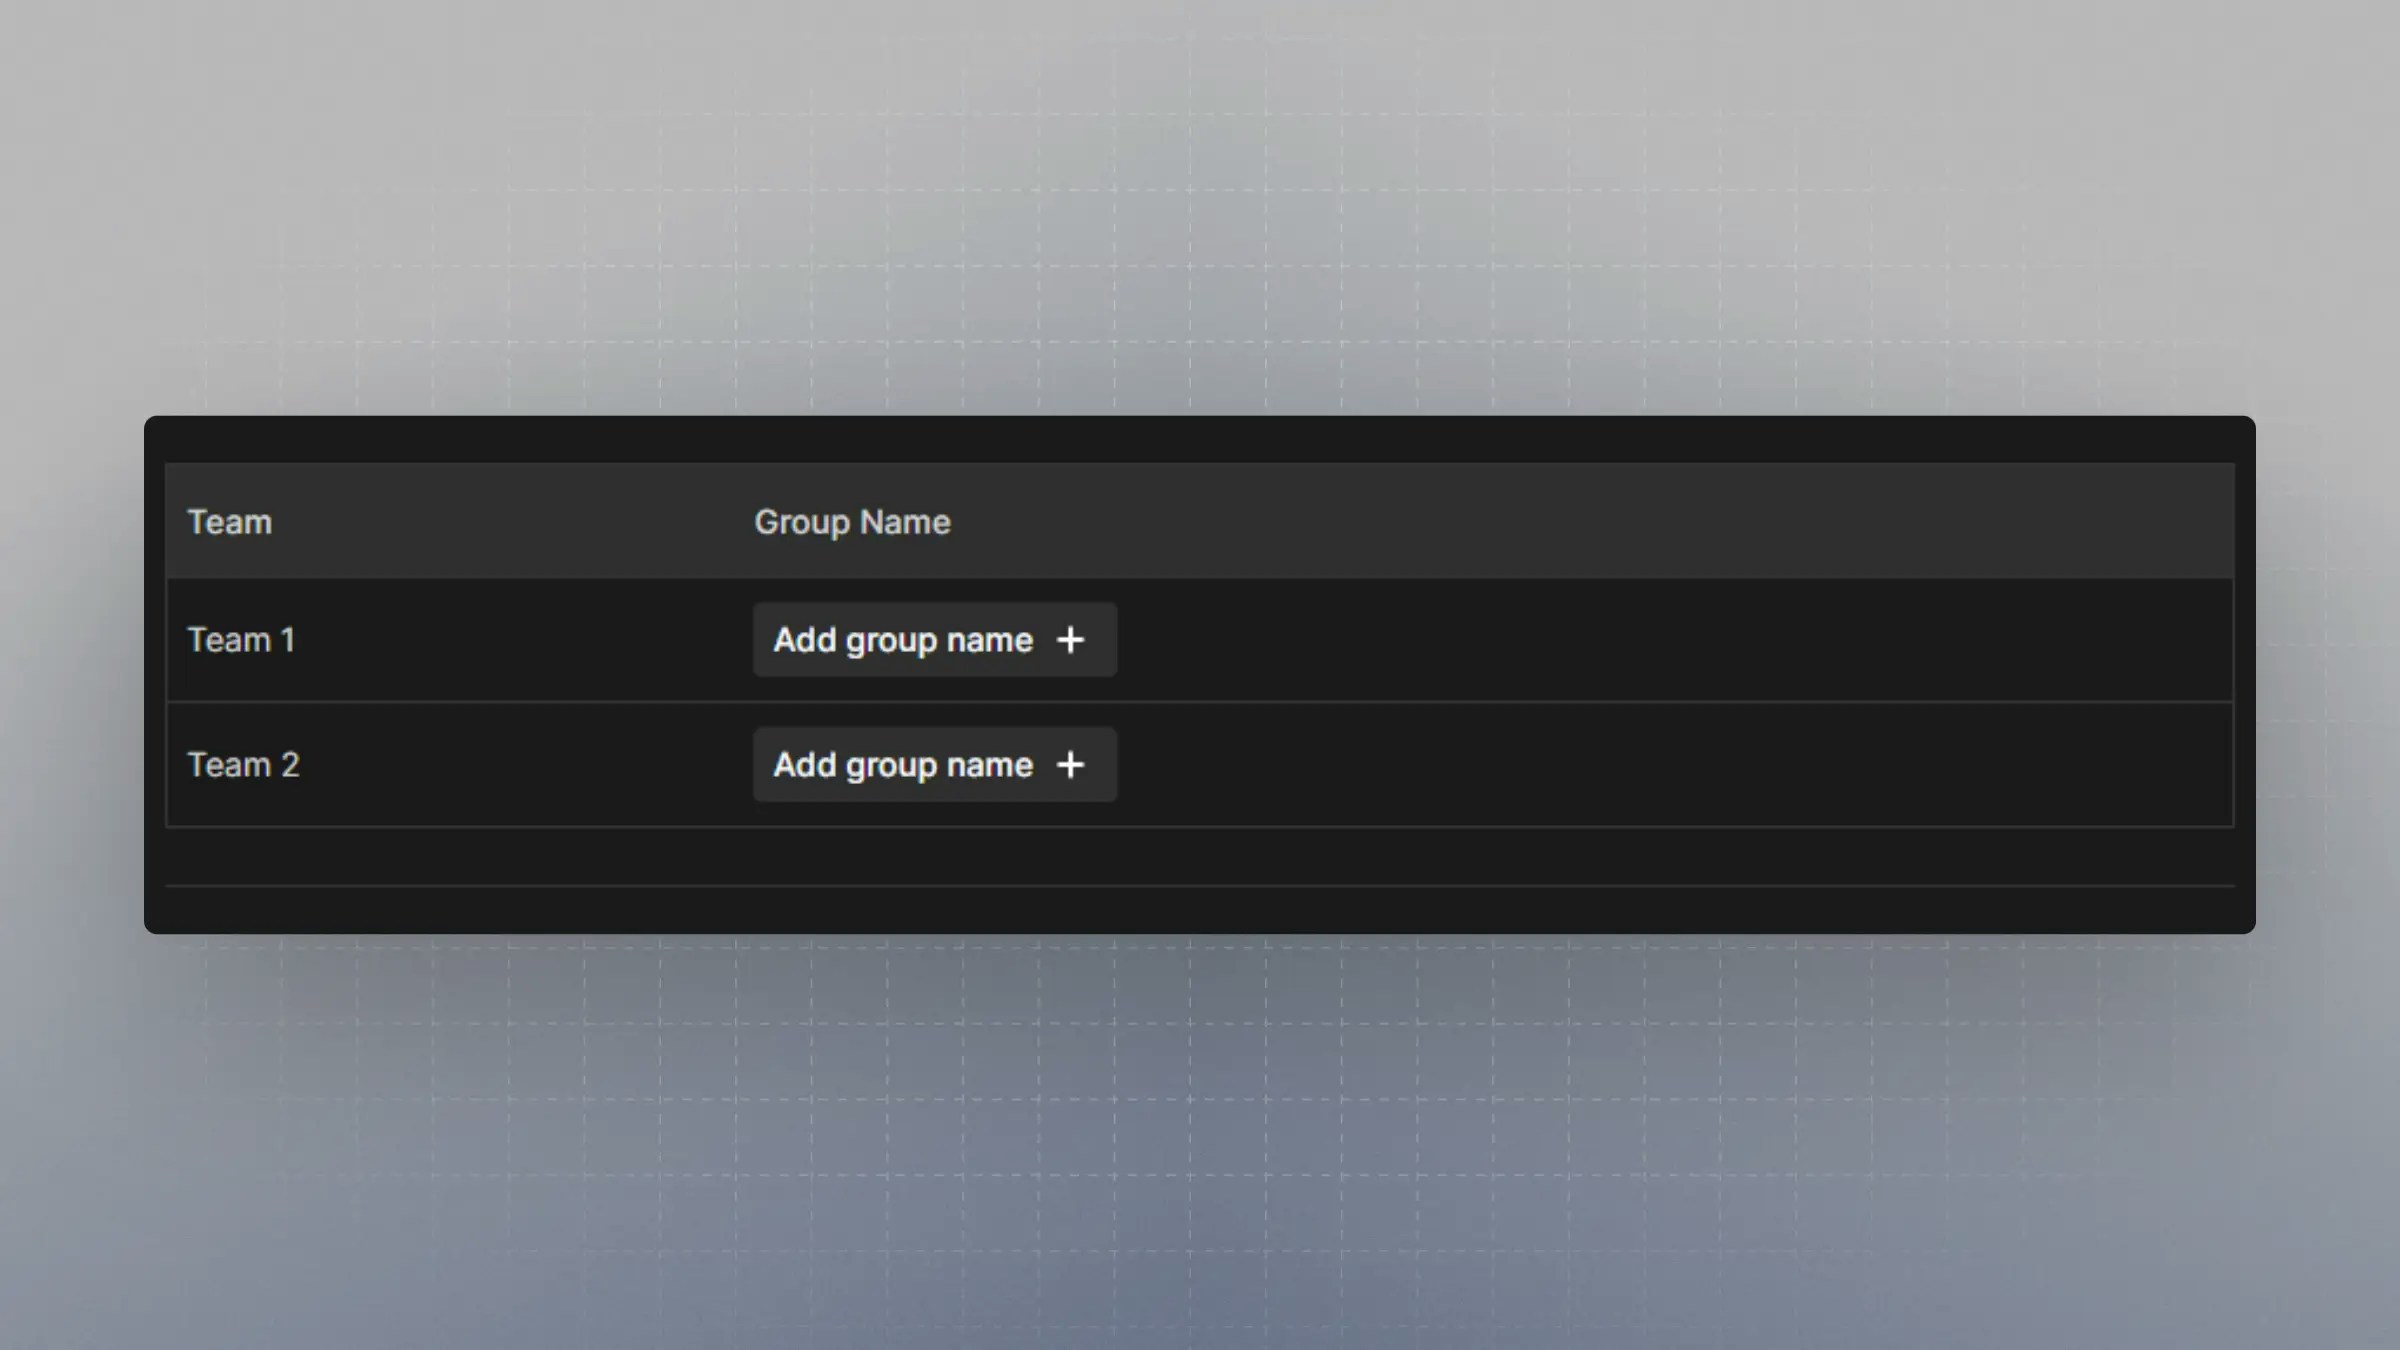
When provisioning groups to your organization, Okta groups can be mapped to teams within your organization, and users will be auto-assigned to these teams. Onhttps://app.cal.com/settings/organization/dsync, there is a table with the teams under your organization. Click on “Add group name” to map the Okta group to the team.
The group name must be spelled exactly as it is shown on Okta.
Email domain verification
Cal.com verifies that each SCIM-provisioned email belongs to your organization before force-joining the user. Provisioning succeeds only when all of the following are true:- Your organization has a verified domain set.
- The provisioned user’s email domain matches that verified domain exactly, or is a subdomain of it (for example,
eu.acme.commatchesacme.com).
Forbidden error and the user is not created or joined to your organization. If you see this error in your identity provider, confirm that the organization is verified and that the affected user’s email domain matches your verified domain.