1
Open your availability
Log in to Cal.com and click Availability in the sidebar. You’ll see your existing schedules, such as Working hours, with the days, hours and timezone each one uses. The schedule marked Default is used by any booking link that doesn’t have its own schedule.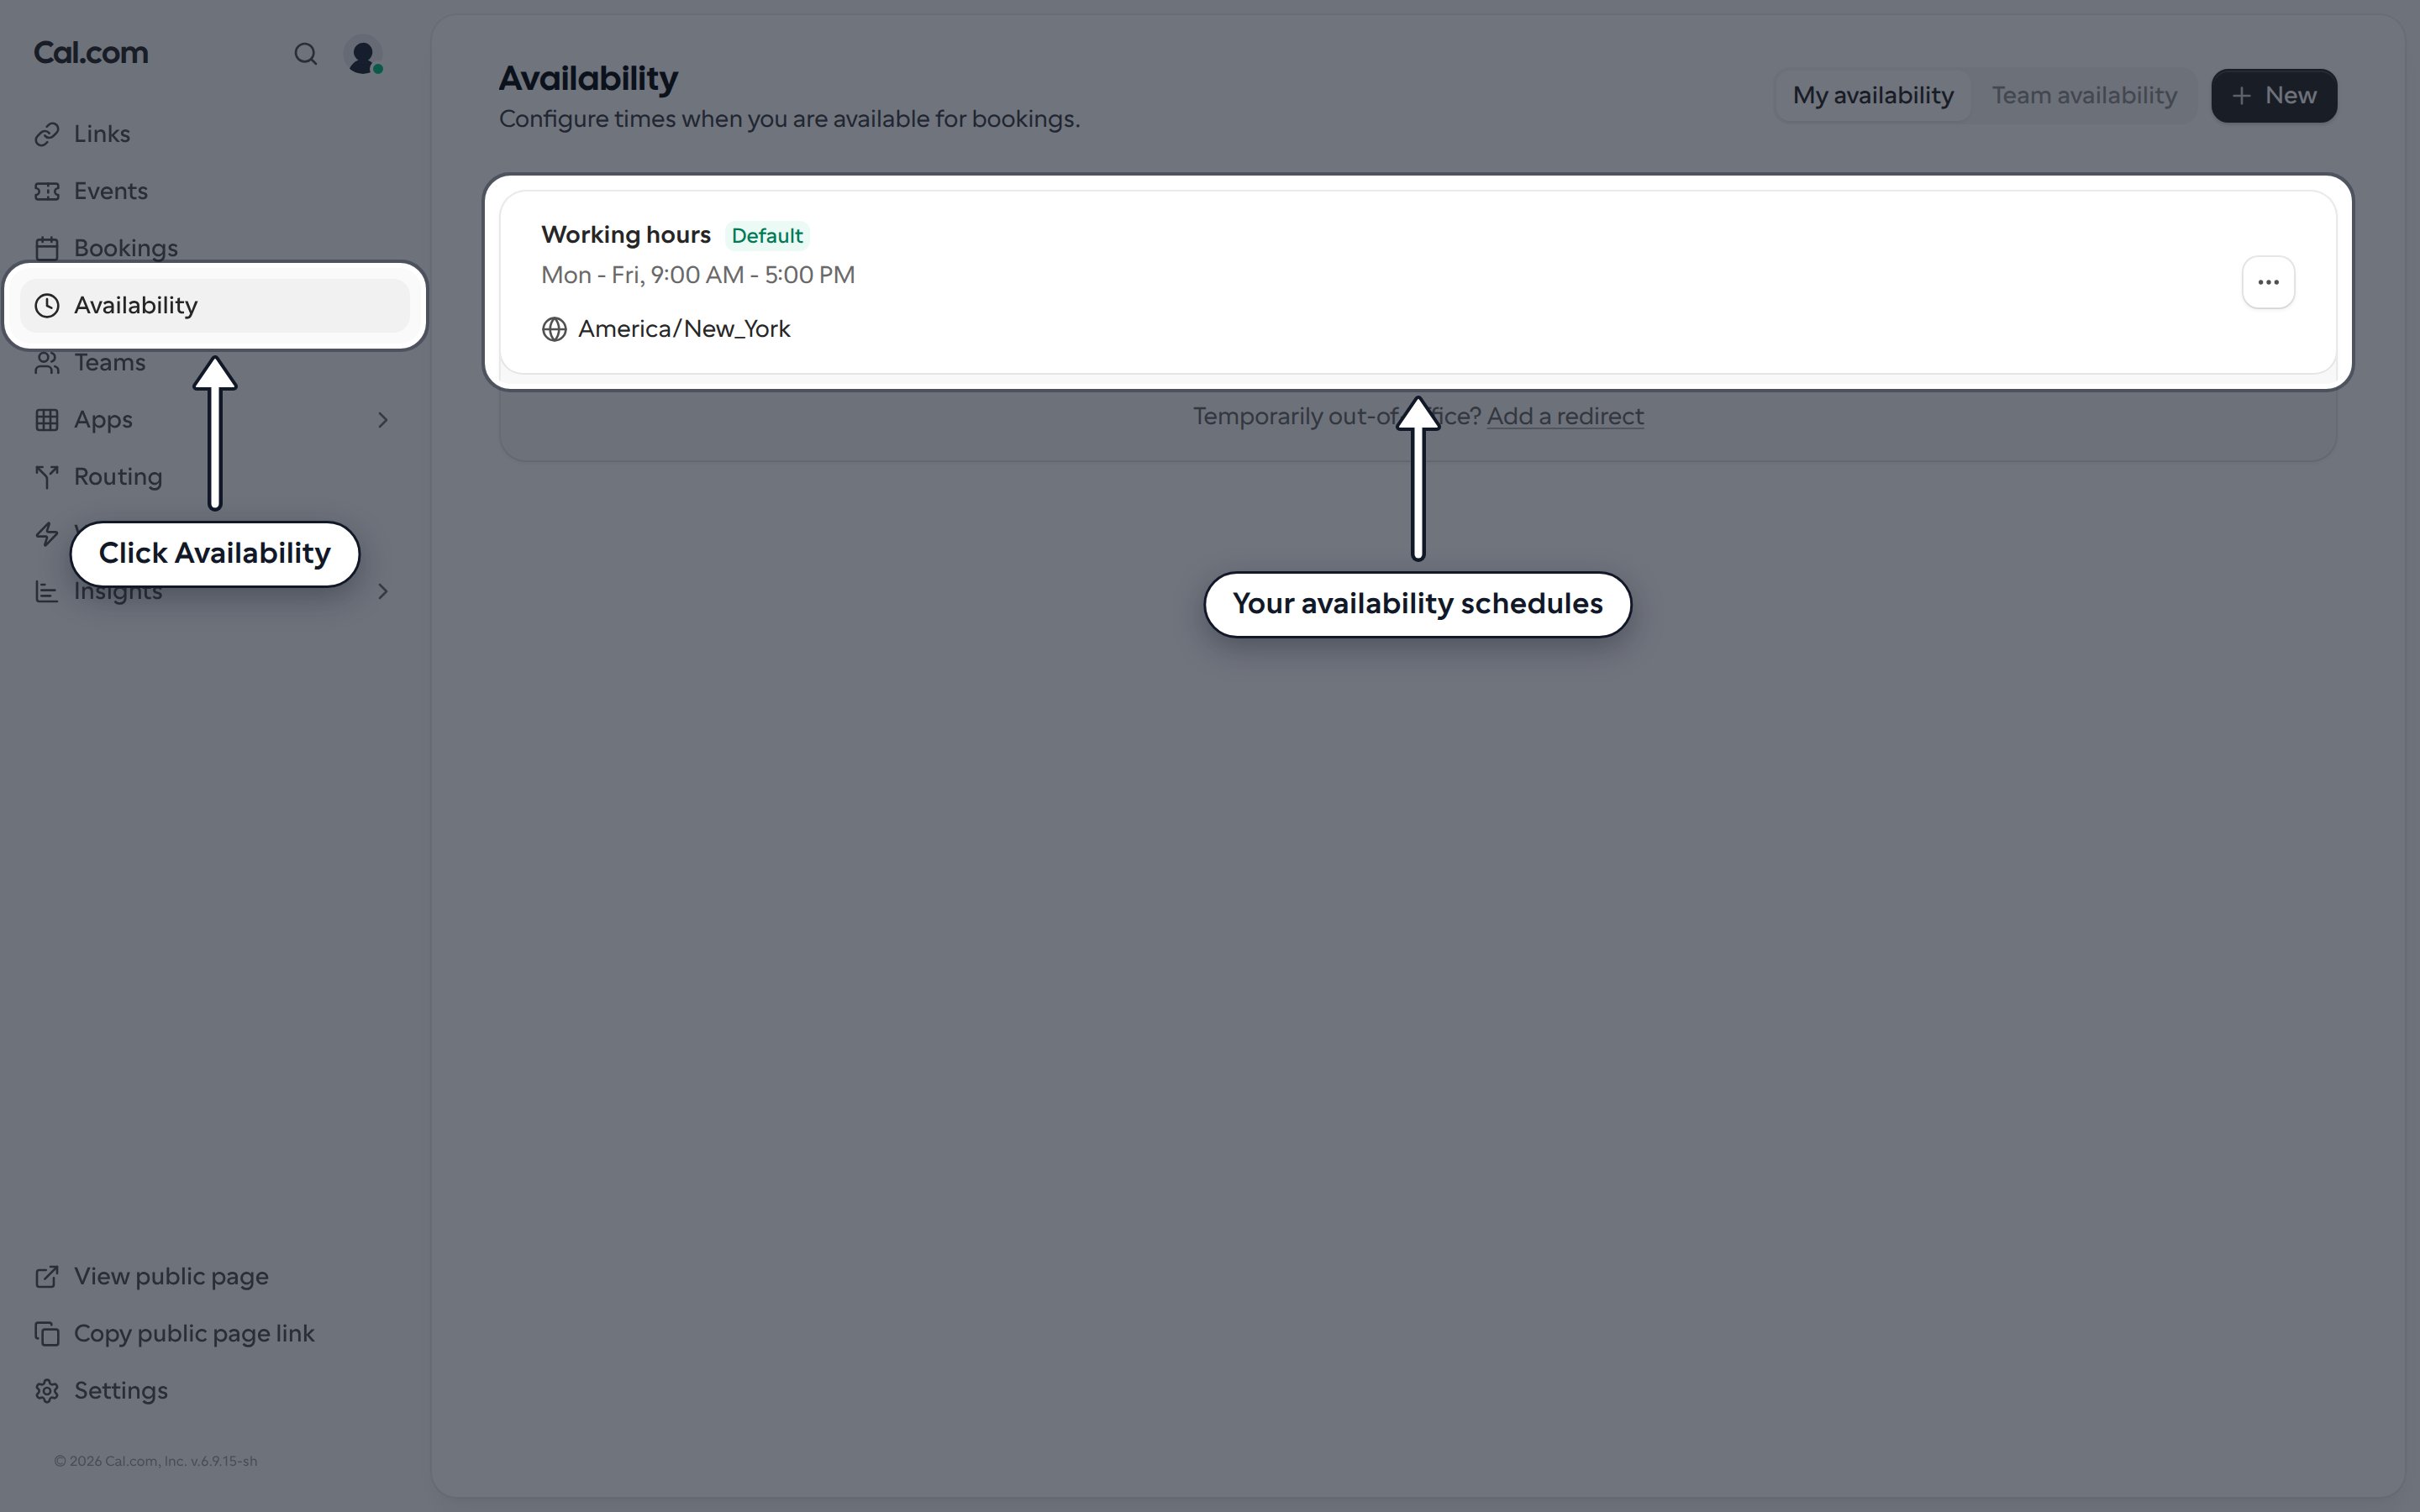
2
Create a new schedule
Click New in the top-right corner, enter a name for the schedule (for example “Test Availability”) and click Continue. New schedules start as Monday to Friday, 9:00am to 5:00pm.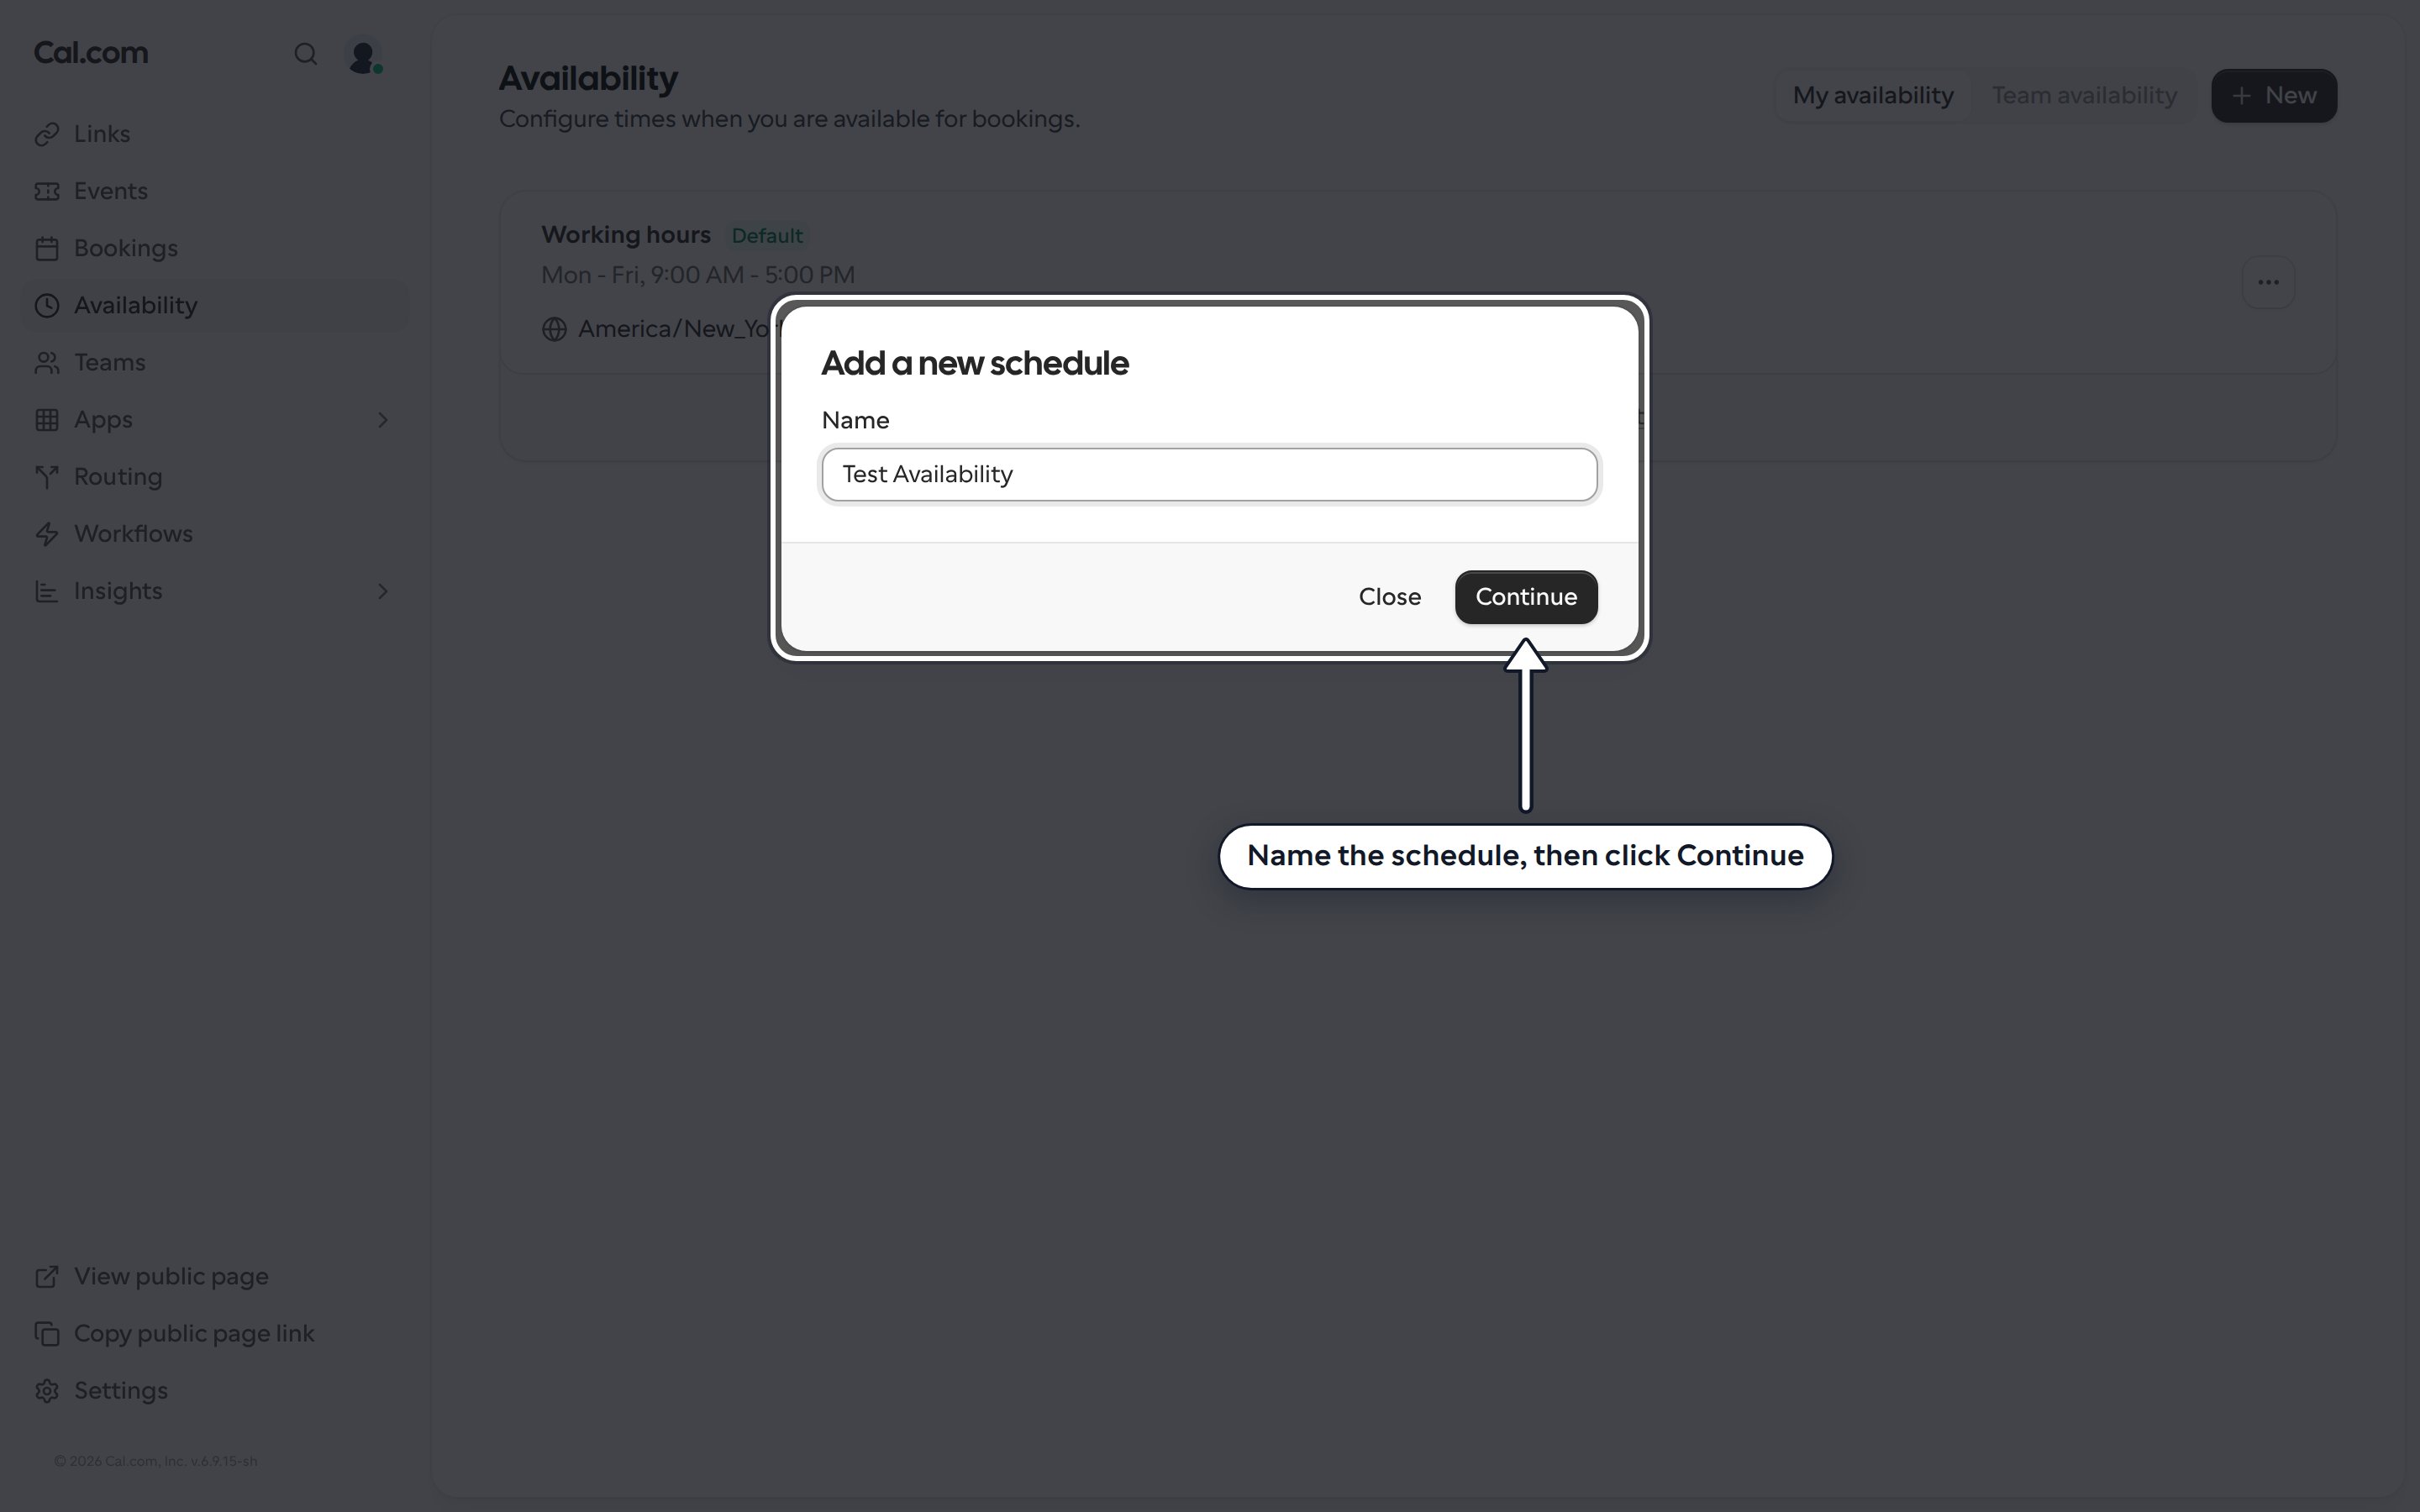
3
Set your weekly hours
In Weekly hours, choose when you’re available each day: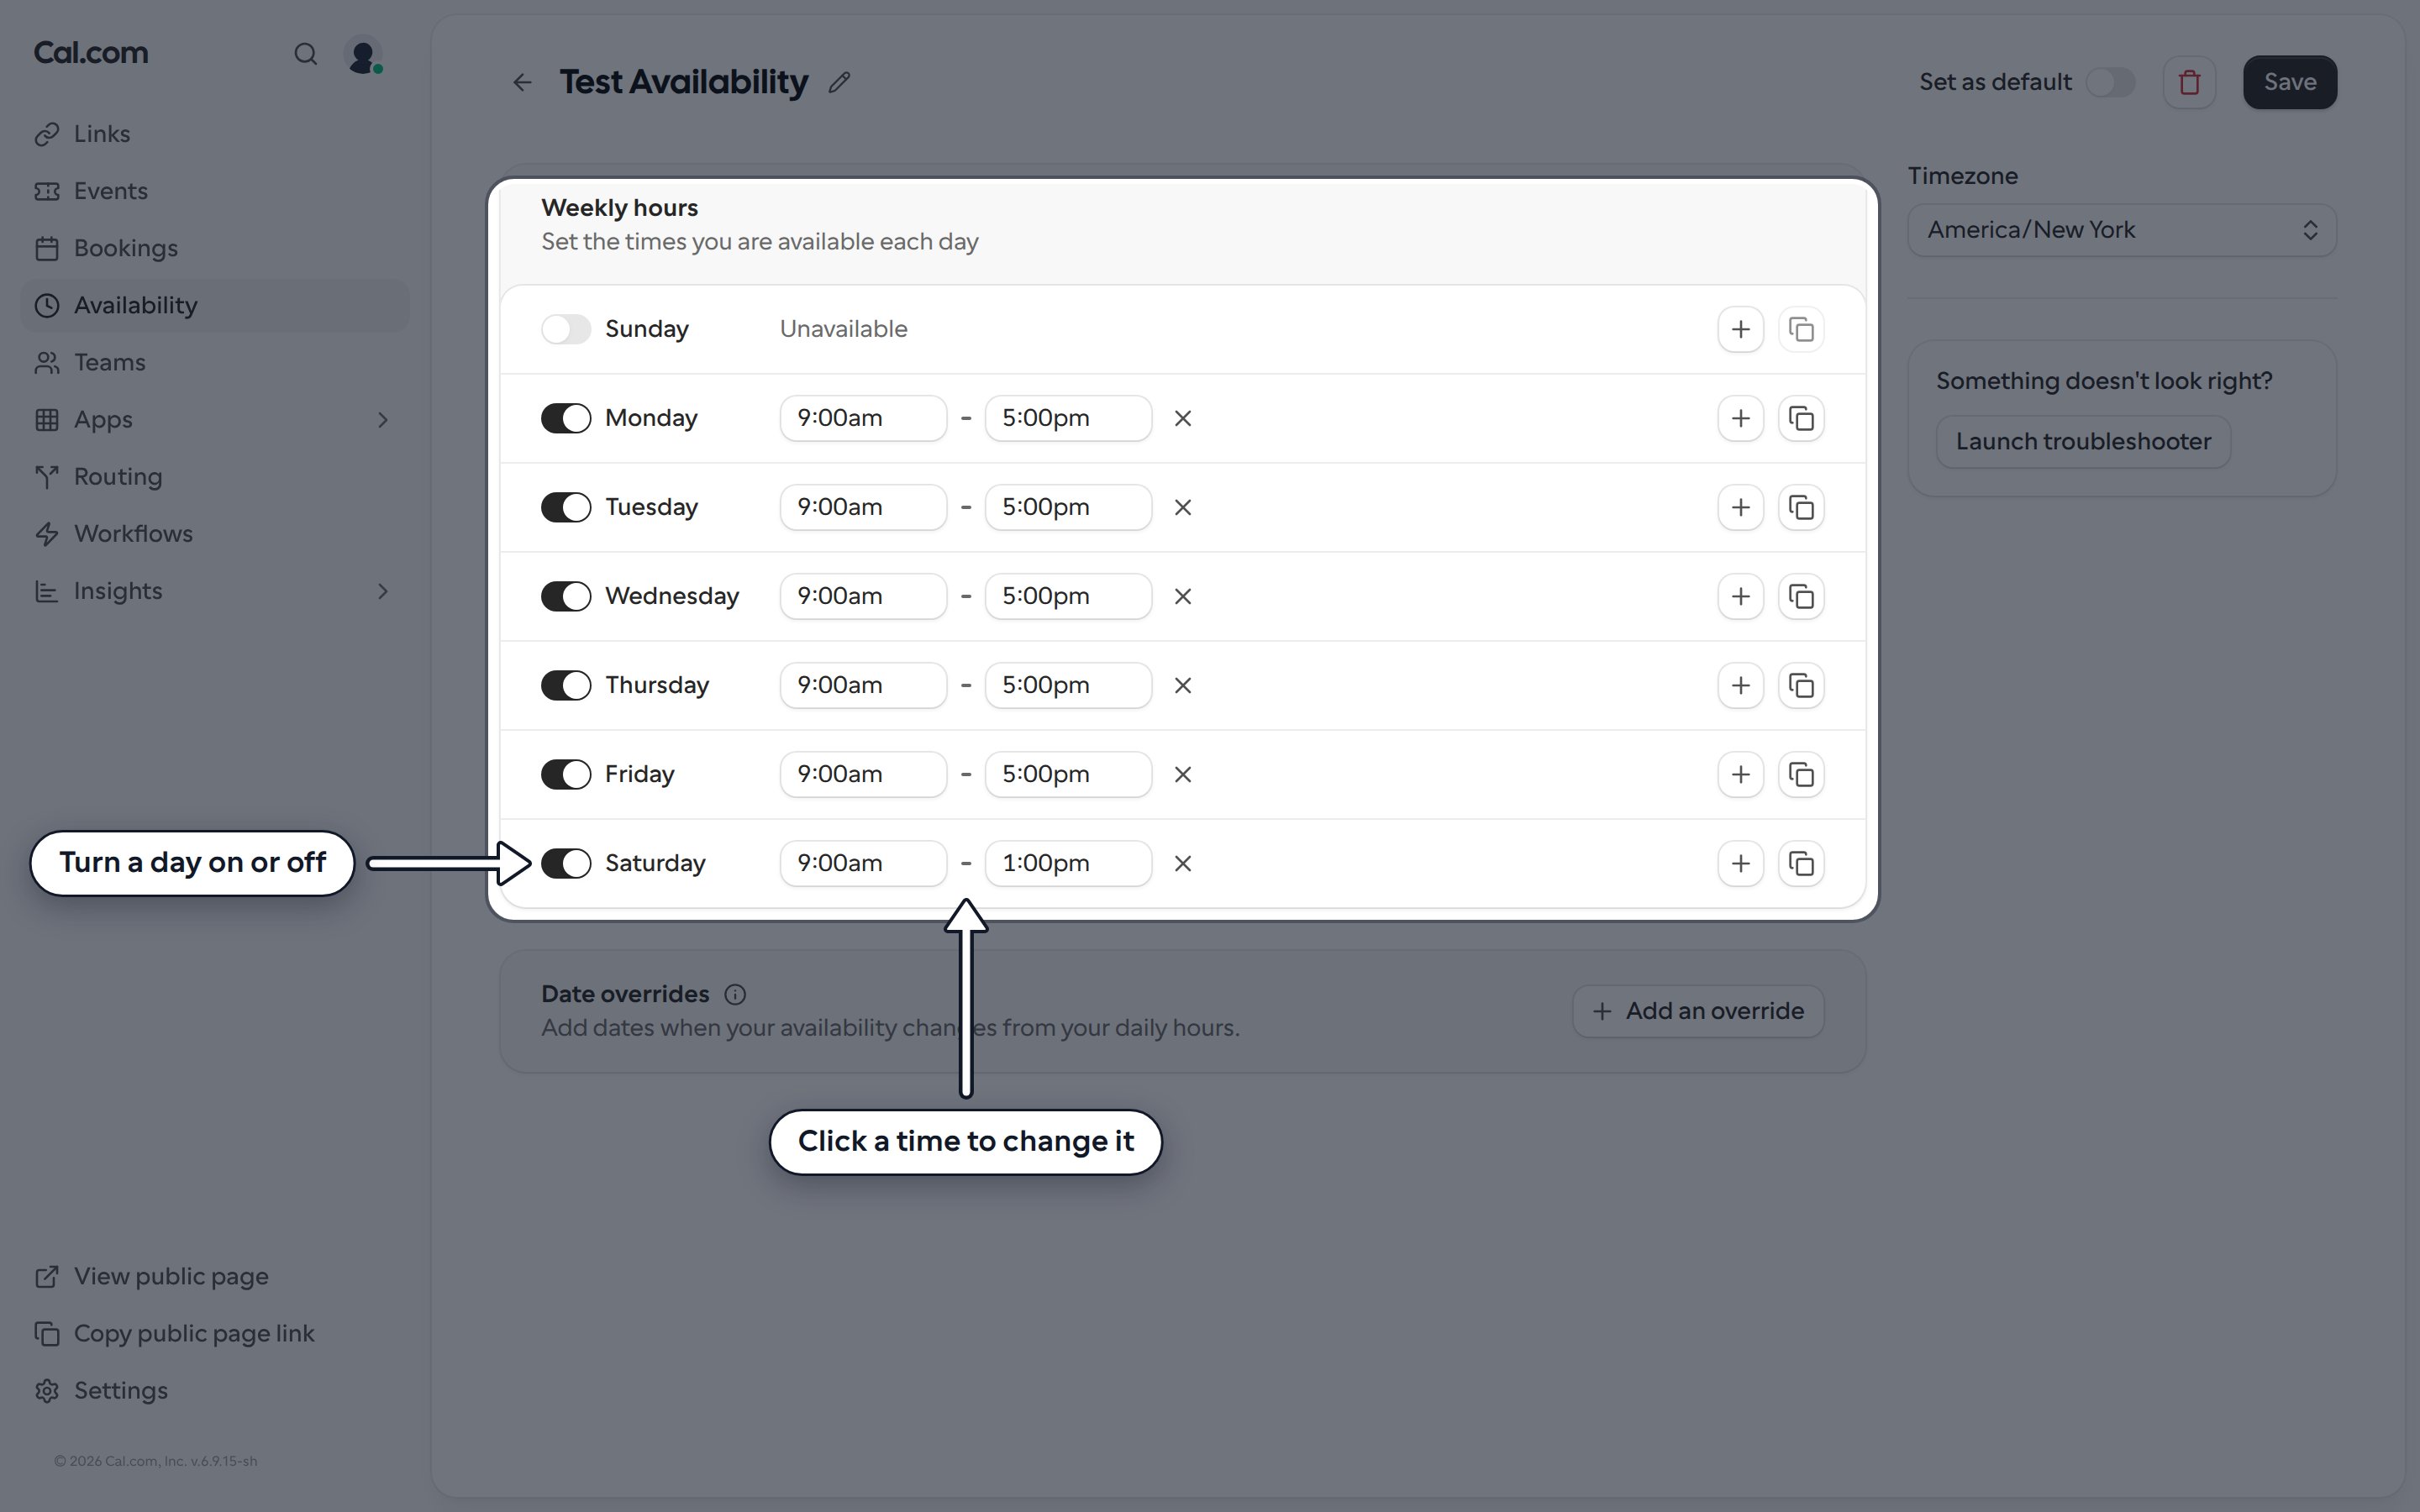
- Turn days on or off: use the toggle next to a day. Days that are off show as Unavailable.
- Change the hours: click a start or end time and pick a new one. For example, turn on Saturday and set it to 9:00am to 1:00pm.
4
Add more than one time slot to a day
To split a day into separate blocks, click the + button on that day’s row. A new time range is added below the first one, and you can set its hours the same way. For example, you can be available 9:00am to 11:00am and again 5:00pm to 7:30pm. Click the X next to a range to remove it.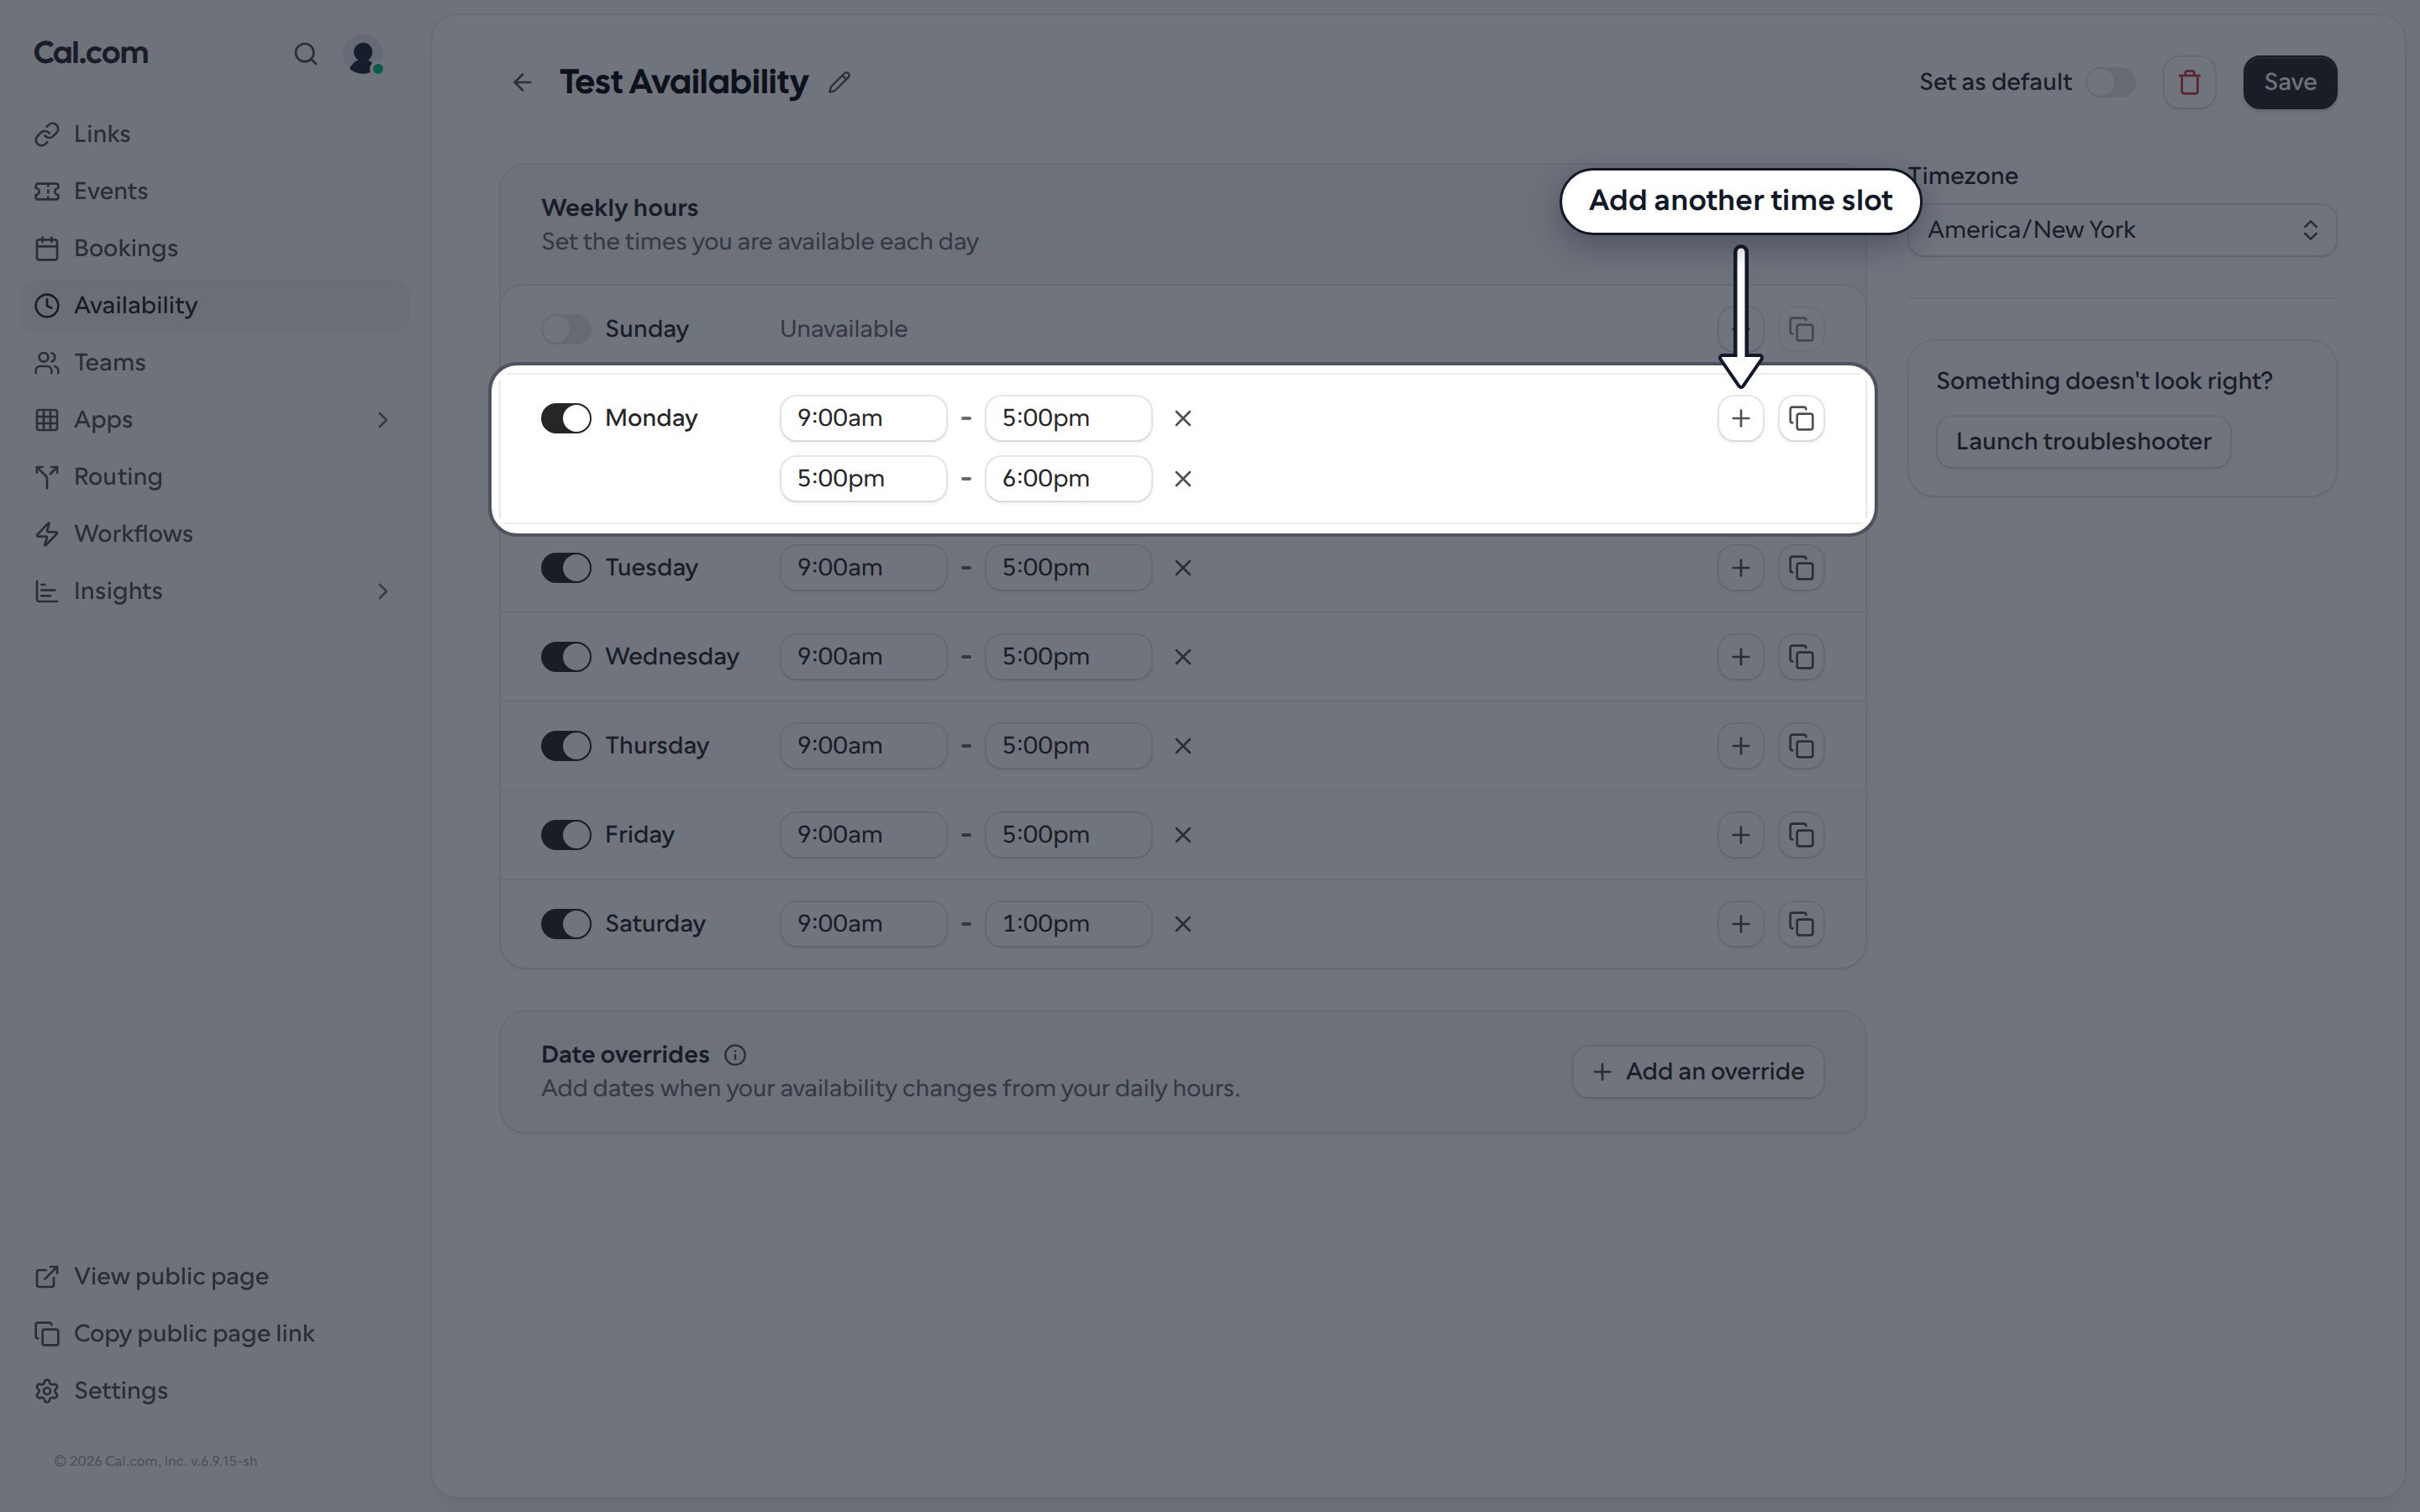
5
Copy hours to other days
Once one day looks right, click the copy button next to it. In Copy times to, select the days you want to match (or Select all) and click Apply.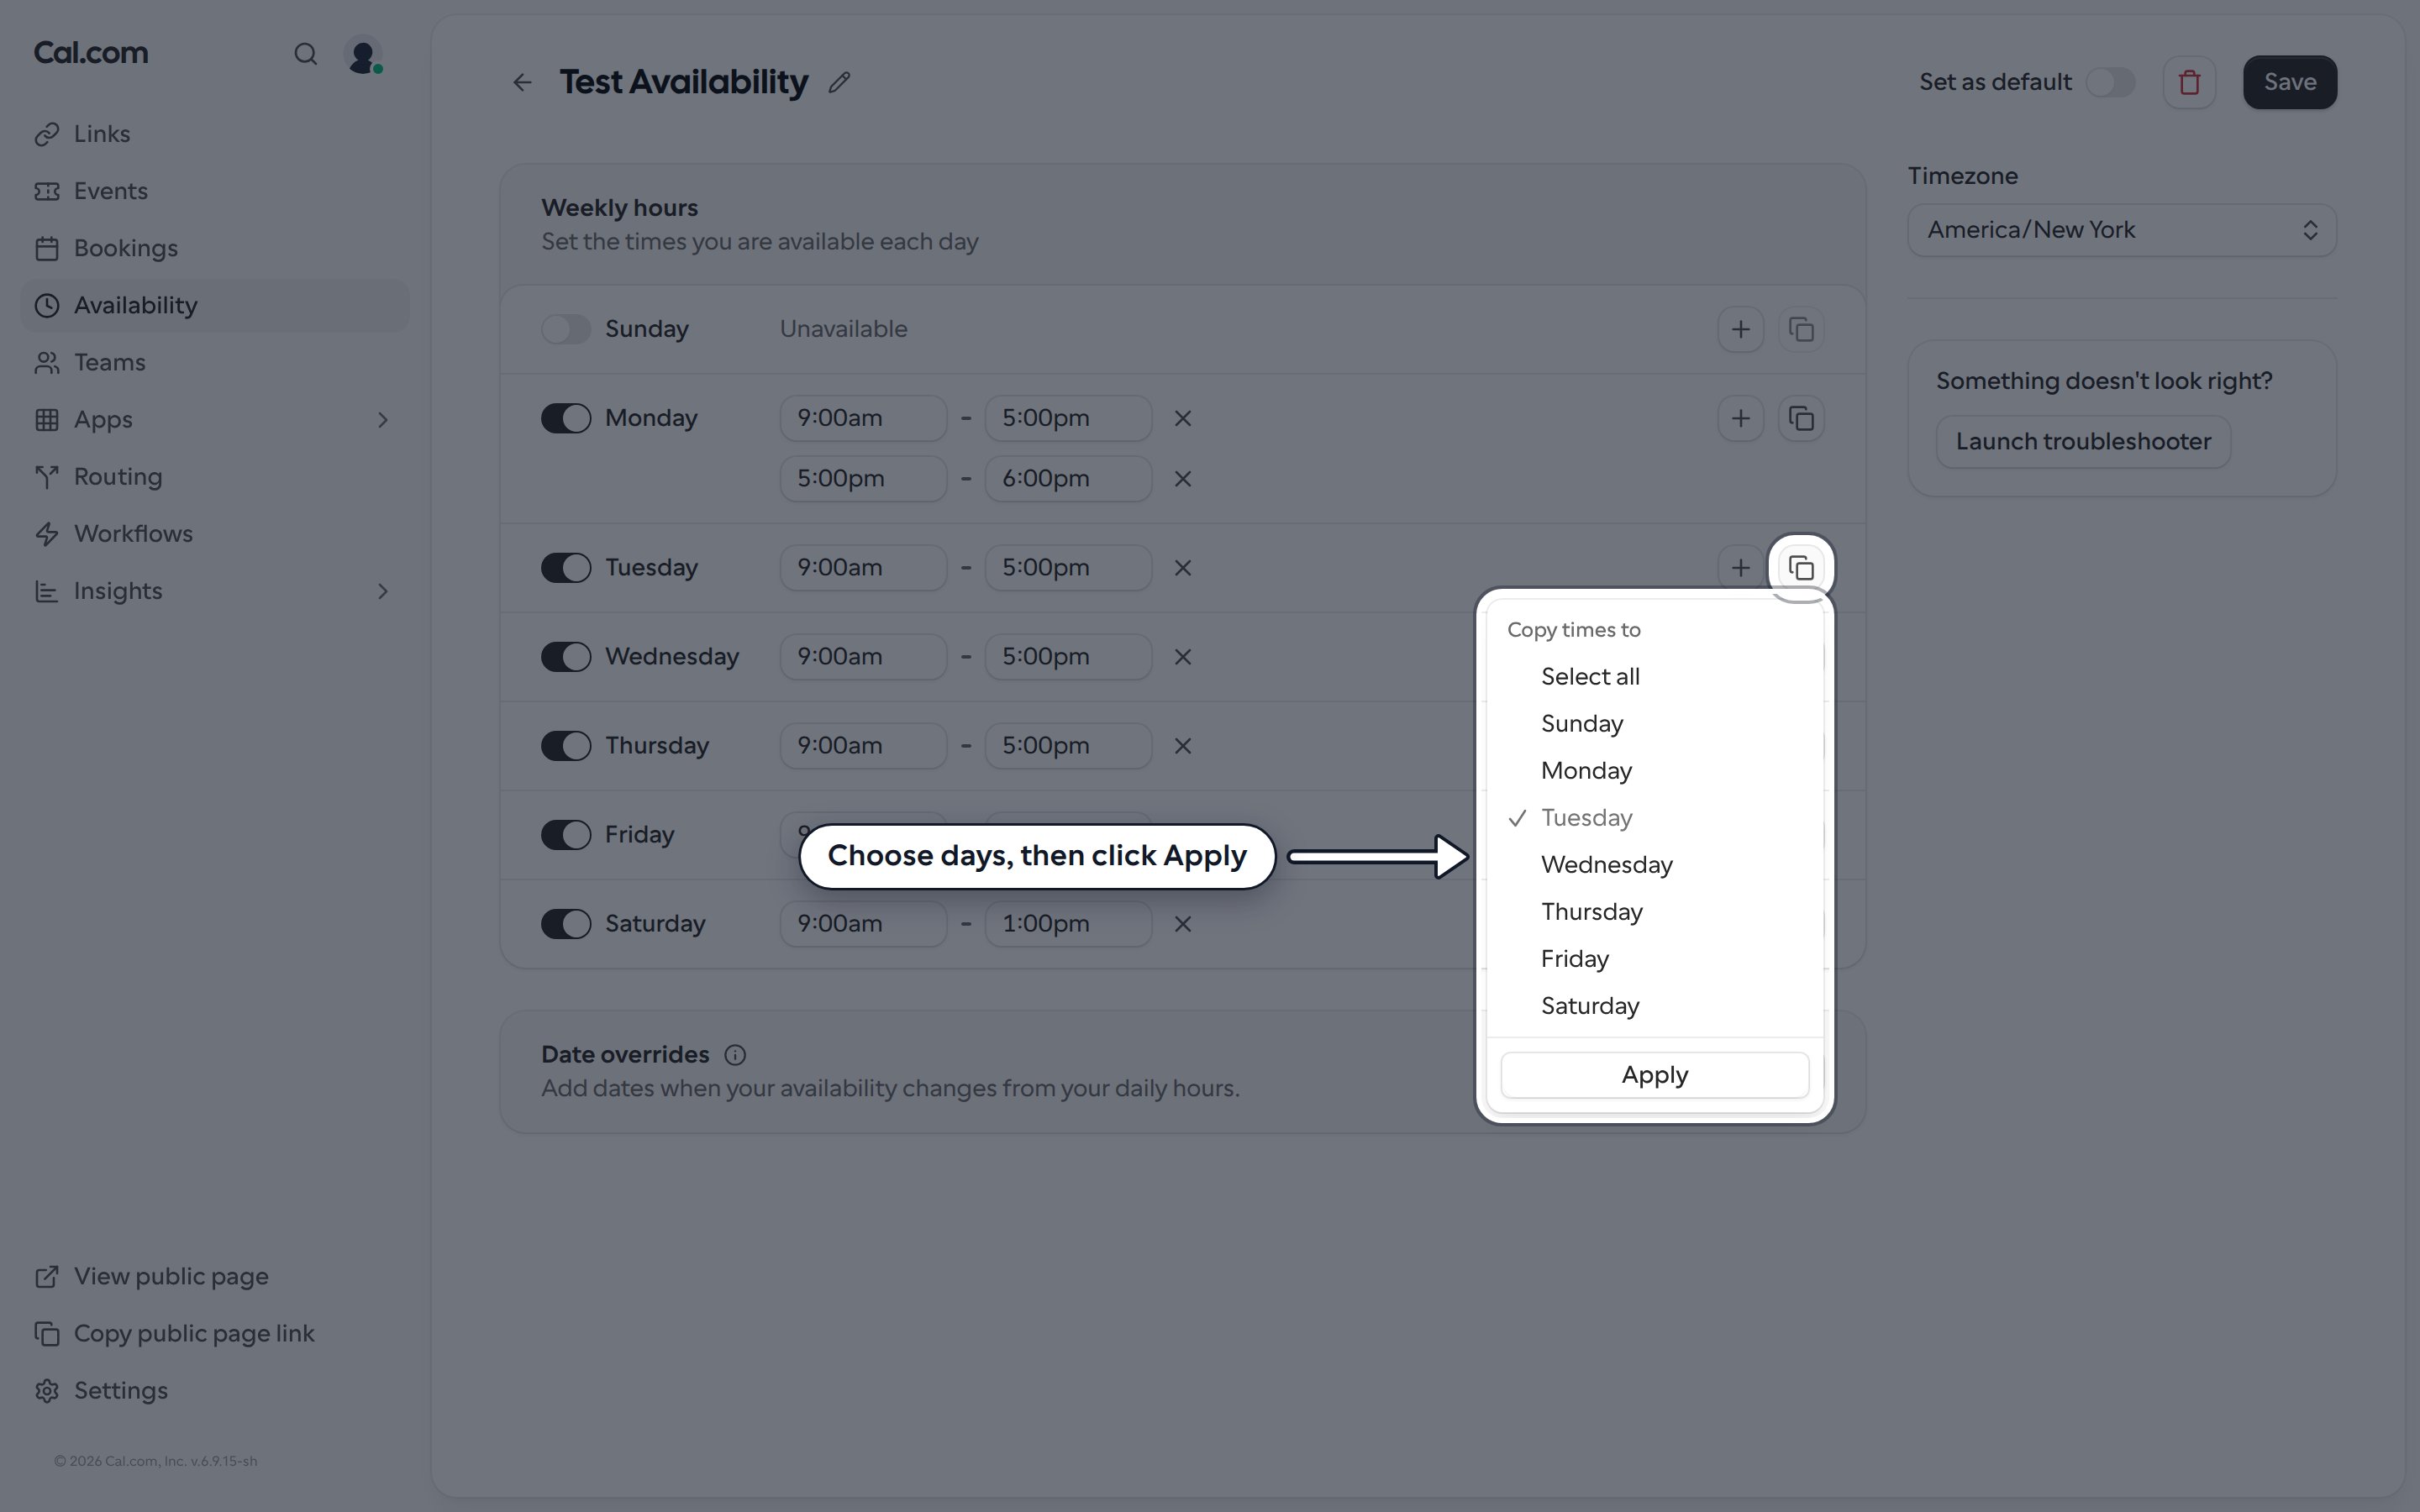
6
Add date overrides
Use a date override when your hours are different on specific dates, such as a holiday or a day you’re finishing early. Click Add an override in the Date overrides section, then: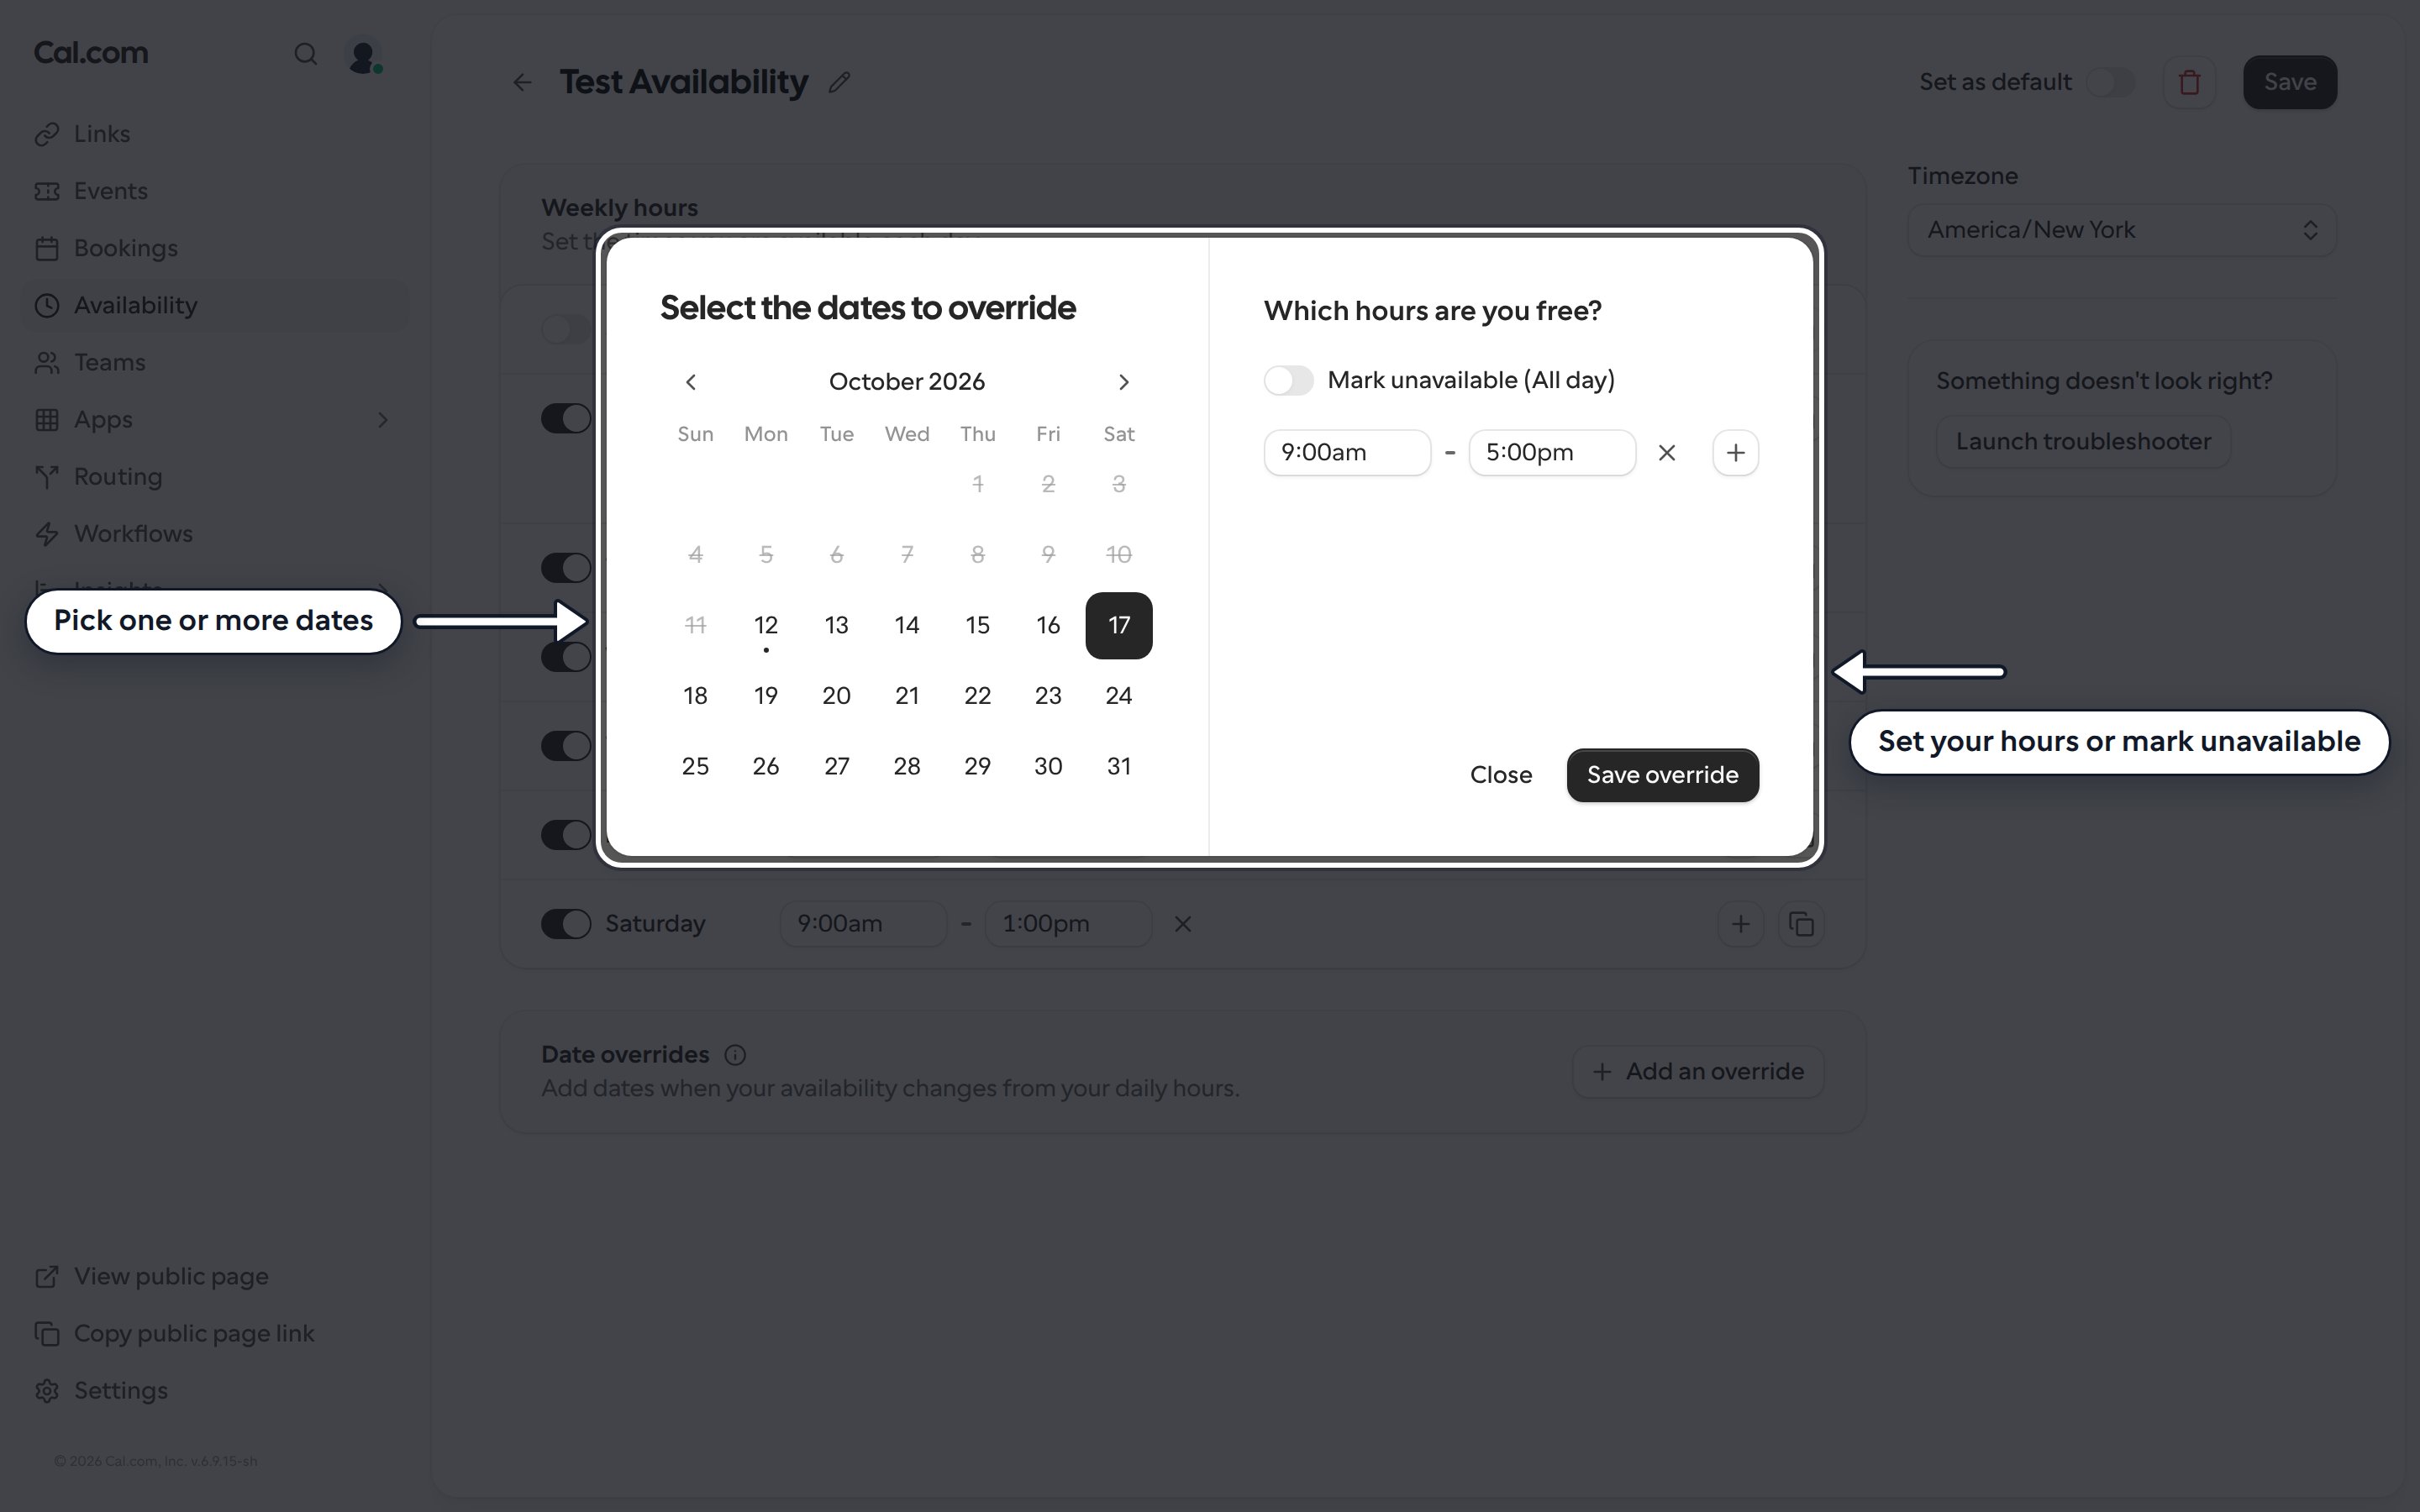
- Pick one or more dates in the calendar.
- Under Which hours are you free?, set the hours for those dates, or turn on Mark unavailable (All day).
- Click Save override.
7
Choose the timezone
Use the Timezone menu to set the timezone for this schedule. This is useful if you travel and want a schedule that follows another country’s time.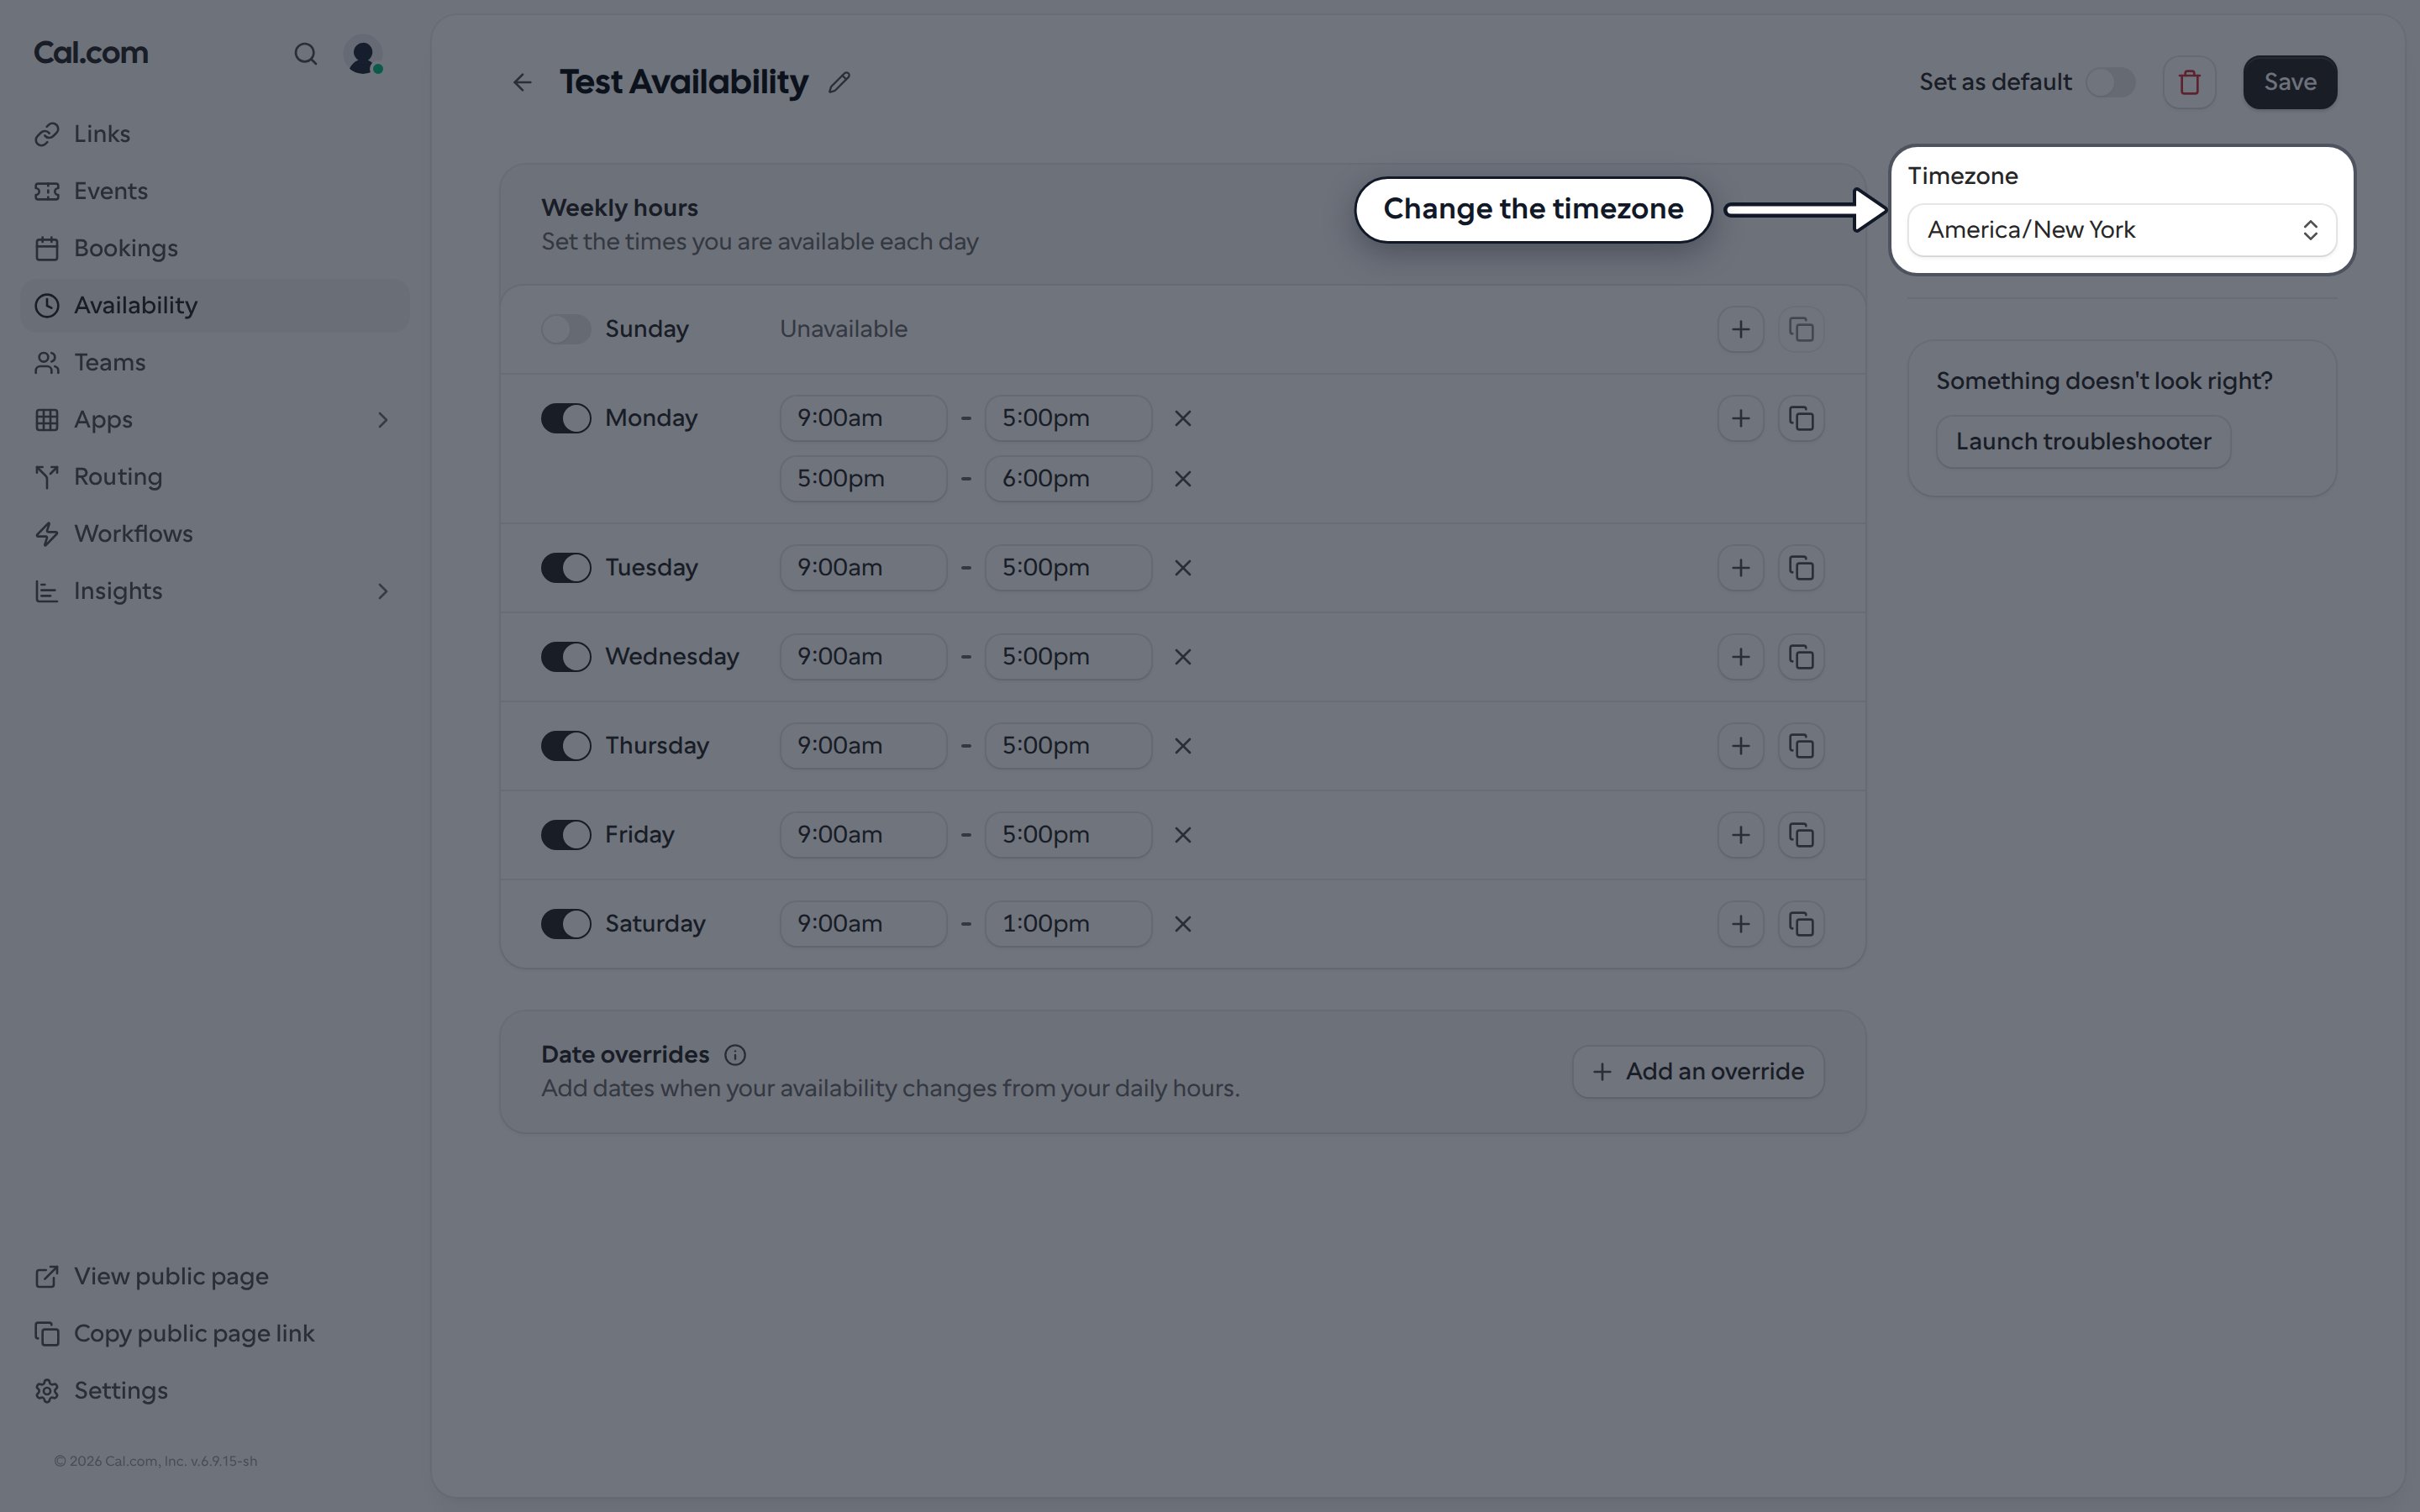
8
Save your schedule
Click Save in the top-right corner to apply your changes. To use this schedule for every booking link that doesn’t have its own schedule, turn on Set as default.
9
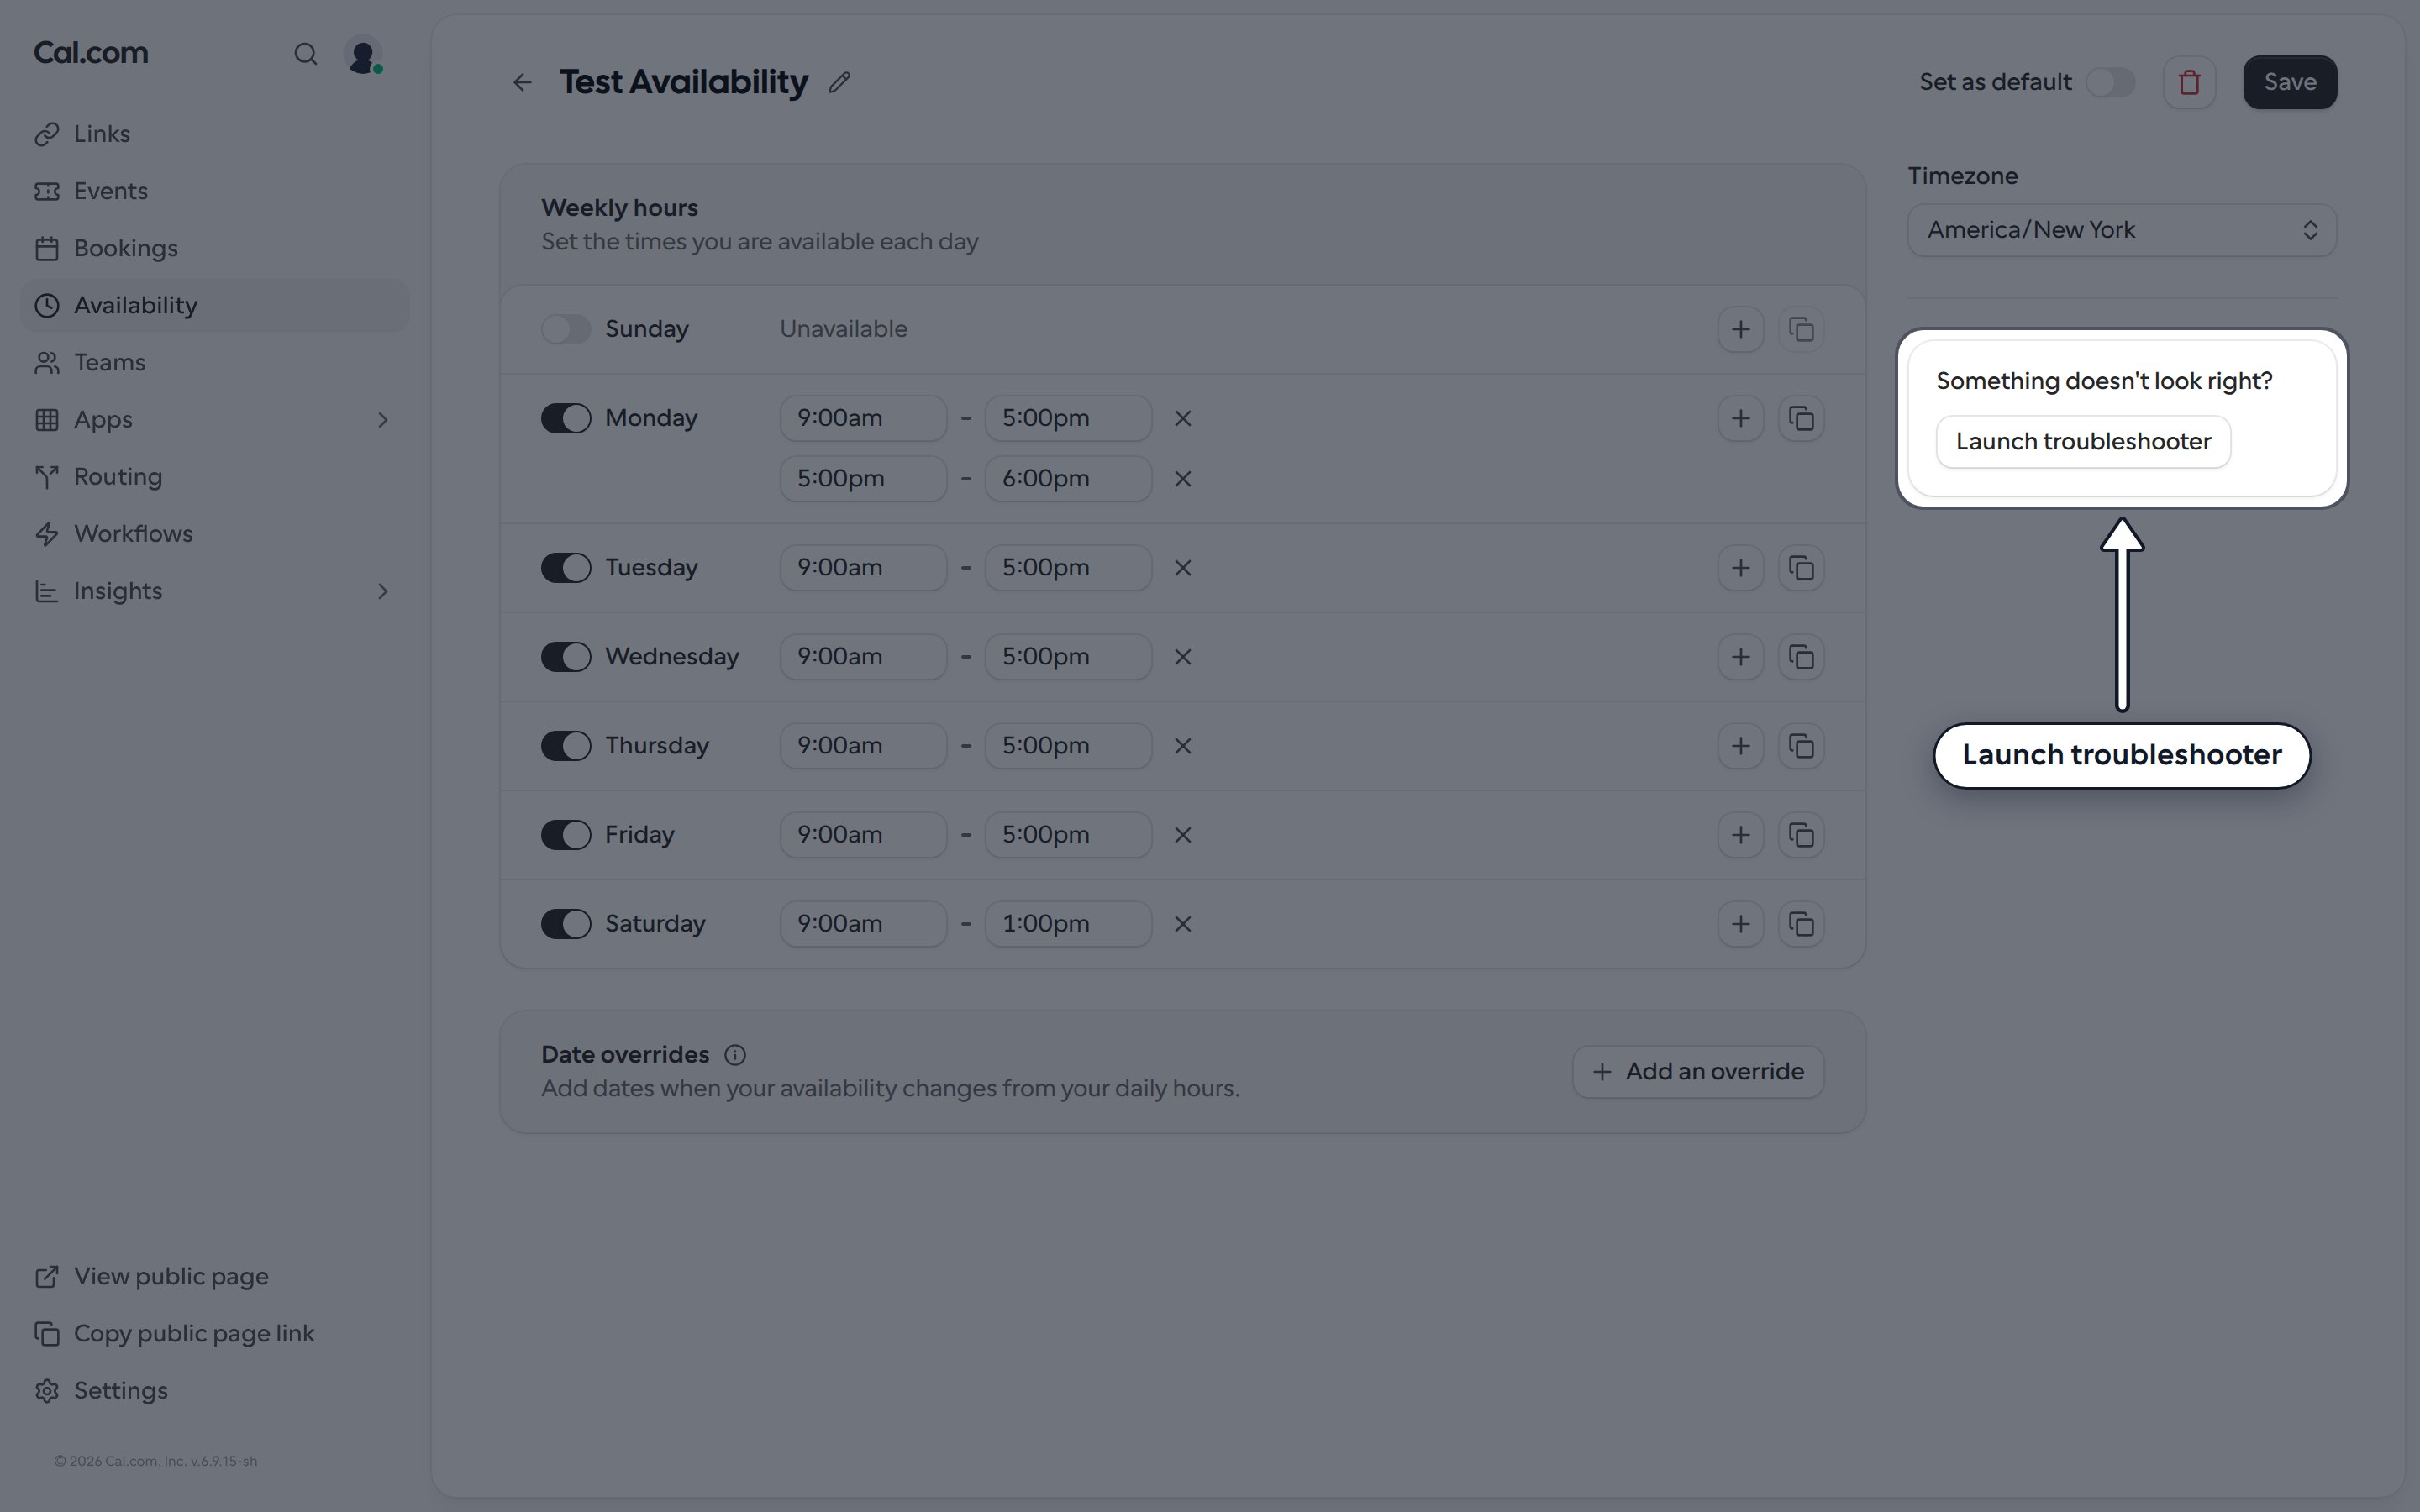
Troubleshoot your availability
If times aren’t showing up the way you expect, click Launch troubleshooter under Something doesn’t look right?. It shows how your schedule, calendar events and other settings combine to decide when you can be booked. See Troubleshoot your availability for examples.