

Turn on Cal Pay for a Link
1
Open the Link you want to charge for
Go to your Links and open the one you want to charge for.
2
Open Payments & Seats
In the left menu of the Link, under Booking experience, select Payments & Seats.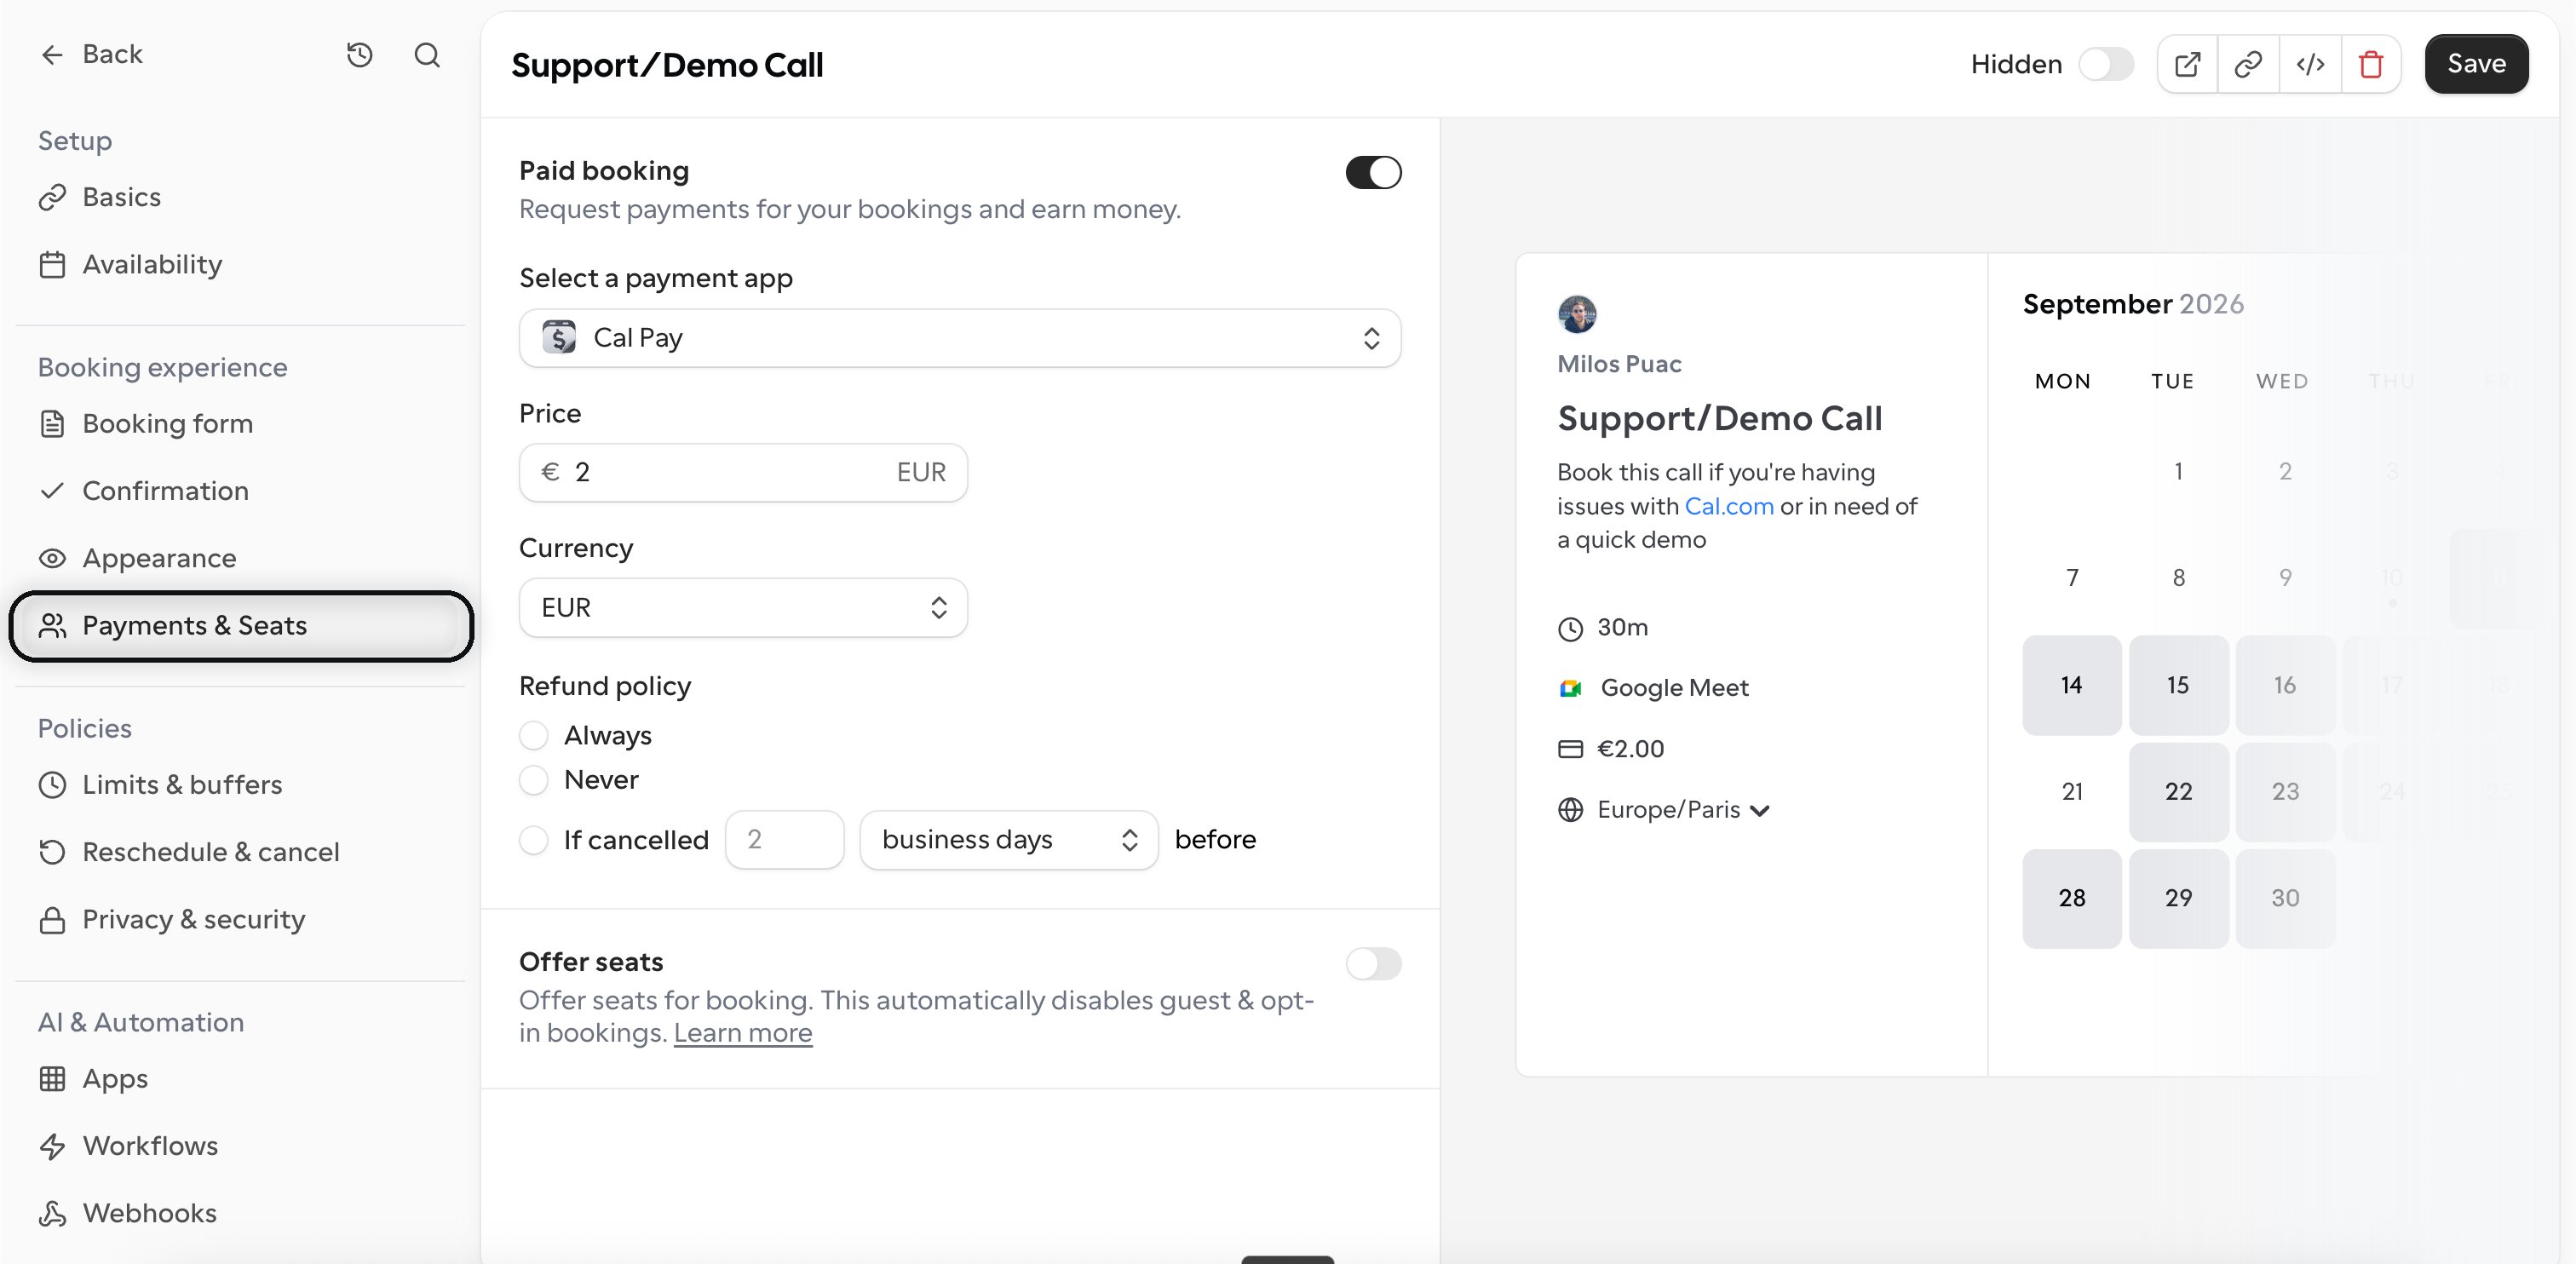
3
Turn on Paid booking
Switch on Paid booking, then choose Cal Pay under Select a payment app.
4
Set a price and currency
Enter the Price and choose the Currency. The price must be at least the currency’s minimum charge.
5
Choose a refund policy
Pick how refunds are handled: Always, Never, or If cancelled a set number of days or business days before the booking.
6
Save
Select Save. Every new booking on that Link now requires payment.
What the booker sees
The booker fills in your booking form as usual and pays before the booking is created. Checkout runs inside the booking page itself, so they are never redirected to an external payment page. Once the payment goes through, the booking is confirmed and they receive their confirmation and a receipt.Fees
Cal Pay charges a fee at two points: when a booker pays you, and when you withdraw your balance. Both are deducted from the amount, never added to the price the booker sees.Fees on each payment
Each payment includes these fees:- Fixed card processing fee: $0.30
- Radar fee: $0.07
- Payment processing percentage fee: a percentage of the payment amount
- Application fee: Cal.com’s take rate
- Orchestration fee
Fees on each withdrawal
You can withdraw your balance by card, standard ACH, next day ACH, wire, PayPal, or Cash App. The processing rate depends on the method you choose.
PayPal and Cash App withdrawals are instant. ACH and wire transfers take 1 to 3 days to reach your bank. A Cal.com withdrawal fee is also deducted from each withdrawal.
Example: a $55.00 booking from payment to bank
Here is how fees added up to 55.00 payment that was then withdrawn to a bank account.How the money reaches you
1
The booker pays
They choose a payment method and pay for the booking.
2
The amount lands in your Cal Pay wallet
Once the transaction goes through, the money settles into your Cal Pay wallet rather than straight into your bank.
3
You start a withdrawal
Go to Apps > Installed apps > Payment. Under Cal Pay you will find Balance and withdrawals with your Total balance and Available balance. Select Withdraw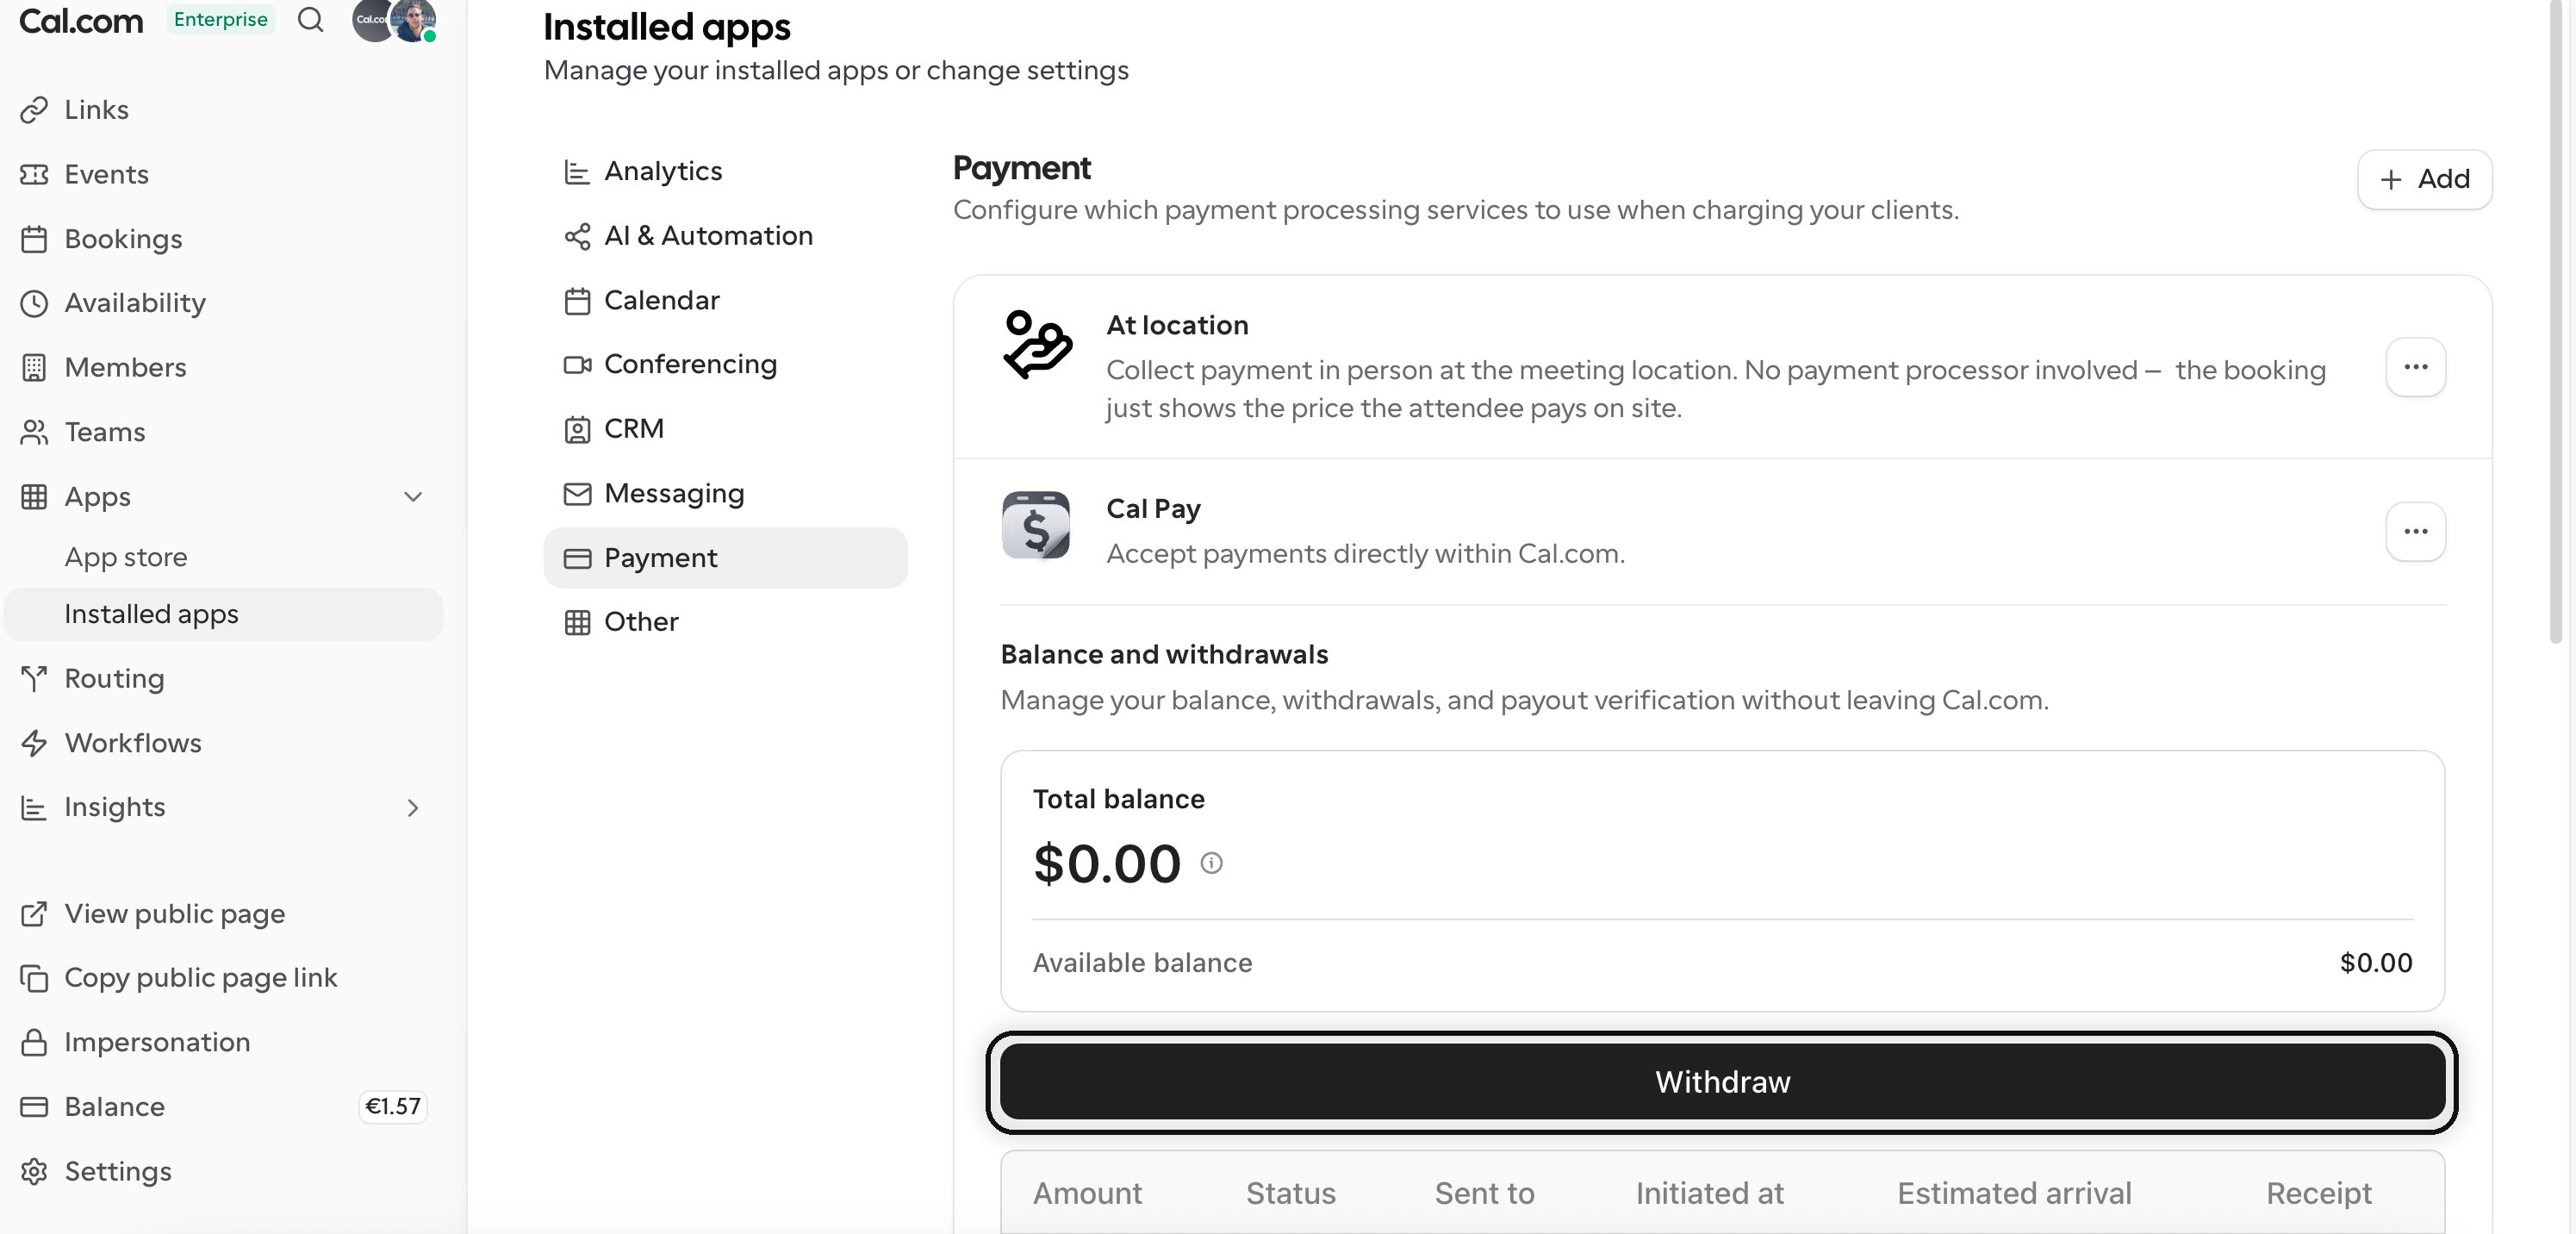
4
You complete identity verification
Identity verification (KYC) happens at your first withdrawal, not when you set Cal Pay up. Do it before you are counting on a payout arriving.
5
You choose where the money goes
Pick your preferred payout method and the funds move from your Cal Pay wallet to that account.