

Create the event
Go to Events in the left sidebar and create a new event. You fill in one sentence, for example I’m hosting Summer Rooftop Sessions on Friday, October 23 at 9:00 AM until 10:00 AM, plus the timezone and whether the event is public or private and requires approval. Select Create event to open the editor, where you fill in everything else. The start must be in the future, and for in-person events you should use the venue’s local time. The event URL (slug) is suggested from the name and can be changed in Basics while the event is a draft. It must be at least 10 characters, use only lowercase letters, numbers, and dashes, and be unique across Cal.com. It is checked against usernames, reserved routes, and other events. If it is already in use, the app tells you the URL is taken. A Private event stays reachable by its URL but is hidden from your public event listing.If you type a link into the event name, it is removed from the saved title, and the URL is never allowed to spell out the removed link. If this forces the URL to change, you are told the new URL and that the old one no longer works. The editor always shows the URL the event is actually saved under.
Fill in the editor
The editor is grouped into sections. A live preview of the public page sits alongside the form.Setup: Basics
The event name, the event URL (read-only once published), an About the event description with a Translate using AI option, the date, time and timezone, and the Private event toggle.Setup: Appearance
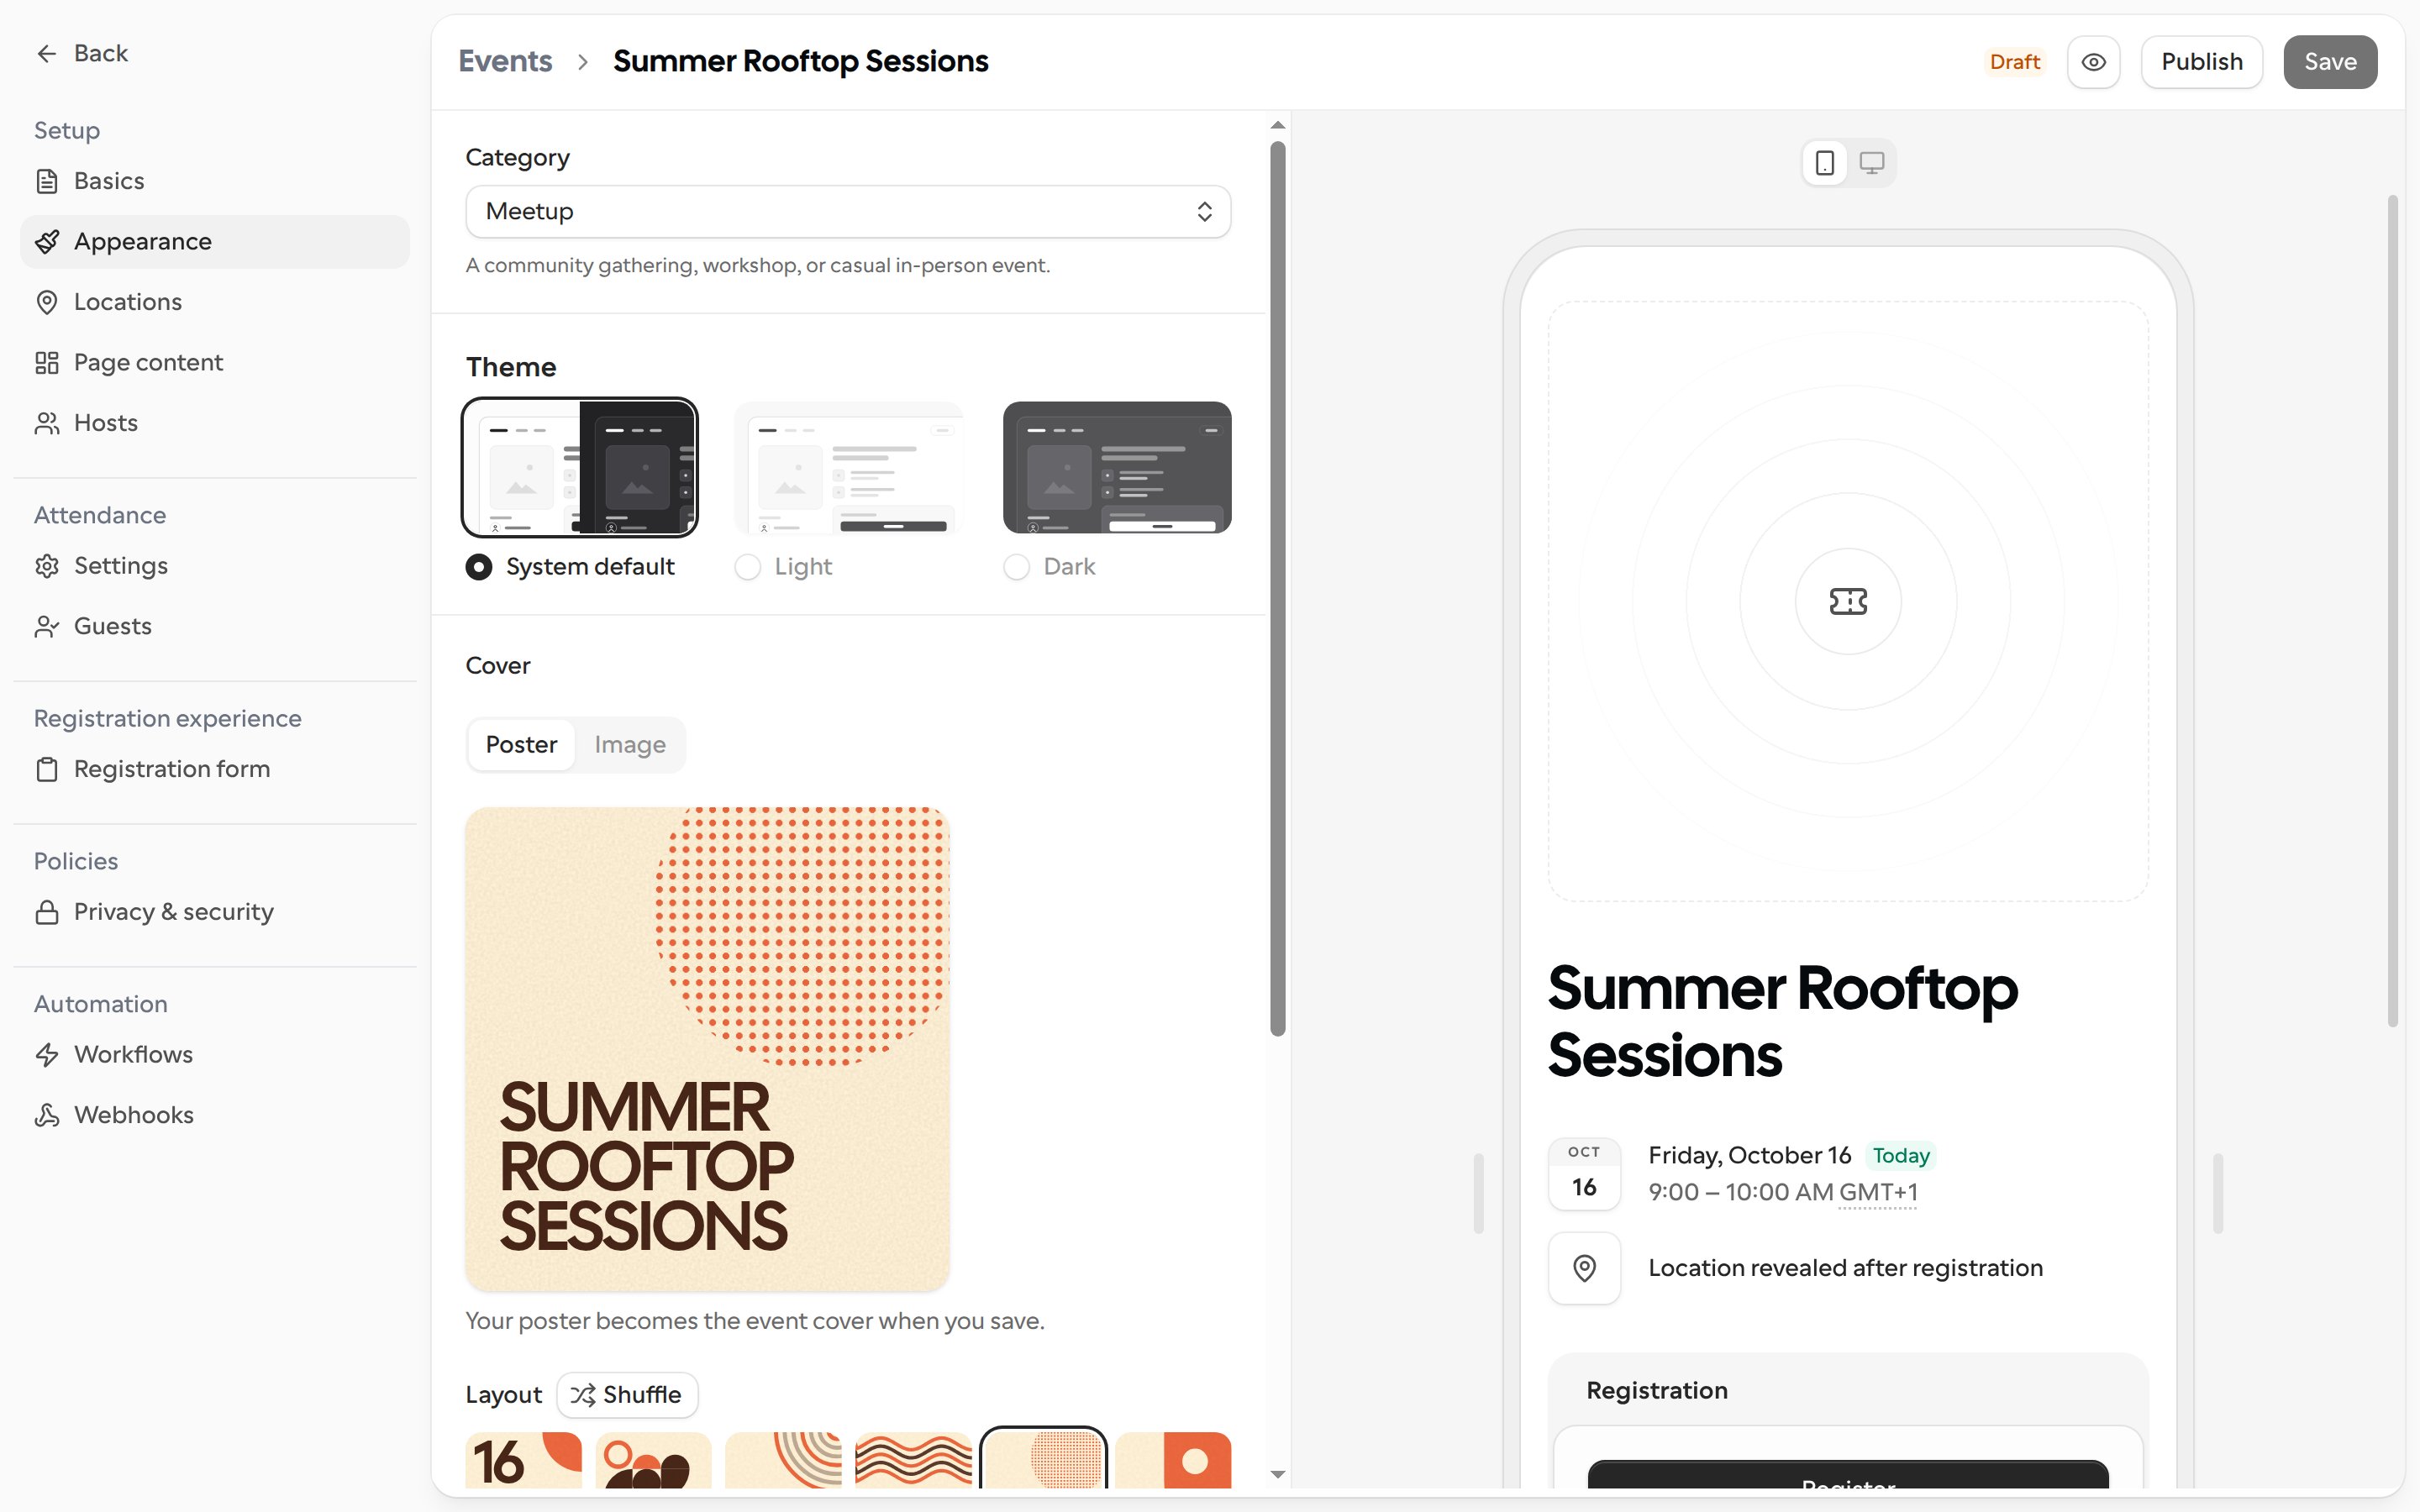
The Appearance tab controls how the public event page looks. The live preview next to the editor updates as you change things.- Category: the kind of event, for example Meetup. Each category has a short description underneath.
- Theme: System default, Light or Dark. Light and Dark always show the page in that theme. System default follows each guest’s device setting.
- Cover: choose Poster or Image.
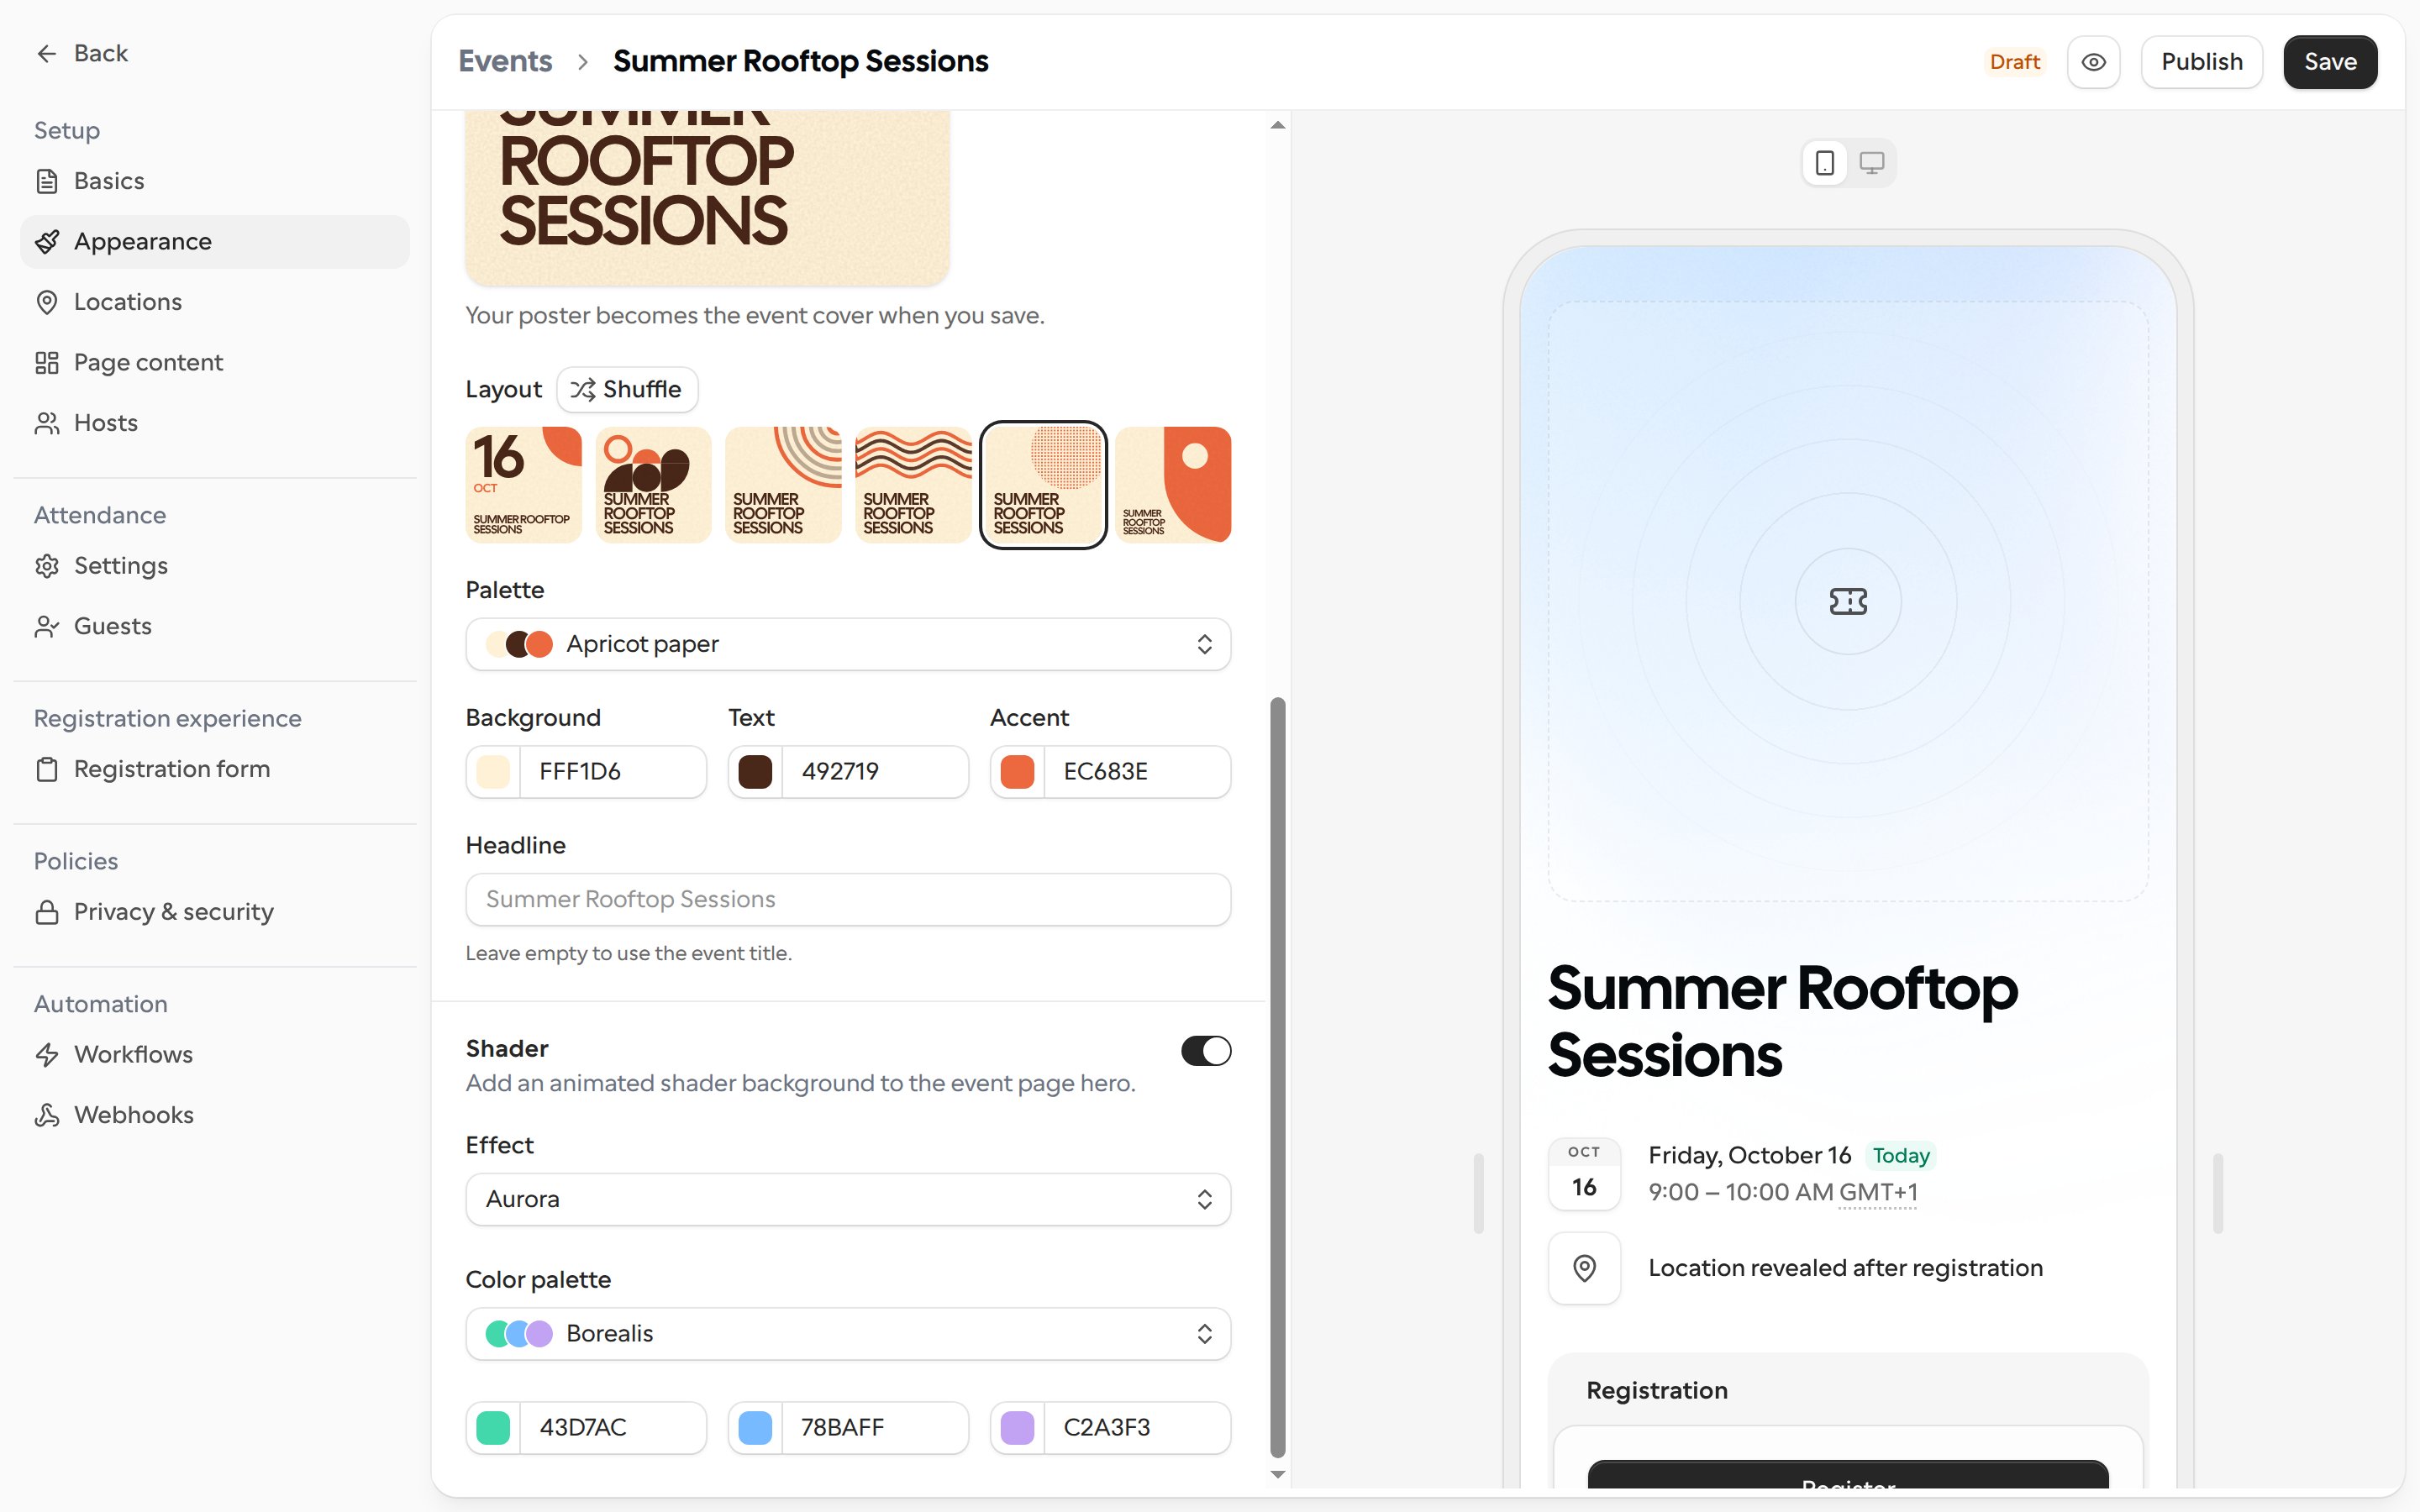
- Poster designs a cover for you from the event name. Pick one of the layouts or click Shuffle, choose a Palette (or set the Background, Text and Accent colors yourself), and optionally type a Headline. Leave the headline empty to use the event title. The poster becomes the event cover when you save.
- Image lets you drag in or browse for your own cover. The ideal size is 800x800 and the maximum is 10 MB. You can replace or remove it later, or generate a cover image with AI, which is uploaded when the event is saved.
- Shader: turn it on to add an animated background to the top of the event page. Pick an Effect and a Color palette, or set the three colors yourself.
Setup: Location
Choose in-person or virtual.- In-person is an address. A map preview is generated automatically after the event is saved, and guests get an Open in maps action. Changing the address regenerates the map.
- Virtual is either Cal Video, another connected conferencing option, or a custom meeting link.
Setup: Hosts
You are always listed as a host. Team members can be added, and people outside your team can be invited as external co-hosts by email. Co-hosts accept or decline, and you can see their Invited, Declined, or accepted state, revoke access at any time, or watch a co-host leave the event themselves. A co-host can edit event details and manage attendees. A co-host cannot change the host roster, cancel, delete, or publish the event, or change who appears on the public guest list. Locked controls tell them to contact the main host.Setup: Page content
Use Page content to add a Lineup and a Schedule to the public page.- Lineup: speakers, performers or anyone else you want to feature, up to 30 people. You can rename the section with Title (it is called Lineup by default). Click Add lineup person to add a name, title, avatar and optional links.
- Schedule: the agenda, up to 50 items. Each item can have a start and end time and the people from the lineup who are involved.
Add media players to a lineup person
In the Add lineup person dialog, use Media to add up to 6 Spotify, YouTube or SoundCloud links per person. Each link shows which provider and type it is, for example Spotify · Artist, and you can give it an optional label, move it up or down, or delete it. Links from other sites aren’t accepted. On the public page, people with media get a play button next to their name. Guests click it to open that person’s players. Nothing loads from Spotify, YouTube or SoundCloud until a guest opens them.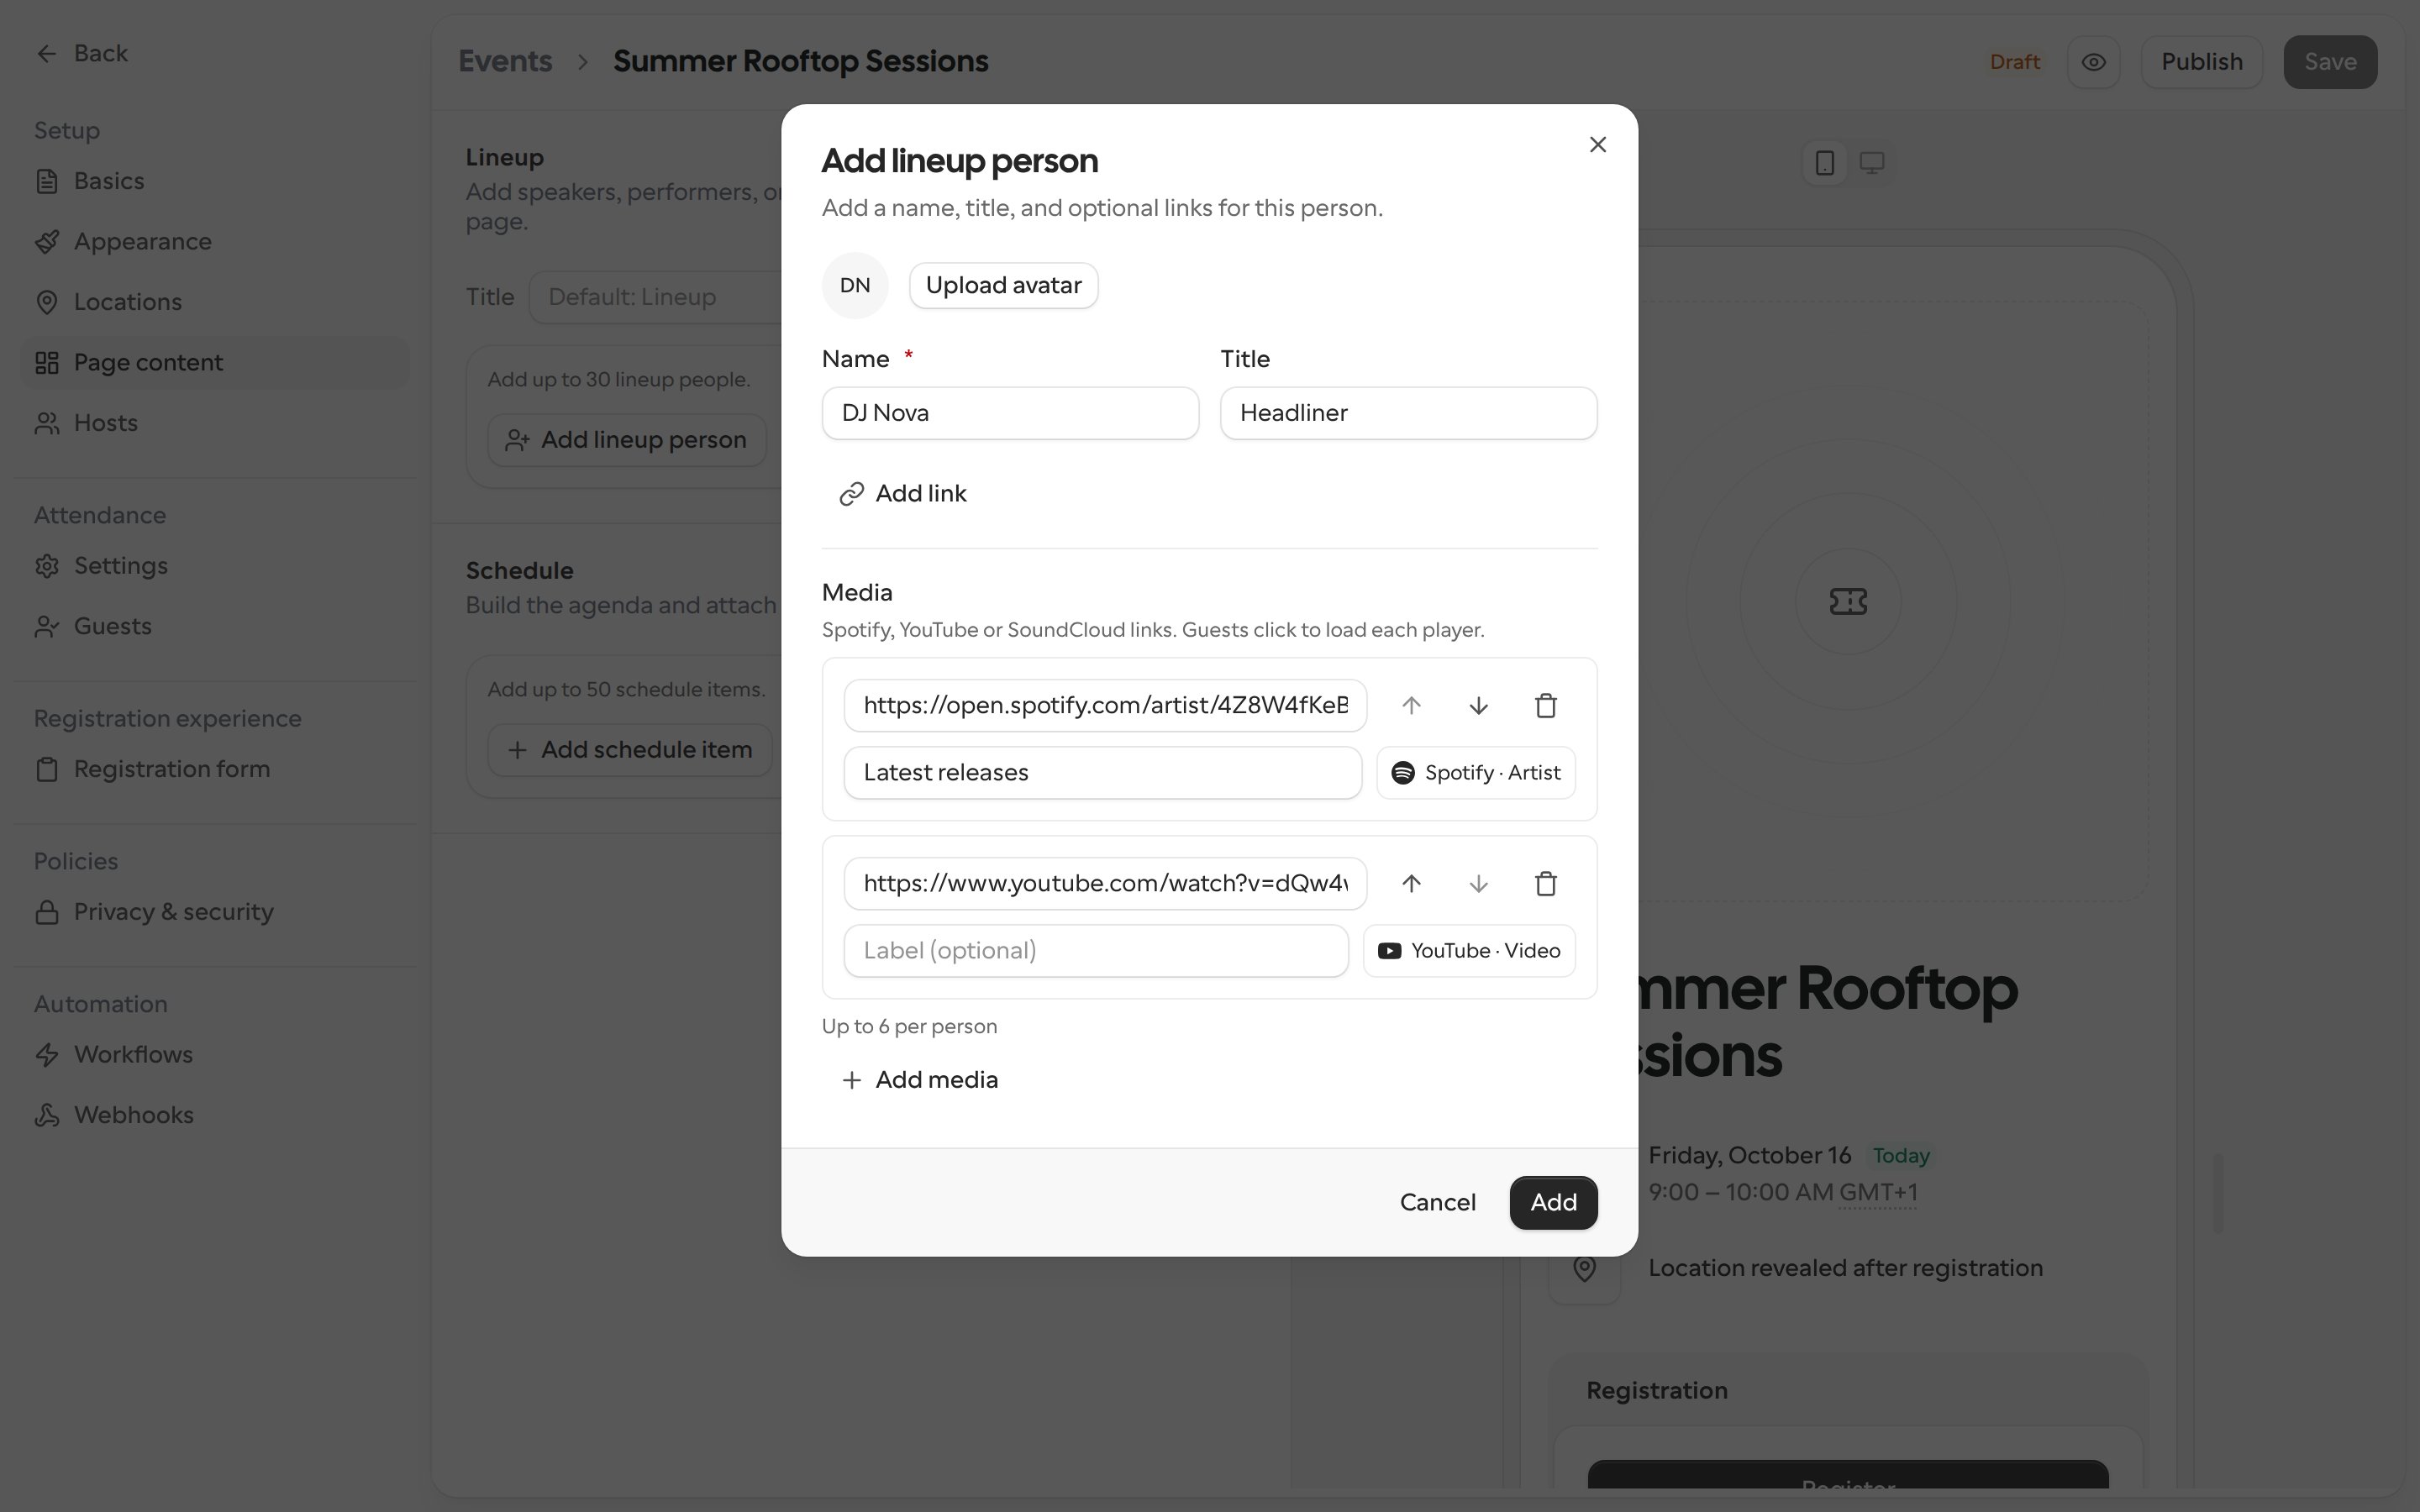
The remaining sections
- Registration experience and Attendance: see Registration, approval and capacity.
- Attendance > Guests: available only after the event is published. See Invite guests and manage the roster.
- Automation > Workflows and Webhooks: events use the same editors as bookings.
Publish the event
An event moves through four statuses:
To publish, make sure the form has no errors and all changes are saved. If you cannot publish, check for unsaved changes or form errors first.
On publish, the event is added to your connected calendar and to those of any accepted co-hosts. If that fails, the event still publishes and you are asked to reconnect your calendar. A calendar problem never blocks publishing.