" height="18.016311920580208px" id="GKXyVanMq" stroke-dasharray="0" stroke-linecap="butt" stroke-linejoin="miter" stroke-miterlimit="10" stroke-width="0.5" stroke="rgb(0, 0, 0)" transform="translate(3 3)" width="18px"/></svg>)
"/><stop offset="1" stop-color="rgb(227, 224, 244)"/></linearGradient><linearGradient id="CBS1bzkxF-2031533640-linear-gradient" x1="0.49751243781094523" x2="0.5024875621890548" y1="0" y2="1"><stop offset="0" stop-color="rgb(255, 255, 255)"/><stop offset="1" stop-color="rgb(227, 224, 244)"/></linearGradient><linearGradient id="Jd7AK81w9-2031533640-linear-gradient" x1="0.49751243781094523" x2="0.5024875621890548" y1="0" y2="1"><stop offset="0" stop-color="rgb(255, 255, 255)"/><stop offset="1" stop-color="rgb(227, 224, 244)"/></linearGradient></defs><g d="M 0 16 L 0 0 L 16 0 L 16 16 Z M 9.167 5.167 C 9.167 4.891 8.943 4.667 8.667 4.667 C 8.391 4.667 8.167 4.891 8.167 5.167 C 8.167 6.784 7.809 7.834 7.155 8.488 C 6.501 9.143 5.451 9.5 3.833 9.5 C 3.557 9.5 3.333 9.724 3.333 10 C 3.333 10.276 3.557 10.5 3.833 10.5 C 5.451 10.5 6.501 10.857 7.155 11.512 C 7.809 12.166 8.167 13.216 8.167 14.833 C 8.167 15.109 8.391 15.333 8.667 15.333 C 8.943 15.333 9.167 15.109 9.167 14.833 C 9.167 13.216 9.524 12.166 10.178 11.512 C 10.832 10.857 11.883 10.5 13.5 10.5 C 13.776 10.5 14 10.276 14 10 C 14 9.724 13.776 9.5 13.5 9.5 C 11.883 9.5 10.832 9.143 10.178 8.488 C 9.524 7.834 9.167 6.784 9.167 5.167 Z M 4 3.667 C 4 3.483 3.851 3.333 3.667 3.333 C 3.483 3.333 3.333 3.483 3.333 3.667 C 3.333 4.32 3.189 4.715 2.952 4.952 C 2.715 5.189 2.32 5.333 1.667 5.333 C 1.483 5.333 1.333 5.483 1.333 5.667 C 1.333 5.851 1.483 6 1.667 6 C 2.32 6 2.715 6.145 2.952 6.382 C 3.189 6.618 3.333 7.013 3.333 7.667 C 3.333 7.851 3.483 8 3.667 8 C 3.851 8 4 7.851 4 7.667 C 4 7.013 4.145 6.618 4.382 6.382 C 4.618 6.145 5.013 6 5.667 6 C 5.851 6 6 5.851 6 5.667 C 6 5.483 5.851 5.333 5.667 5.333 C 5.013 5.333 4.618 5.189 4.382 4.952 C 4.145 4.715 4 4.32 4 3.667 Z M 7.333 1 C 7.333 0.816 7.184 0.667 7 0.667 C 6.816 0.667 6.667 0.816 6.667 1 C 6.667 1.422 6.573 1.65 6.445 1.778 C 6.317 1.906 6.089 2 5.667 2 C 5.483 2 5.333 2.149 5.333 2.333 C 5.333 2.517 5.483 2.667 5.667 2.667 C 6.089 2.667 6.317 2.761 6.445 2.889 C 6.573 3.016 6.667 3.244 6.667 3.667 C 6.667 3.851 6.816 4 7 4 C 7.184 4 7.333 3.851 7.333 3.667 C 7.333 3.244 7.427 3.016 7.555 2.889 C 7.683 2.761 7.911 2.667 8.333 2.667 C 8.517 2.667 8.667 2.517 8.667 2.333 C 8.667 2.149 8.517 2 8.333 2 C 7.911 2 7.683 1.906 7.555 1.778 C 7.427 1.65 7.333 1.422 7.333 1 Z" fill="transparent" height="16px" id="aoZYv33vR" width="16px"><path d="M 0 16 L 0 0 L 16 0 L 16 16 Z" fill="transparent" height="16px" id="Z2uGmhW9f" width="16px"/><g d="M 7.833 4.5 C 7.833 4.224 7.609 4 7.333 4 C 7.057 4 6.833 4.224 6.833 4.5 C 6.833 6.117 6.476 7.168 5.822 7.822 C 5.168 8.476 4.117 8.833 2.5 8.833 C 2.224 8.833 2 9.057 2 9.333 C 2 9.61 2.224 9.833 2.5 9.833 C 4.117 9.833 5.168 10.191 5.822 10.845 C 6.476 11.499 6.833 12.549 6.833 14.167 C 6.833 14.443 7.057 14.667 7.333 14.667 C 7.609 14.667 7.833 14.443 7.833 14.167 C 7.833 12.549 8.191 11.499 8.845 10.845 C 9.499 10.191 10.549 9.833 12.167 9.833 C 12.443 9.833 12.667 9.61 12.667 9.333 C 12.667 9.057 12.443 8.833 12.167 8.833 C 10.549 8.833 9.499 8.476 8.845 7.822 C 8.191 7.168 7.833 6.117 7.833 4.5 Z M 2.667 3 C 2.667 2.816 2.517 2.667 2.333 2.667 C 2.149 2.667 2 2.816 2 3 C 2 3.654 1.855 4.048 1.618 4.285 C 1.382 4.522 0.987 4.667 0.333 4.667 C 0.149 4.667 0 4.816 0 5 C 0 5.184 0.149 5.333 0.333 5.333 C 0.987 5.333 1.382 5.478 1.618 5.715 C 1.855 5.952 2 6.346 2 7 C 2 7.184 2.149 7.333 2.333 7.333 C 2.517 7.333 2.667 7.184 2.667 7 C 2.667 6.346 2.811 5.952 3.048 5.715 C 3.285 5.478 3.68 5.333 4.333 5.333 C 4.517 5.333 4.667 5.184 4.667 5 C 4.667 4.816 4.517 4.667 4.333 4.667 C 3.68 4.667 3.285 4.522 3.048 4.285 C 2.811 4.048 2.667 3.654 2.667 3 Z M 6 0.333 C 6 0.149 5.851 0 5.667 0 C 5.483 0 5.333 0.149 5.333 0.333 C 5.333 0.756 5.239 0.984 5.112 1.112 C 4.984 1.239 4.756 1.333 4.333 1.333 C 4.149 1.333 4 1.483 4 1.667 C 4 1.851 4.149 2 4.333 2 C 4.756 2 4.984 2.094 5.112 2.222 C 5.239 2.35 5.333 2.578 5.333 3 C 5.333 3.184 5.483 3.333 5.667 3.333 C 5.851 3.333 6 3.184 6 3 C 6 2.578 6.094 2.35 6.222 2.222 C 6.35 2.094 6.578 2 7 2 C 7.184 2 7.333 1.851 7.333 1.667 C 7.333 1.483 7.184 1.333 7 1.333 C 6.578 1.333 6.35 1.239 6.222 1.112 C 6.094 0.984 6 0.756 6 0.333 Z" fill="transparent" height="14.66671286102295px" id="ae6ccdFme" transform="translate(1.333 0.667)" width="12.66663px"><path d="M 5.833 0.5 C 5.833 0.224 5.609 0 5.333 0 C 5.057 0 4.833 0.224 4.833 0.5 C 4.833 2.117 4.476 3.168 3.822 3.822 C 3.168 4.476 2.117 4.833 0.5 4.833 C 0.224 4.833 0 5.057 0 5.333 C 0 5.61 0.224 5.833 0.5 5.833 C 2.117 5.833 3.168 6.191 3.822 6.845 C 4.476 7.499 4.833 8.549 4.833 10.167 C 4.833 10.443 5.057 10.667 5.333 10.667 C 5.609 10.667 5.833 10.443 5.833 10.167 C 5.833 8.549 6.191 7.499 6.845 6.845 C 7.499 6.191 8.549 5.833 10.167 5.833 C 10.443 5.833 10.667 5.61 10.667 5.333 C 10.667 5.057 10.443 4.833 10.167 4.833 C 8.549 4.833 7.499 4.476 6.845 3.822 C 6.191 3.168 5.833 2.117 5.833 0.5 Z" fill="url(%23t2lXByE48-2031533640-linear-gradient)" height="10.66671px" id="t2lXByE48" transform="translate(2 4)" width="10.66663px"/><path d="M 2.667 0.333 C 2.667 0.149 2.517 0 2.333 0 C 2.149 0 2 0.149 2 0.333 C 2 0.987 1.855 1.382 1.618 1.618 C 1.382 1.855 0.987 2 0.333 2 C 0.149 2 0 2.149 0 2.333 C 0 2.517 0.149 2.667 0.333 2.667 C 0.987 2.667 1.382 2.811 1.618 3.048 C 1.855 3.285 2 3.68 2 4.333 C 2 4.517 2.149 4.667 2.333 4.667 C 2.517 4.667 2.667 4.517 2.667 4.333 C 2.667 3.68 2.811 3.285 3.048 3.048 C 3.285 2.811 3.68 2.667 4.333 2.667 C 4.517 2.667 4.667 2.517 4.667 2.333 C 4.667 2.149 4.517 2 4.333 2 C 3.68 2 3.285 1.855 3.048 1.618 C 2.811 1.382 2.667 0.987 2.667 0.333 Z" fill="url(%23CBS1bzkxF-2031533640-linear-gradient)" height="4.66667px" id="CBS1bzkxF" transform="translate(0 2.667)" width="4.66667px"/><path d="M 2 0.333 C 2 0.149 1.851 0 1.667 0 C 1.483 0 1.333 0.149 1.333 0.333 C 1.333 0.756 1.239 0.984 1.112 1.112 C 0.984 1.239 0.756 1.333 0.333 1.333 C 0.149 1.333 0 1.483 0 1.667 C 0 1.851 0.149 2 0.333 2 C 0.756 2 0.984 2.094 1.112 2.222 C 1.239 2.35 1.333 2.578 1.333 3 C 1.333 3.184 1.483 3.333 1.667 3.333 C 1.851 3.333 2 3.184 2 3 C 2 2.578 2.094 2.35 2.222 2.222 C 2.35 2.094 2.578 2 3 2 C 3.184 2 3.333 1.851 3.333 1.667 C 3.333 1.483 3.184 1.333 3 1.333 C 2.578 1.333 2.35 1.239 2.222 1.112 C 2.094 0.984 2 0.756 2 0.333 Z" fill="url(%23Jd7AK81w9-2031533640-linear-gradient)" height="3.333333px" id="Jd7AK81w9" transform="translate(4 0)" width="3.3333399999999997px"/></g></g></svg>)
" height="24px" id="WCm44spAV" width="24px"/><path d="M 3.892 7.742 C 1.674 7.742 0 6.014 0 3.882 C 0 1.738 1.589 0 3.892 0 C 5.107 0 5.951 0.374 6.623 1.173 L 5.566 2.09 C 5.118 1.621 4.564 1.386 3.892 1.386 C 2.452 1.386 1.547 2.517 1.547 3.882 C 1.547 5.246 2.452 6.356 3.924 6.356 C 4.649 6.356 5.193 6.111 5.63 5.63 L 6.718 6.558 C 6.153 7.24 5.193 7.742 3.892 7.742 Z" fill="rgb(255, 255, 255)" height="7.741500000000002px" id="XEPpGD7l5" transform="translate(4 8.25)" width="6.717999999999989px"/><path d="M 2.74 7.922 C 1.215 7.922 0 6.632 0 5.032 C 0 3.433 1.215 2.122 2.74 2.122 C 3.7 2.122 4.201 2.516 4.5 3.113 L 4.5 2.239 L 5.928 2.239 L 5.928 7.784 L 4.531 7.784 L 4.531 6.877 C 4.233 7.507 3.731 7.922 2.74 7.922 Z M 1.439 5.023 C 1.439 5.865 2.057 6.622 2.975 6.622 C 3.924 6.622 4.531 5.897 4.531 5.033 C 4.531 4.169 3.924 3.423 2.975 3.423 C 2.057 3.423 1.439 4.159 1.439 5.022 Z M 6.784 7.784 L 6.784 0 L 8.224 0 L 8.224 7.784 L 6.784 7.784 Z" fill="rgb(255, 255, 255)" height="7.9224997406005855px" id="lGDJupIUR" transform="translate(10.5 8)" width="8.223500194549558px"/></g></svg>)
" width="18px"><path d="M 2 8 C 0.895 8 0 7.105 0 6 L 0 2 C 0 0.895 0.895 0 2 0 L 6 0 C 7.105 0 8 0.895 8 2 L 8 6 C 8 7.105 7.105 8 6 8 Z" fill="transparent" height="8px" id="ZrCrI93dV" stroke-dasharray="" stroke-linecap="round" stroke-linejoin="round" stroke-width="2" stroke="rgb(0, 0, 0)" width="8px"/><path d="M 0 0 L 0 4 C 0 5.105 0.895 6 2 6 L 6 6" fill="transparent" height="6px" id="emltWYAiE" stroke-dasharray="" stroke-linecap="round" stroke-linejoin="round" stroke-width="2" stroke="rgb(0, 0, 0)" transform="translate(4 8)" width="6px"/><path d="M 2 8 C 0.895 8 0 7.105 0 6 L 0 2 C 0 0.895 0.895 0 2 0 L 6 0 C 7.105 0 8 0.895 8 2 L 8 6 C 8 7.105 7.105 8 6 8 Z" fill="transparent" height="8px" id="WpBecYDfi" stroke-dasharray="" stroke-linecap="round" stroke-linejoin="round" stroke-width="2" stroke="rgb(0, 0, 0)" transform="translate(10 10)" width="8px"/></g></svg>)

Salesforce Lead Routing: Bewährte Methoden & Einrichtung
Dieser Leitfaden behandelt alles von grundlegenden Zuweisungsregeln bis hin zu fortgeschrittenen Strategien, die Ihre Speed-to-Lead- und Conversion-Raten im Jahr 2026 verbessern.

We’ve all been there: a hot lead finally hits your inbox, but by the time a sales rep actually picks up the phone, that person has already moved on to a competitor.
It’s frustrating, really, and honestly, it’s a waste of marketing budget.
If your team is currently juggling Salesforce leads manually or watching high-value opportunities sit in a generic queue for days, then you need a solid system for Salesforce lead routing. After all, effective routing puts the right information in front of the right person on your team at exactly the right time.
Setting up your lead management CRM correctly does more than just organize data, though; it also builds a process that supports lead tracking and keeps your sales reps from burning out.
Well, this guide covers how lead routing Salesforce functions, the steps to get it running, and the strategies that actually move the needle on your conversion rates. We’ll also look at why native tools sometimes fall short when it comes to speed-to-lead.
Sometimes simply assigning a lead isn't enough, and you need a way to get them on the calendar immediately. So we'll explore how adding a specialized scheduling layer can bridge that gap.
Now, let’s get your lead management system working for you.

What Is Salesforce Lead Routing?
So first of all, what exactly is lead routing?
In the context of Salesforce, it’s the automated process that takes a new prospect and hands them off to the right sales representative or team. You can think of it as a digital traffic controller for your incoming leads.
When a potential customer fills out a form on your site, they become a lead, and your lead management CRM needs to decide who’s best equipped to handle that specific person. Getting this right is a huge deal for your sales performance because if you have a solid lead management system in place, you’re making sure that no one’s left waiting.
Fast response times usually lead to higher win rates, too. On the other hand, if your Salesforce leads are just sitting in a general folder, they’ll probably get cold before anyone even notices they exist.
This process is a core part of the wider lead management umbrella.
While lead management covers everything from finding prospects to closing deals, routing is the specific gear that moves people through the pipeline. It links directly to your sales tracking as well. When every lead has a clear owner from the start, it’s much easier to see which reps are performing well and where your sales process might have a bottleneck.
Using lead management software to handle these assignments automatically removes a lot of manual busywork. It stops your sales managers from having to spend their whole morning playing “who gets what” with a spreadsheet.
Instead, the lead routing process happens in the background, instantly. This keeps your team focused on talking to customers rather than arguing over who should have received a certain notification.
How Salesforce Lead Routing Works

Now that we have a handle on the basics, let’s look at the actual mechanics behind the scenes.
Salesforce lead routing mainly relies on a set of instructions called “Salesforce lead assignment rules.” These function as a checklist that the system runs through every time a new lead pops up. So if a lead meets specific routing criteria, like living in a certain city or expressing interest in a particular product, the rule tells Salesforce exactly where that lead should land.
These rules function based on specific conditions you set within your lead management CRM system. For example, you might create a rule that sends all leads from California to your West Coast sales team. You can get pretty granular with this, using any data field you’ve collected, such as company size or industry type.
This automation is a massive step up from manual assignment, where a person has to physically click through every record to decide who gets it. Automation keeps things moving 24/7, so your routing system stays updated without human intervention.
Ownership is the next big piece of the puzzle. When a lead is routed, it can go directly to a specific user or into a “queue.” A queue is basically a shared bucket where a group of reps can see incoming work.
If your team uses queues, any available rep can grab a lead and start working. And once someone takes ownership, the lead is officially theirs, which helps with sales tracking and prevents two people from calling the same person at the same time.
Switching from manual processes to an automated lead management system usually changes the energy of a sales floor, too. Instead of reps waiting around for a manager to hand out tasks, they receive instant notifications.
This setup minimizes the gap between a customer showing interest and a salesperson starting the conversation. It also creates a much more efficient flow for everyone involved in your lead management efforts.
Types of Lead Routing in Salesforce

There isn't a one-size-fits-all way to distribute leads, so companies usually pick a method that matches their specific sales structure.
The good thing is that most lead management tools allow you to toggle between a few different logic styles depending on how your reps work. Needless to say, choosing the right one helps keep the team happy and ensures no single person gets buried under a mountain of work while others sit idle.
Let's look at the different ways you can slice and dice your incoming traffic.
Round Robin Lead Routing
Round Robin distribution is a popular choice for teams that want total fairness. The system creates a rotating list of reps and hands out new Salesforce leads one by one in a specific order.
If you have three reps, the first lead goes to Rep A, the second to Rep B, and the third to Rep C. Then it starts all over again. Very straightforward way to keep workloads balanced without anyone needing to manually intervene.
Territory-Based Routing
Now, if your sales team is divided by geography, territory-based routing is the way to go. This logic uses data points like zip codes, states, or countries to route leads to the right regional expert.
So someone looking for a solution in London gets routed to your UK team, while a lead in New York goes to the East Coast rep. This is helpful because your team can stay focused on specific local market trends or time zones.
Account-Based Routing
Sometimes you already have a relationship with a company, and a new person from that same business reaches out. In these cases, lead to account matching identifies that connection and sends the lead directly to the rep who already manages that account.
This creates a much better experience for the customer because they don't have to explain their history to a stranger. It keeps all communication within the same circle, as well.
Availability-Based Routing
This method is all about who’s actually at their desk and ready to talk. If a rep is on vacation or already in a meeting, the lead management system software skips them and finds someone who’s currently active.
This is a great strategy for maintaining a fast speed-to-lead. It avoids the common problem of a hot prospect sitting in the inbox of someone who won't be back in the office until Monday.
Priority-Based Routing
Of course, not all leads are created equal. Well, priority-based routing looks at the potential value or “warmth” of a lead before deciding where it goes.
You might want your most experienced senior reps to handle each qualified lead while sending smaller inquiries to a general queue. And by using lead management platform filters, you can ensure your best resources are spent on the opportunities that are most likely to impact your bottom line.
Benefits of Effective Lead Routing

Getting your logic right pays off quickly, mostly because it removes the friction that usually slows down a sales cycle. When you move away from manual hand-offs and let a lead management system take over, you notice a massive jump in speed-to-lead.
This is just a fancy way of saying you’re talking to inbound leads while they’re still interested in your product. Every minute a prospect waits for a callback, their interest level drops, so hitting them up while they’re still on your website is a huge win.
Naturally, this speed leads to much higher conversion rates.
A potential customer who receives an immediate, helpful response feels valued and is more likely to move forward with a demo or a purchase.
And so by using lead routing Salesforce tools to automate this, you stop high-value opportunities from falling through the cracks. It turns a chaotic inbox into a streamlined pipeline where every single person gets the attention they need without delay.
Internal team dynamics also improve quite a bit. Proper routing creates a balanced workload, so your top performers aren't burnt out while newer reps are left with nothing to do. It establishes a fair playing field where everyone has access to Salesforce leads based on the rules you’ve decided are best for the business.
As a result, this transparency keeps morale high because the team knows the system is objective and consistent.
Finally, you get way better data for your sales tracking and overall accountability. Because the system automatically logs who received which lead and when, you can easily pull reports to see how the team is performing.
You’ll know exactly how long it takes for a rep to follow up and which routing methods are bringing in the most revenue. Having this clear visibility makes it much easier to refine your lead management strategy over time.
Salesforce Lead Routing Best Practices
One thing to keep in mind is that setting up the technical side is only half the battle. To actually see a return on your investment, you need a strategy that keeps the gears turning without getting stuck.
Following a few industry standards will help you avoid the common pitfalls that turn a helpful lead management system into a headache for your sales team. So next, we’ll look at the specific habits that separate a high-performing sales team from one that is constantly fighting with its database.
Define Clear Routing Rules
Confusion is the enemy of a fast sales cycle. For this reason, you need to sit down and map out exactly who gets what before you touch any settings in your lead management CRM.
If your rules overlap (like having two different reps assigned to the same zip code), the system will get confused and leads will stall. Clear, non-conflicting boundaries ensure that every new prospect has a single, definite owner from the moment they appear.
Prioritize Speed-to-Lead
We’ve touched on this before, but it bears repeating because it’s the most important factor in modern sales. Your Salesforce lead routing should be built for speed.
The goal is to get a human being in contact with the prospect while their problem is still top of mind. If your current process involves three levels of approval before a rep can make a call, you’re going to lose people to faster competitors.
Use Lead Scoring Before Routing
Not every person who fills out a form is ready to buy right now, so sending every single low-quality “test” entry to your senior reps is a waste of their time. By using lead scoring, you can filter your Salesforce leads based on how likely they are to convert.
This way, your team only spends their energy on high-intent prospects while the rest go through an automated nurturing process.
Keep Routing Logic Simple
Sure, it’s tempting to build a massive, complex system that accounts for every possible scenario, but overengineering usually leads to failure, actually.
Remember that complex logic is harder to fix when something goes wrong and even harder to explain to new hires. So start with a straightforward setup that covers 90% of your needs. You can always add specific layers later if you find a genuine gap in the process.
Align Territories and Ownership
Duplicate outreach is embarrassing for your brand. When your sales lead management software isn't aligned with your actual sales territories, two reps might end up calling the same person.
This usually happens when data is messy or rules aren't updated. Regularly checking that your digital territories match your real-world team structure prevents these awkward overlaps and keeps your lead tracking accurate.
Continuously Optimize
The set-it-and-forget-it approach doesn't work well here. Instead, you should regularly look at your sales tracking data to see how your routing is performing.
If one rep is consistently overwhelmed while another has a light load, it’s time to adjust the balance. Use the reporting tools within your lead management tools to find these imbalances and tweak your rules monthly to keep everything running at peak efficiency.
How to Set Up Lead Routing in Salesforce (Step-by-Step)
Now we can get into the actual configuration.
Setting this up might feel a bit technical, but if you take it one piece at a time, it’s very manageable. You’ll be working within the Setup menu of your lead management CRM, so make sure you have administrative access before you start clicking around.
Step 1: Prepare Your Lead Data
Before you build any rules, you need to make sure the information you’re collecting is actually useful for sorting. If you want to route by location, your forms need to capture a zip code or country.
Check your lead object in Salesforce to verify that all the necessary fields exist. Without clean, consistent data coming in, even the best lead management system software won't be able to put people in the right place.
Step 2: Create Lead Assignment Rules
Head over to the “Lead Assignment Rules” section in your settings. This is where you tell the platform how to handle Salesforce lead routing.
You can only have one “active” rule at a time, but that single rule can contain many different entries. Each entry acts like a filter that scans the lead's info to decide who gets the notification.
Step 3: Set Up Queues
Sometimes you don't want a lead to go to just one person. Setting up a queue allows a specific group, like your “Support Team” or “Mid-Market Sales”, to share the load.
This is a great middle ground for lead management because it gives multiple people visibility. Anyone in that group can jump in and take ownership, which helps prevent a bottleneck if one person is out for lunch.
Step 4: Configure Routing Logic
This is the part where you get specific with your filters. You might set a rule that says, “If Industry equals Technology AND Employees is greater than 500, send to Enterprise Team.”
You can stack these conditions to create a very precise lead routing flow. Pay close attention to the order of these rules; Salesforce processes them from the top down, so put your most specific criteria first.
Step 5: Assign Leads to Users
Once your logic is set, you need to tell the system who’s on the receiving end. You’ll map those rule entries to either a specific user or the queues you just created.
This ensures that when a lead meets your criteria, the sales lead software knows exactly which inbox to ping. Double-check that everyone you’re assigning leads to has the right permissions to actually view and edit those records.
Step 6: Test Your Setup
Never go live without a dry run. You can simulate a new lead by manually entering a few test records that meet your different rule criteria.
Check to see if they land in the right place and if the correct reps get the email alerts. Testing helps you catch small logic errors or typos that could accidentally send your best Salesforce leads to a dead-end folder.
Step 7: Monitor and Optimize
After you flip the switch, keep a close eye on your sales tracking dashboards. You want to see how quickly leads are being picked up and if the distribution feels fair across the team.
Most lead management tools provide reports on assignment history, which you should review monthly. If you notice certain rules are never being triggered, it might be time to simplify your logic and refine your strategy.
Common Lead Routing Challenges in Salesforce

Even with a plan in place, things can go sideways once you start dealing with a high volume of traffic. Most companies eventually hit a few bumps that make their lead management feel more like a chore than a help.
Recognizing these issues early prevents your sales pipeline from turning into a clogged mess.
Leads Assigned Incorrectly
It’s incredibly common for a prospect to end up with the wrong rep. This usually happens because the data coming from your web forms is messy, or a routing rule has a typo.
When a West Coast specialist receives a lead from, say, London, it wastes time and slows down the whole process. So keeping your lead tracking software updated and checking your filters regularly is the only way to keep these errors from piling up.
Slow Response Times
Native Salesforce lead routing is great at moving data, but it doesn't always move people. Even if a lead is assigned to a rep in seconds, that rep might be in a meeting or away from their desk.
And by the time they see the notification, the lead has already gone cold. This delay is a major hurdle for teams trying to hit aggressive speed-to-lead goals, especially when the customer expects an immediate answer.
Overloaded Reps
Without proper balance, your top-performing reps can quickly become victims of their own success. If your lead management system isn't smart enough to check for current workload or calendar availability, it might keep piling new prospects onto a person who’s already drowning in calls.
This leads to burnout for the staff and a terrible experience for the potential customer who gets a rushed, late response.
Broken or Overly Complex Workflows
Sometimes we try to be too clever with our automation. But when you stack dozens of conflicting rules on top of each other, the logic eventually breaks.
A broken workflow might mean leads are getting stuck in a digital limbo where nobody is assigned at all. Keeping your lead management tools simple makes it easier to spot where a leak is happening so you can fix it before you lose too much revenue.
Limitations of Native Salesforce Lead Routing
While the built-in tools are a great starting point, they have some baked-in restrictions that can eventually slow you down.
Native lead routing Salesforce features are primarily static. This means the system follows a rigid set of rules that don't account for the messy, real-time nature of a sales day. If a rep is technically assigned a lead but they’re currently in a deep-focus session or away from their desk, the system doesn't care; it just moves the data and moves on.
This lack of real-time decision-making is a big hurdle for teams trying to optimize their lead management CRM. The platform isn't checking to see if a rep is actually available to take a call right this second. It just checks if they meet the criteria you wrote in the settings last month.
Because of this, you often end up with a high-speed data transfer but a very low-speed human connection.
Managing these rules also requires a surprising amount of ongoing manual work. Every time you hire a new rep, change a territory, or launch a new product, an admin has to go into the back end to update the logic.
For a small team, this is fine. However, as you scale, this administrative burden grows. Your lead management system software can quickly become a tangled web of “if/then” statements that are terrifying to change because you might break the whole flow.
Finally, native routing starts to feel quite clunky once your business hits a certain size. It’s hard to build truly dynamic experiences (i.e. letting a high-intent prospect book a meeting immediately after filling out a form) using only the default tools.
You're essentially stuck with a pass-the-baton style of lead management, where the baton often gets dropped because the next person wasn't ready to catch it. To get past these hurdles, many teams look for a way to add a more flexible, intelligent layer on top of their CRM.
Using Cal.com for Smarter Lead Routing
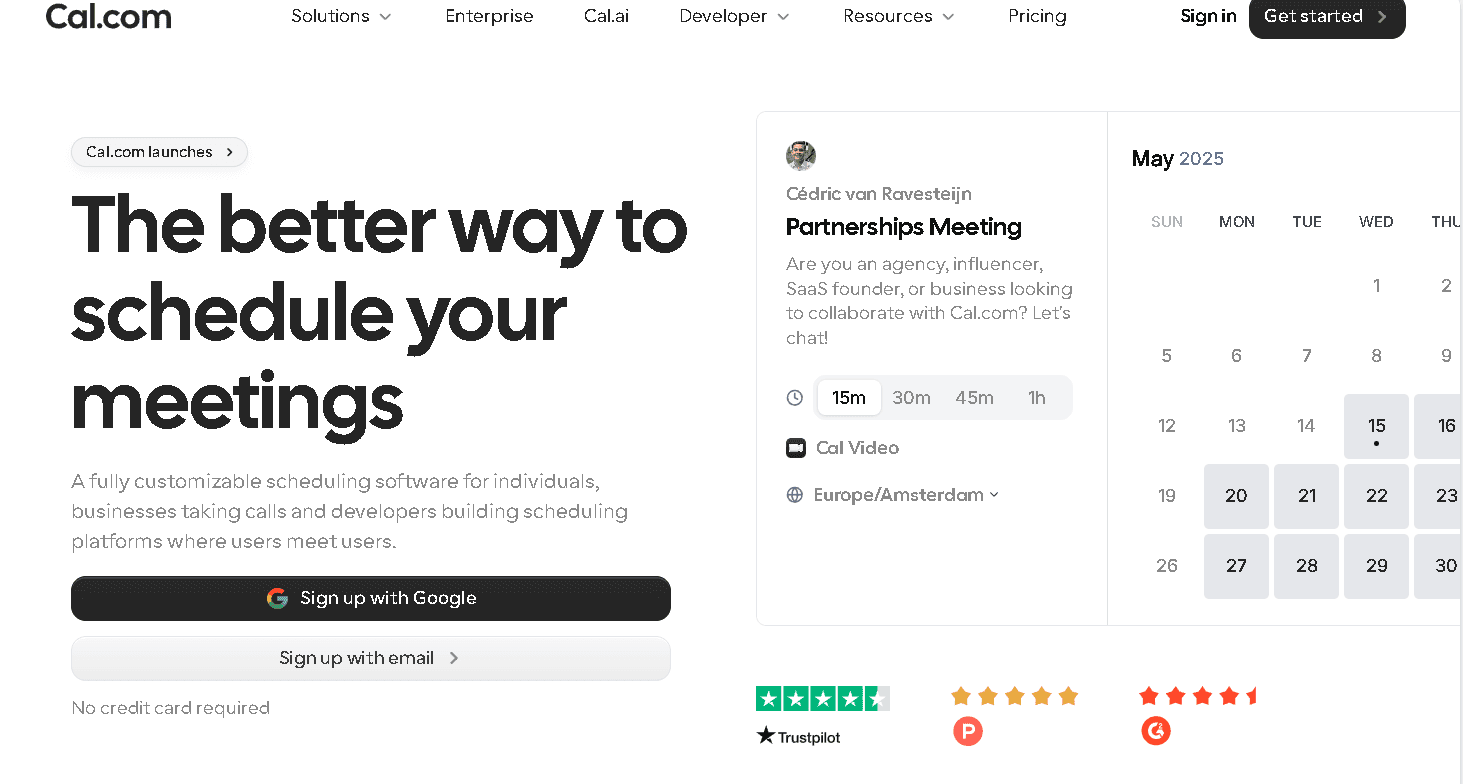
When your business grows, you might find that traditional assignment rules start to feel a bit stiff. This is where adding a dedicated scheduling layer like Cal.com makes a world of difference.
Now, it doesn't replace your CRM but instead works on top of it to handle the parts of the process that require a more human, real-time touch.
To get a better idea of how this actually works, we’ll look at how Cal.com fits into your existing tech stack.
Why Teams Add Cal.com on Top of Salesforce
Most organizations use Salesforce to manage their data, and it’s great for that. However, Cal.com steps in to handle the actual scheduling and real-time assignment. You remove the friction that usually happens between someone filling out a form and actually getting a meeting on the books by connecting the two.
And you get the best of both: a robust lead management system and a flexible way to talk to people instantly.
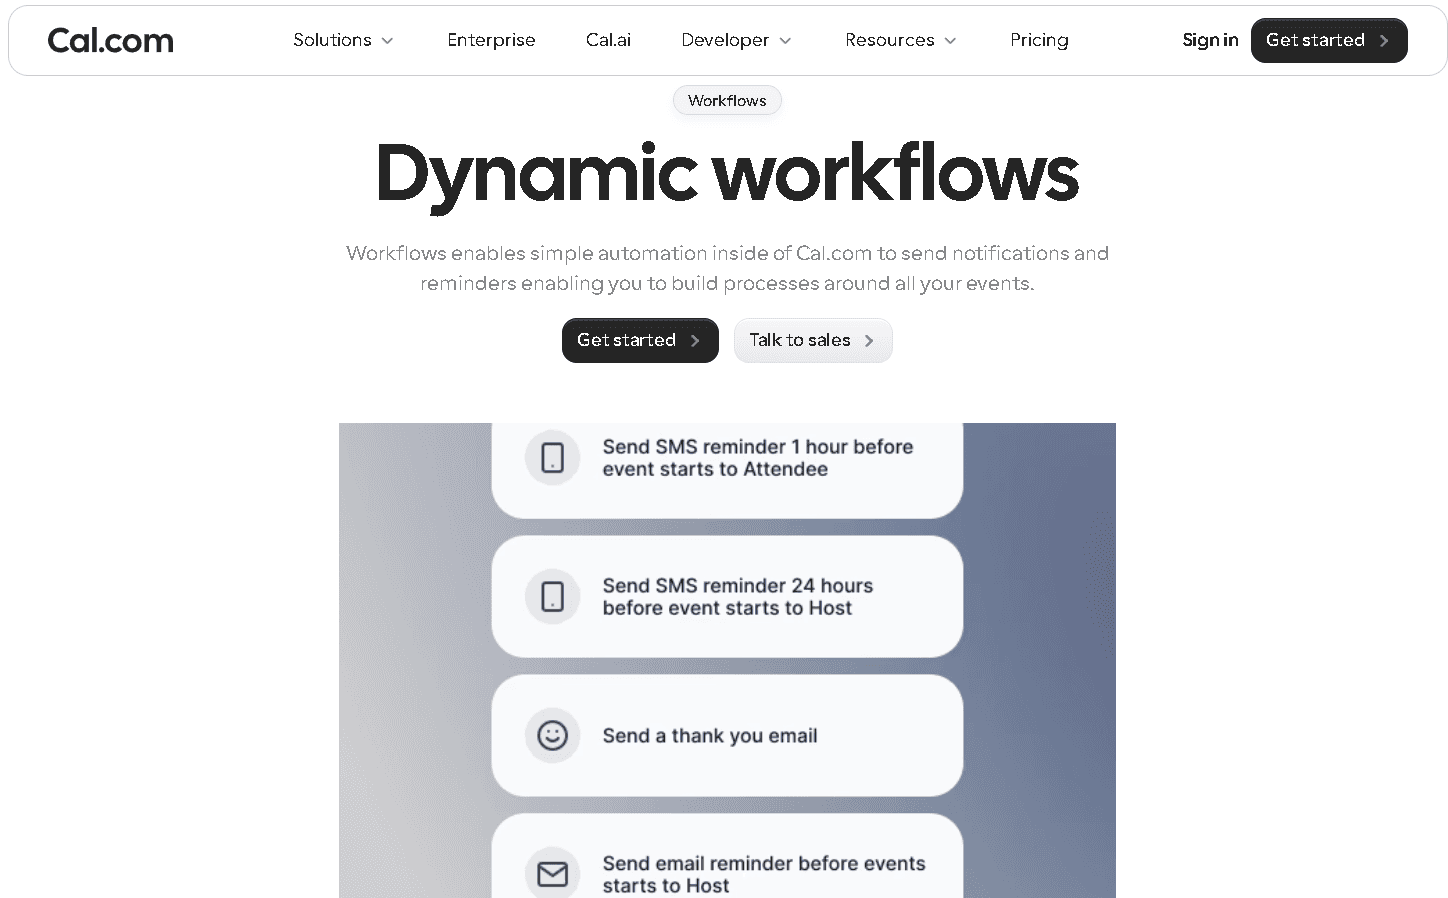
How Cal.com Improves Lead Routing
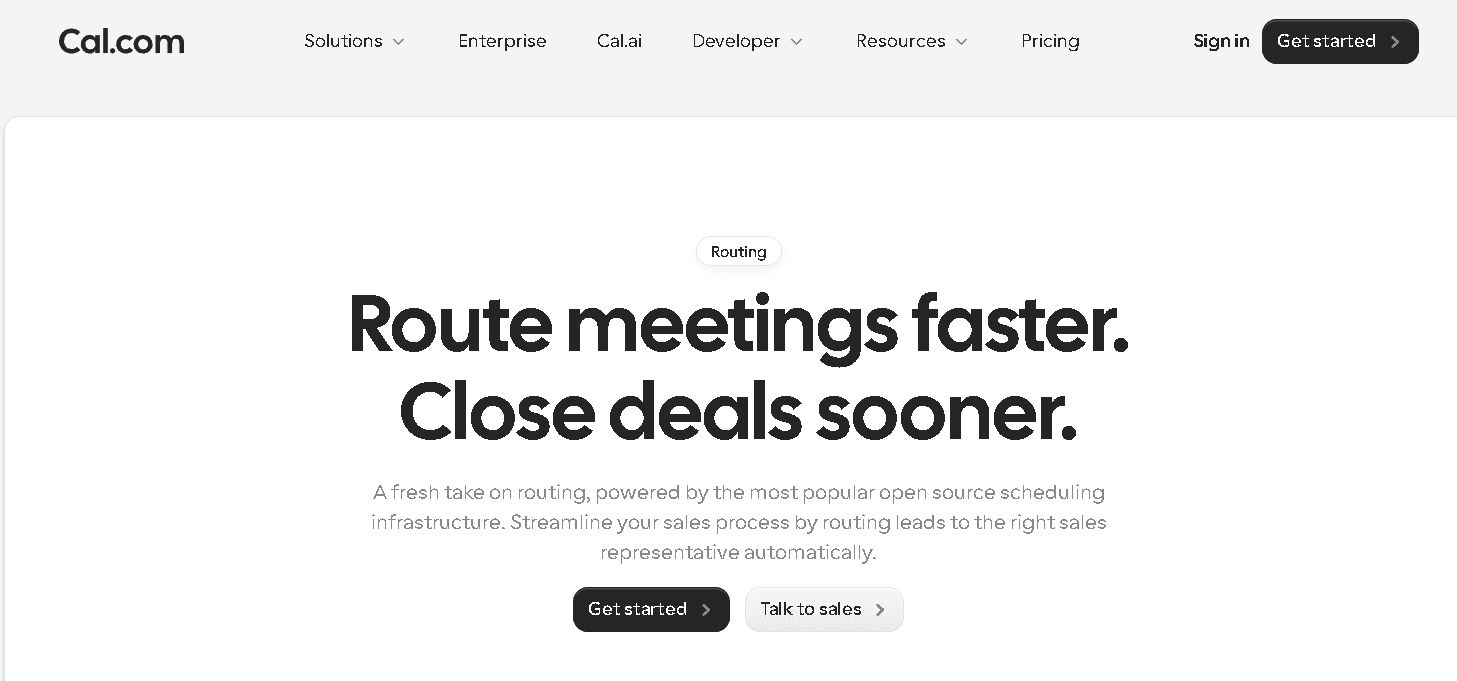
One of the biggest perks here is the use of automated scheduling workflows. Instead of a lead waiting hours for a rep to check their email, they can book a meeting with the right person immediately.
This eliminates the exhausting back-and-forth emails that often kill a deal, and polishing each message with an AI editor keeps replies clear and professional.
Key Use Cases
This setup is particularly effective for inbound demo requests where the prospect is already warm and ready to talk.
If you’re dealing with high-intent leads that need instant booking to stay engaged, this is your solution. It’s a game-changer for sales and marketing teams obsessed with optimizing their speed-to-lead and ensuring their sales lead software actually results in conversations.
Salesforce + Cal.com Workflow Example
The process is pretty seamless for the customer. First, a lead submits a form on your website. That data enters your lead management CRM just like normal.
Then, Cal.com instantly triggers a scheduling page based on the routing rules you’ve set. Once the prospect picks a time, the meeting is assigned automatically to the correct rep’s calendar, and all that info is synced back to your sales tracking records.
When to Use Cal.com Instead of Native Routing Alone
You should consider moving to this model if your primary goal is instant booking rather than just basic data assignment. If you’re struggling with slow response times or your internal lead routing setup is becoming too complex for an admin to manage, it’s time for a change.
Adding this layer ensures your lead management tools are working to close deals, not just move records around a database.
Salesforce Lead Routing Example (Real Workflow)
Let's look at how this actually plays out in a day-to-day sales environment.
Imagine a potential client visiting your website to request a product demo. They fill out a form with their name, company size, and location. This moment is the starting point for your lead routing Salesforce logic.
Behind the curtain, the system immediately scans the data. If the lead is from a mid-market company in the Midwest, your assignment rules identify the correct regional representative.
Within seconds, the lead management CRM changes the owner of that record from a generic system user to a specific person on your team. This automation is what keeps your lead tracking clean and organized from the very beginning.
Once the assignment happens, the chosen rep receives a notification. Ideally, they pick up the phone or send a personalized email right away. This part of the process is where your sales lead software is supposed to shine by giving the rep all the context they need to start a meaningful conversation.
The lead’s status updates, and the clock starts ticking on your response time metrics.
However, even with a great setup, delays usually pop up right after the assignment. A rep might be in the middle of another call, or they could be away from their desk when the alert hits their inbox.
These small gaps are where hot prospects start to cool down. While Salesforce lead routing handles the data transfer perfectly, the human element can still cause a bottleneck if there’s no way to bridge the gap between “getting assigned” and “getting on a call.”
Final Thoughts: Optimizing Your Lead Routing Strategy
Wrapping things up, the goal for your lead management system should always be to make life easier for both your team and your customers.
A successful strategy is one that grows with you. You want a setup that can handle five leads a day just as smoothly as five hundred, without requiring a total overhaul every time you add a new team member to your lead management CRM.
Keeping your routing logic simple is the best way to maintain that scalability.
It’s easy to get carried away with dozens of niche rules, but the most effective systems usually stick to a few core principles. Focus on accuracy first, making sure Salesforce leads get to the right person, and then look for ways to shave minutes off your response time.
Speed is your biggest asset in a competitive market, so every second you save during the hand-off counts toward your bottom line.
Integrating the right lead management tools to reduce friction is the final step in building a high-performing sales process. While native features do the heavy lifting for data organization, adding a scheduling layer like Cal.com helps you bridge the gap between a lead being assigned and a meeting actually happening.
Remove those extra steps, and you create a much smoother path for your prospects. And a streamlined process means more conversations, better sales tracking, and ultimately, a more successful sales organization.
FAQ
What is lead routing in Salesforce?
Lead routing is the automated process of handing off new prospects to the correct sales representatives. It uses a set of predefined rules within your lead management CRM to make sure every inquiry has an owner.
How does Salesforce lead routing work?
The system evaluates incoming data against your specific assignment rules. Based on these conditions, like location or industry, it distributes the lead to individual users or shared queues automatically.
What is the best lead routing method?
The right choice depends on your team’s structure, but most businesses use Round Robin, territory-based, or priority-based routing. These methods help maintain a balanced workload and ensure expertise.
Can Salesforce automate lead routing?
Yes, you can automate the entire process using lead assignment rules and built-in workflow automation. This removes the need for managers to manually hand out Salesforce leads every day.
What are the limitations of Salesforce lead routing?
The native system is strictly rule-based and lacks real-time awareness of a rep's actual availability. It also requires constant manual updates as your team scales and your territories change.
How do you improve lead routing in Salesforce?
Focus on writing clear, simple rules and prioritizing your speed-to-lead. Integrating specialized scheduling tools also helps reduce the delays that happen between assignment and the first conversation.
What tools improve Salesforce lead routing?
Adding a layer like Cal.com on top of your lead management system improves performance significantly. It introduces real-time scheduling, allowing prospects to book meetings immediately rather than waiting for a callback.

Beginnen Sie noch heute kostenlos mit Cal.com!
Erleben Sie nahtlose Planung und Produktivität ohne versteckte Gebühren. Melden Sie sich in Sekunden an und beginnen Sie noch heute, Ihre Planung zu vereinfachen, ganz ohne Kreditkarte!


