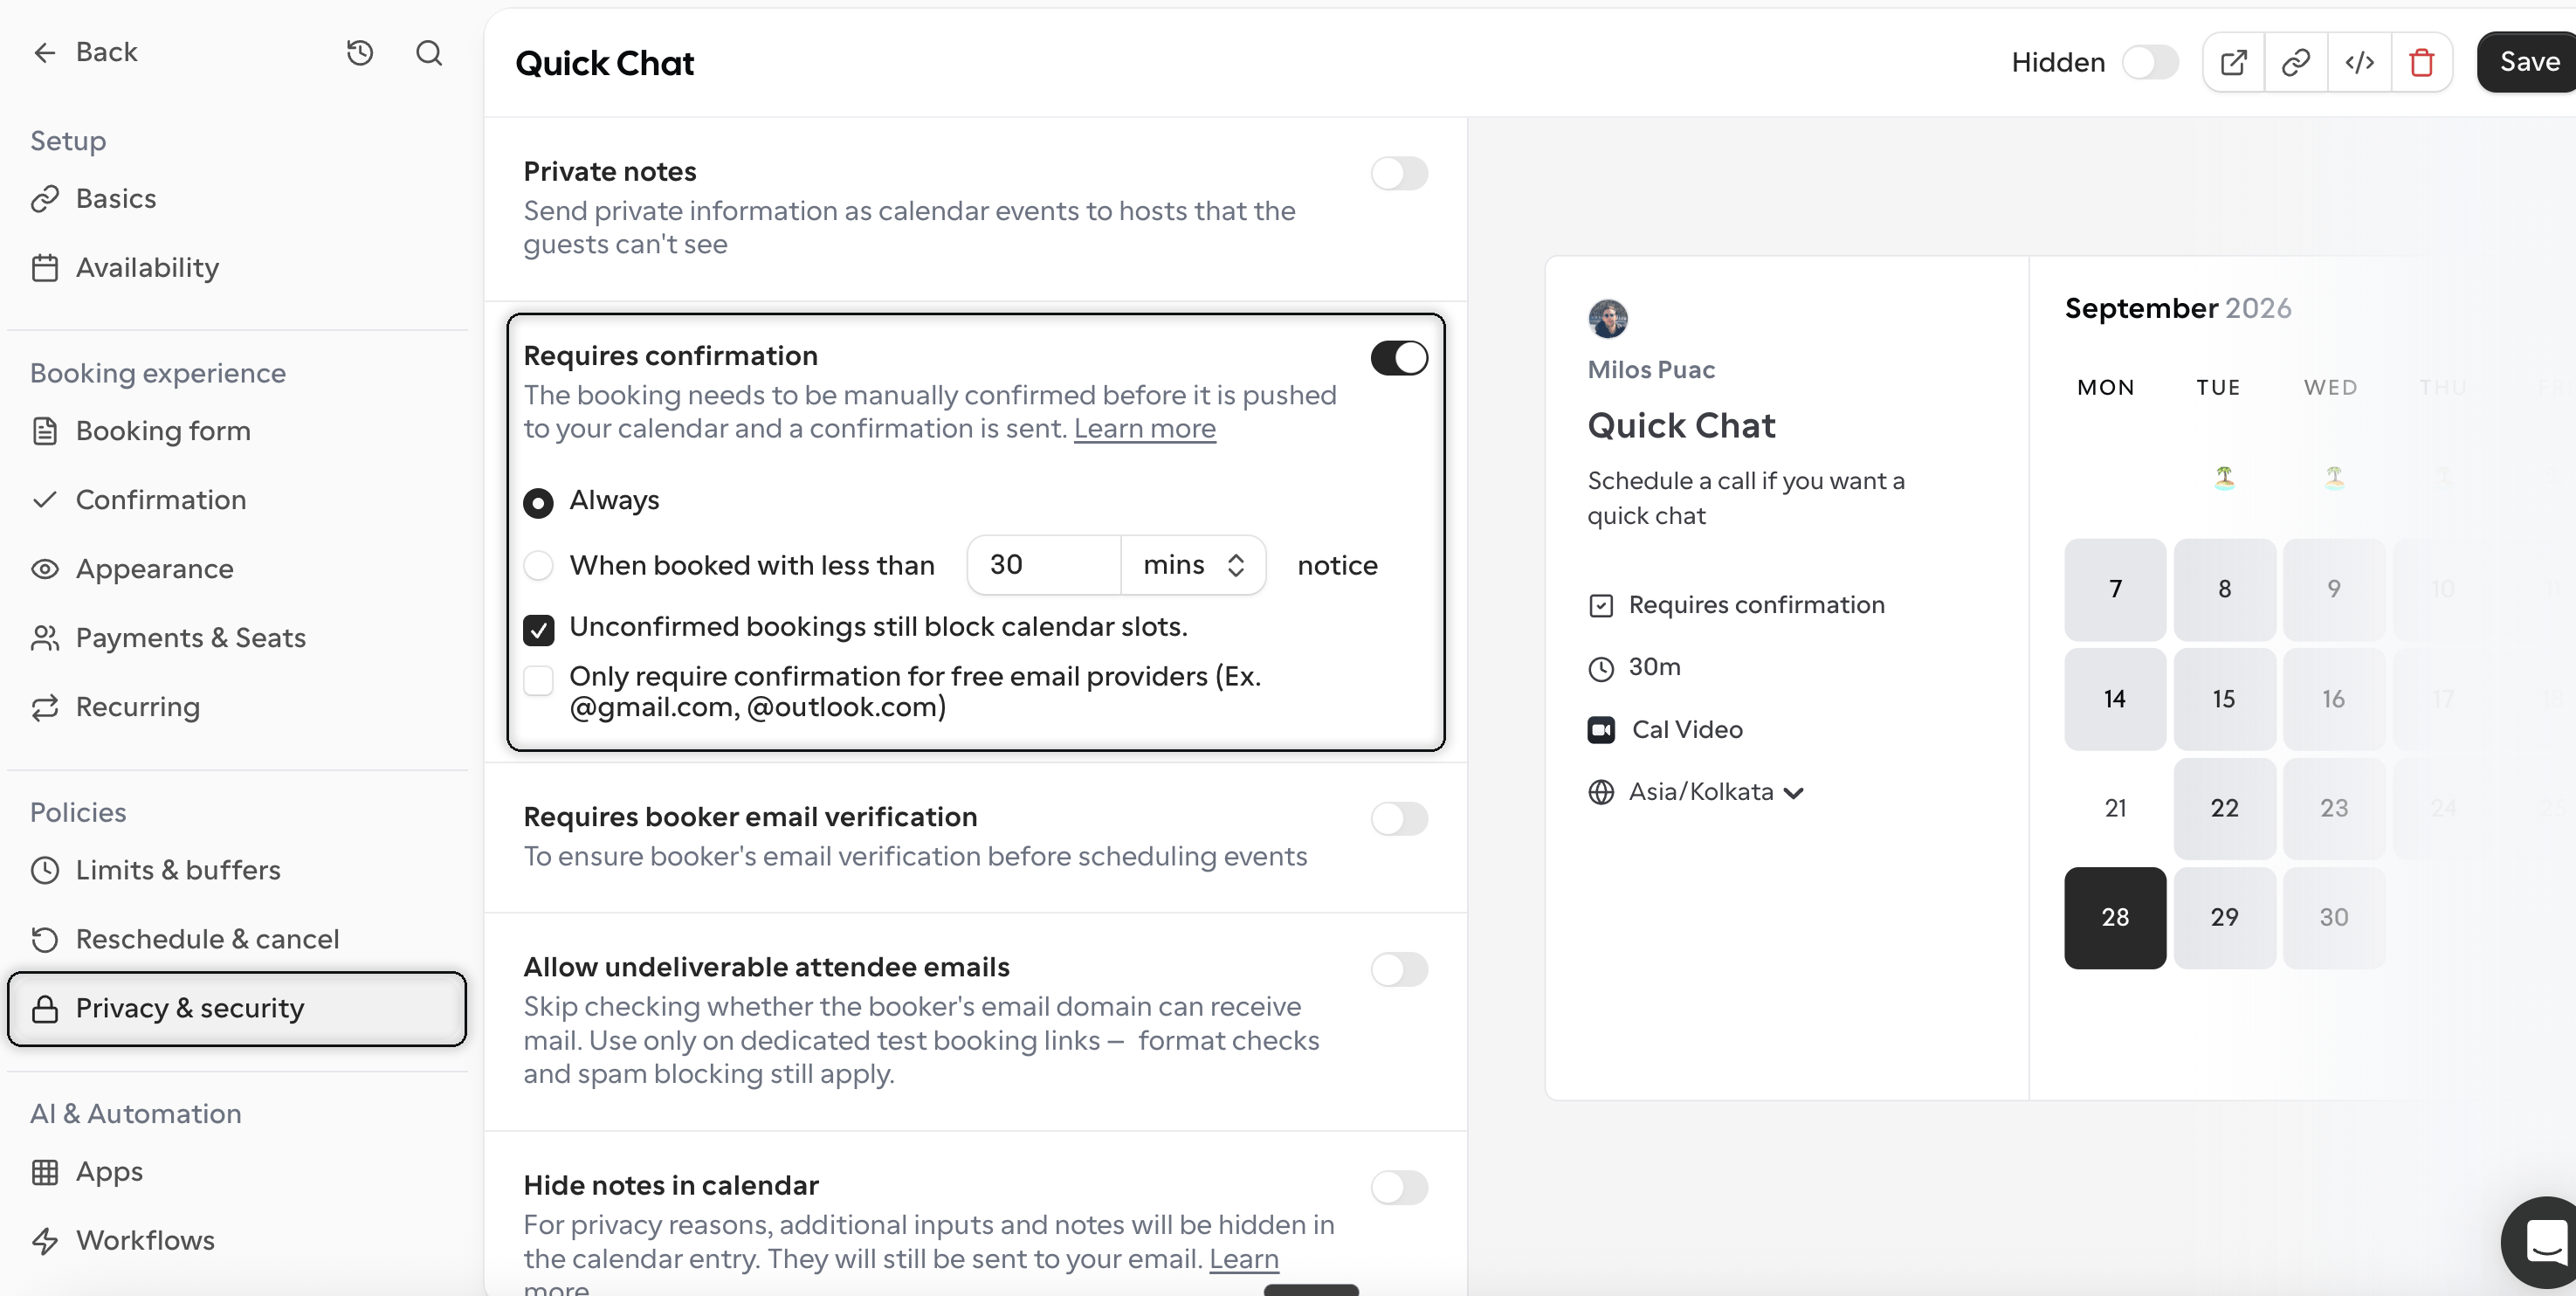
By default, any open slot on your booking page can be booked instantly. Requiring confirmation adds a manual approval step: when someone books, the request comes to you first, and the booking is only pushed to your calendar and confirmed to the attendee once you accept it. Until then, the booking stays in a pending state and no confirmation email is sent. This is useful when you want control over who gets on your calendar, such as screening inbound sales calls, vetting interview requests, or protecting your time from bookings that arrive with very little notice. How to enable it
  1. Go to Links and open the link you want to change.
  2. In the left sidebar, under Policies, select Privacy & security.
  3. Toggle on Requires confirmation.
  4. Click Save.
Require Confirmation Highlighted Once enabled, your booking page will show a “Requires confirmation” label so attendees know their booking is subject to approval. Choosing when confirmation is required You can decide how strictly this applies:
  • Always – every booking on this event type needs your approval before it is confirmed.
  • When booked with less than X notice – only bookings made close to the start time need approval. Set the threshold in minutes, hours, or days. Bookings made further in advance are confirmed automatically, so this is a good option if you only want to review last-minute requests.
Additional options
  • Unconfirmed bookings still block calendar slots – while a booking is waiting for your approval, that time is held and not offered to other bookers. Turn this off if you want the slot to stay open until you confirm.
  • Only require confirmation for free email providers – bookings from addresses on free providers such as @gmail.com or @outlook.com require your approval, while bookings from company domains are confirmed automatically. This is a simple way to filter for business contacts without reviewing every request.
Managing pending bookings Bookings awaiting your approval appear under the Unconfirmed tab on your Bookings page. From there you can accept or reject each request. Accepting pushes the event to your calendar and sends the confirmation to the attendee; rejecting notifies them that the booking was declined, and you can optionally include a reason.