" height="18.016311920580208px" id="GKXyVanMq" stroke-dasharray="0" stroke-linecap="butt" stroke-linejoin="miter" stroke-miterlimit="10" stroke-width="0.5" stroke="rgb(0, 0, 0)" transform="translate(3 3)" width="18px"/></svg>)
"/><stop offset="1" stop-color="rgb(227, 224, 244)"/></linearGradient><linearGradient id="CBS1bzkxF-2031533640-linear-gradient" x1="0.49751243781094523" x2="0.5024875621890548" y1="0" y2="1"><stop offset="0" stop-color="rgb(255, 255, 255)"/><stop offset="1" stop-color="rgb(227, 224, 244)"/></linearGradient><linearGradient id="Jd7AK81w9-2031533640-linear-gradient" x1="0.49751243781094523" x2="0.5024875621890548" y1="0" y2="1"><stop offset="0" stop-color="rgb(255, 255, 255)"/><stop offset="1" stop-color="rgb(227, 224, 244)"/></linearGradient></defs><g d="M 0 16 L 0 0 L 16 0 L 16 16 Z M 9.167 5.167 C 9.167 4.891 8.943 4.667 8.667 4.667 C 8.391 4.667 8.167 4.891 8.167 5.167 C 8.167 6.784 7.809 7.834 7.155 8.488 C 6.501 9.143 5.451 9.5 3.833 9.5 C 3.557 9.5 3.333 9.724 3.333 10 C 3.333 10.276 3.557 10.5 3.833 10.5 C 5.451 10.5 6.501 10.857 7.155 11.512 C 7.809 12.166 8.167 13.216 8.167 14.833 C 8.167 15.109 8.391 15.333 8.667 15.333 C 8.943 15.333 9.167 15.109 9.167 14.833 C 9.167 13.216 9.524 12.166 10.178 11.512 C 10.832 10.857 11.883 10.5 13.5 10.5 C 13.776 10.5 14 10.276 14 10 C 14 9.724 13.776 9.5 13.5 9.5 C 11.883 9.5 10.832 9.143 10.178 8.488 C 9.524 7.834 9.167 6.784 9.167 5.167 Z M 4 3.667 C 4 3.483 3.851 3.333 3.667 3.333 C 3.483 3.333 3.333 3.483 3.333 3.667 C 3.333 4.32 3.189 4.715 2.952 4.952 C 2.715 5.189 2.32 5.333 1.667 5.333 C 1.483 5.333 1.333 5.483 1.333 5.667 C 1.333 5.851 1.483 6 1.667 6 C 2.32 6 2.715 6.145 2.952 6.382 C 3.189 6.618 3.333 7.013 3.333 7.667 C 3.333 7.851 3.483 8 3.667 8 C 3.851 8 4 7.851 4 7.667 C 4 7.013 4.145 6.618 4.382 6.382 C 4.618 6.145 5.013 6 5.667 6 C 5.851 6 6 5.851 6 5.667 C 6 5.483 5.851 5.333 5.667 5.333 C 5.013 5.333 4.618 5.189 4.382 4.952 C 4.145 4.715 4 4.32 4 3.667 Z M 7.333 1 C 7.333 0.816 7.184 0.667 7 0.667 C 6.816 0.667 6.667 0.816 6.667 1 C 6.667 1.422 6.573 1.65 6.445 1.778 C 6.317 1.906 6.089 2 5.667 2 C 5.483 2 5.333 2.149 5.333 2.333 C 5.333 2.517 5.483 2.667 5.667 2.667 C 6.089 2.667 6.317 2.761 6.445 2.889 C 6.573 3.016 6.667 3.244 6.667 3.667 C 6.667 3.851 6.816 4 7 4 C 7.184 4 7.333 3.851 7.333 3.667 C 7.333 3.244 7.427 3.016 7.555 2.889 C 7.683 2.761 7.911 2.667 8.333 2.667 C 8.517 2.667 8.667 2.517 8.667 2.333 C 8.667 2.149 8.517 2 8.333 2 C 7.911 2 7.683 1.906 7.555 1.778 C 7.427 1.65 7.333 1.422 7.333 1 Z" fill="transparent" height="16px" id="aoZYv33vR" width="16px"><path d="M 0 16 L 0 0 L 16 0 L 16 16 Z" fill="transparent" height="16px" id="Z2uGmhW9f" width="16px"/><g d="M 7.833 4.5 C 7.833 4.224 7.609 4 7.333 4 C 7.057 4 6.833 4.224 6.833 4.5 C 6.833 6.117 6.476 7.168 5.822 7.822 C 5.168 8.476 4.117 8.833 2.5 8.833 C 2.224 8.833 2 9.057 2 9.333 C 2 9.61 2.224 9.833 2.5 9.833 C 4.117 9.833 5.168 10.191 5.822 10.845 C 6.476 11.499 6.833 12.549 6.833 14.167 C 6.833 14.443 7.057 14.667 7.333 14.667 C 7.609 14.667 7.833 14.443 7.833 14.167 C 7.833 12.549 8.191 11.499 8.845 10.845 C 9.499 10.191 10.549 9.833 12.167 9.833 C 12.443 9.833 12.667 9.61 12.667 9.333 C 12.667 9.057 12.443 8.833 12.167 8.833 C 10.549 8.833 9.499 8.476 8.845 7.822 C 8.191 7.168 7.833 6.117 7.833 4.5 Z M 2.667 3 C 2.667 2.816 2.517 2.667 2.333 2.667 C 2.149 2.667 2 2.816 2 3 C 2 3.654 1.855 4.048 1.618 4.285 C 1.382 4.522 0.987 4.667 0.333 4.667 C 0.149 4.667 0 4.816 0 5 C 0 5.184 0.149 5.333 0.333 5.333 C 0.987 5.333 1.382 5.478 1.618 5.715 C 1.855 5.952 2 6.346 2 7 C 2 7.184 2.149 7.333 2.333 7.333 C 2.517 7.333 2.667 7.184 2.667 7 C 2.667 6.346 2.811 5.952 3.048 5.715 C 3.285 5.478 3.68 5.333 4.333 5.333 C 4.517 5.333 4.667 5.184 4.667 5 C 4.667 4.816 4.517 4.667 4.333 4.667 C 3.68 4.667 3.285 4.522 3.048 4.285 C 2.811 4.048 2.667 3.654 2.667 3 Z M 6 0.333 C 6 0.149 5.851 0 5.667 0 C 5.483 0 5.333 0.149 5.333 0.333 C 5.333 0.756 5.239 0.984 5.112 1.112 C 4.984 1.239 4.756 1.333 4.333 1.333 C 4.149 1.333 4 1.483 4 1.667 C 4 1.851 4.149 2 4.333 2 C 4.756 2 4.984 2.094 5.112 2.222 C 5.239 2.35 5.333 2.578 5.333 3 C 5.333 3.184 5.483 3.333 5.667 3.333 C 5.851 3.333 6 3.184 6 3 C 6 2.578 6.094 2.35 6.222 2.222 C 6.35 2.094 6.578 2 7 2 C 7.184 2 7.333 1.851 7.333 1.667 C 7.333 1.483 7.184 1.333 7 1.333 C 6.578 1.333 6.35 1.239 6.222 1.112 C 6.094 0.984 6 0.756 6 0.333 Z" fill="transparent" height="14.66671286102295px" id="ae6ccdFme" transform="translate(1.333 0.667)" width="12.66663px"><path d="M 5.833 0.5 C 5.833 0.224 5.609 0 5.333 0 C 5.057 0 4.833 0.224 4.833 0.5 C 4.833 2.117 4.476 3.168 3.822 3.822 C 3.168 4.476 2.117 4.833 0.5 4.833 C 0.224 4.833 0 5.057 0 5.333 C 0 5.61 0.224 5.833 0.5 5.833 C 2.117 5.833 3.168 6.191 3.822 6.845 C 4.476 7.499 4.833 8.549 4.833 10.167 C 4.833 10.443 5.057 10.667 5.333 10.667 C 5.609 10.667 5.833 10.443 5.833 10.167 C 5.833 8.549 6.191 7.499 6.845 6.845 C 7.499 6.191 8.549 5.833 10.167 5.833 C 10.443 5.833 10.667 5.61 10.667 5.333 C 10.667 5.057 10.443 4.833 10.167 4.833 C 8.549 4.833 7.499 4.476 6.845 3.822 C 6.191 3.168 5.833 2.117 5.833 0.5 Z" fill="url(%23t2lXByE48-2031533640-linear-gradient)" height="10.66671px" id="t2lXByE48" transform="translate(2 4)" width="10.66663px"/><path d="M 2.667 0.333 C 2.667 0.149 2.517 0 2.333 0 C 2.149 0 2 0.149 2 0.333 C 2 0.987 1.855 1.382 1.618 1.618 C 1.382 1.855 0.987 2 0.333 2 C 0.149 2 0 2.149 0 2.333 C 0 2.517 0.149 2.667 0.333 2.667 C 0.987 2.667 1.382 2.811 1.618 3.048 C 1.855 3.285 2 3.68 2 4.333 C 2 4.517 2.149 4.667 2.333 4.667 C 2.517 4.667 2.667 4.517 2.667 4.333 C 2.667 3.68 2.811 3.285 3.048 3.048 C 3.285 2.811 3.68 2.667 4.333 2.667 C 4.517 2.667 4.667 2.517 4.667 2.333 C 4.667 2.149 4.517 2 4.333 2 C 3.68 2 3.285 1.855 3.048 1.618 C 2.811 1.382 2.667 0.987 2.667 0.333 Z" fill="url(%23CBS1bzkxF-2031533640-linear-gradient)" height="4.66667px" id="CBS1bzkxF" transform="translate(0 2.667)" width="4.66667px"/><path d="M 2 0.333 C 2 0.149 1.851 0 1.667 0 C 1.483 0 1.333 0.149 1.333 0.333 C 1.333 0.756 1.239 0.984 1.112 1.112 C 0.984 1.239 0.756 1.333 0.333 1.333 C 0.149 1.333 0 1.483 0 1.667 C 0 1.851 0.149 2 0.333 2 C 0.756 2 0.984 2.094 1.112 2.222 C 1.239 2.35 1.333 2.578 1.333 3 C 1.333 3.184 1.483 3.333 1.667 3.333 C 1.851 3.333 2 3.184 2 3 C 2 2.578 2.094 2.35 2.222 2.222 C 2.35 2.094 2.578 2 3 2 C 3.184 2 3.333 1.851 3.333 1.667 C 3.333 1.483 3.184 1.333 3 1.333 C 2.578 1.333 2.35 1.239 2.222 1.112 C 2.094 0.984 2 0.756 2 0.333 Z" fill="url(%23Jd7AK81w9-2031533640-linear-gradient)" height="3.333333px" id="Jd7AK81w9" transform="translate(4 0)" width="3.3333399999999997px"/></g></g></svg>)
" height="24px" id="WCm44spAV" width="24px"/><path d="M 3.892 7.742 C 1.674 7.742 0 6.014 0 3.882 C 0 1.738 1.589 0 3.892 0 C 5.107 0 5.951 0.374 6.623 1.173 L 5.566 2.09 C 5.118 1.621 4.564 1.386 3.892 1.386 C 2.452 1.386 1.547 2.517 1.547 3.882 C 1.547 5.246 2.452 6.356 3.924 6.356 C 4.649 6.356 5.193 6.111 5.63 5.63 L 6.718 6.558 C 6.153 7.24 5.193 7.742 3.892 7.742 Z" fill="rgb(255, 255, 255)" height="7.741500000000002px" id="XEPpGD7l5" transform="translate(4 8.25)" width="6.717999999999989px"/><path d="M 2.74 7.922 C 1.215 7.922 0 6.632 0 5.032 C 0 3.433 1.215 2.122 2.74 2.122 C 3.7 2.122 4.201 2.516 4.5 3.113 L 4.5 2.239 L 5.928 2.239 L 5.928 7.784 L 4.531 7.784 L 4.531 6.877 C 4.233 7.507 3.731 7.922 2.74 7.922 Z M 1.439 5.023 C 1.439 5.865 2.057 6.622 2.975 6.622 C 3.924 6.622 4.531 5.897 4.531 5.033 C 4.531 4.169 3.924 3.423 2.975 3.423 C 2.057 3.423 1.439 4.159 1.439 5.022 Z M 6.784 7.784 L 6.784 0 L 8.224 0 L 8.224 7.784 L 6.784 7.784 Z" fill="rgb(255, 255, 255)" height="7.9224997406005855px" id="lGDJupIUR" transform="translate(10.5 8)" width="8.223500194549558px"/></g></svg>)
" width="18px"><path d="M 2 8 C 0.895 8 0 7.105 0 6 L 0 2 C 0 0.895 0.895 0 2 0 L 6 0 C 7.105 0 8 0.895 8 2 L 8 6 C 8 7.105 7.105 8 6 8 Z" fill="transparent" height="8px" id="ZrCrI93dV" stroke-dasharray="" stroke-linecap="round" stroke-linejoin="round" stroke-width="2" stroke="rgb(0, 0, 0)" width="8px"/><path d="M 0 0 L 0 4 C 0 5.105 0.895 6 2 6 L 6 6" fill="transparent" height="6px" id="emltWYAiE" stroke-dasharray="" stroke-linecap="round" stroke-linejoin="round" stroke-width="2" stroke="rgb(0, 0, 0)" transform="translate(4 8)" width="6px"/><path d="M 2 8 C 0.895 8 0 7.105 0 6 L 0 2 C 0 0.895 0.895 0 2 0 L 6 0 C 7.105 0 8 0.895 8 2 L 8 6 C 8 7.105 7.105 8 6 8 Z" fill="transparent" height="8px" id="WpBecYDfi" stroke-dasharray="" stroke-linecap="round" stroke-linejoin="round" stroke-width="2" stroke="rgb(0, 0, 0)" transform="translate(10 10)" width="8px"/></g></svg>)
By

Cédric van Ravesteijn
How to switch from calendly to Cal.com in 10 minutes
Leaving Calendly? You are not alone. Thousands of users switch to Cal.com for more control, flexibility, and long term value. The best part is you can move your entire setup in under 10 minutes.

Why people make the switch
Calendly is a great tool when you are starting out. But as your needs grow, it can start to feel limiting. Cal.com gives you more control without increasing costs.
No per-user pricing
Fully open source and self-hostable
Custom branding across all booking pages
Built-in workflows, reminders, payments, and more
You are not just switching to a similar tool. You are upgrading to a platform that puts you in control.
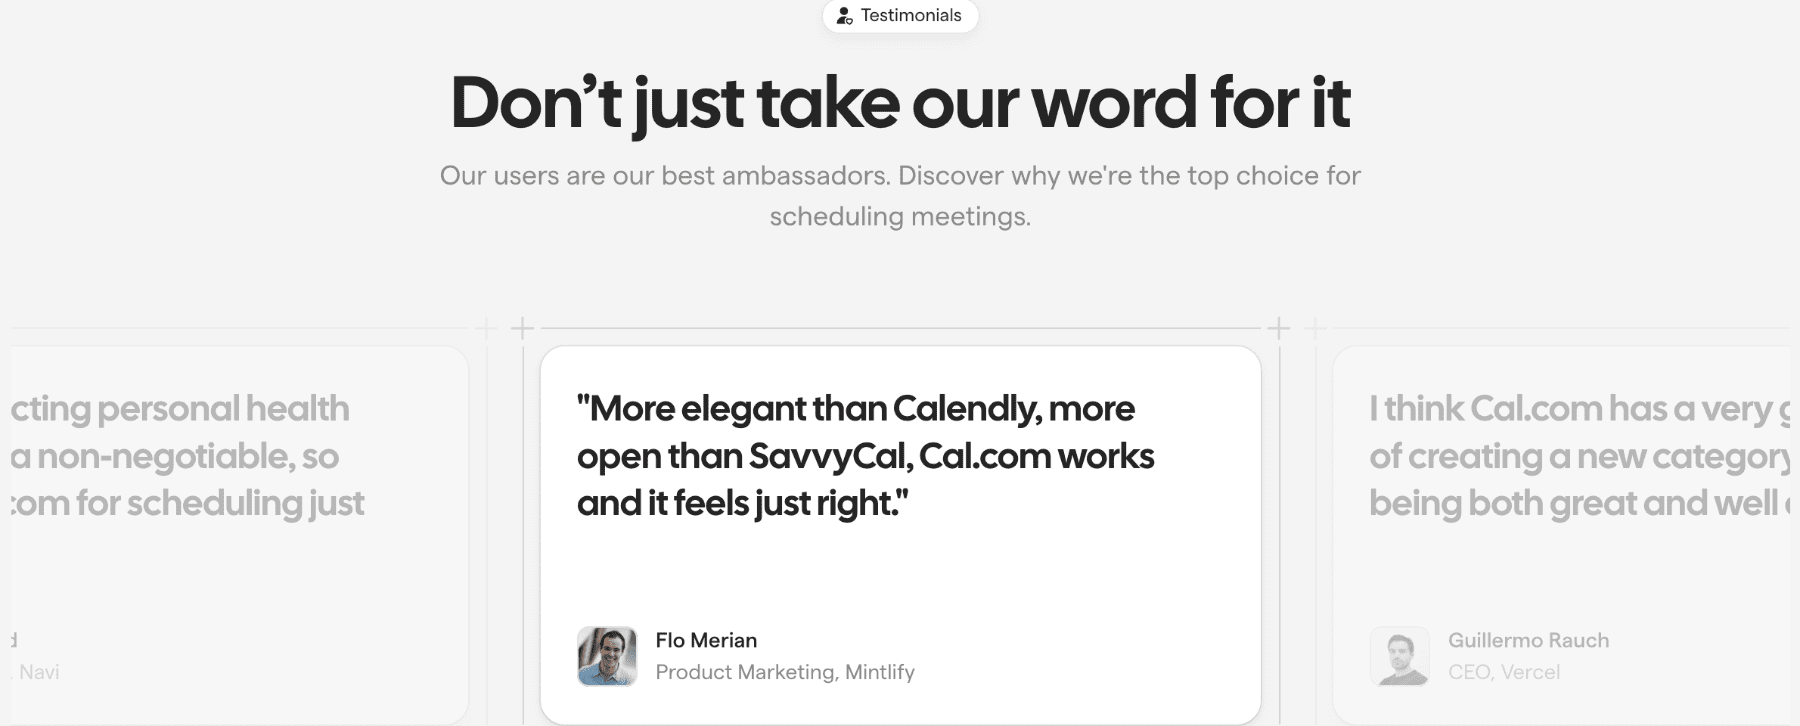
Here's what other users are saying:
I like how Cal.com’s Teams and Organizations plan gives us centralized control over scheduling across the entire company. The ability to manage team availability, create shared event types, enable round-robin routing, and use detailed team analytics has made a huge difference in how efficiently our teams operate. The platform is flexible enough for sales, support, and internal operations to customize their own workflows while staying aligned under one organization dashboard. G2 user
Step 1: Connect your calendar
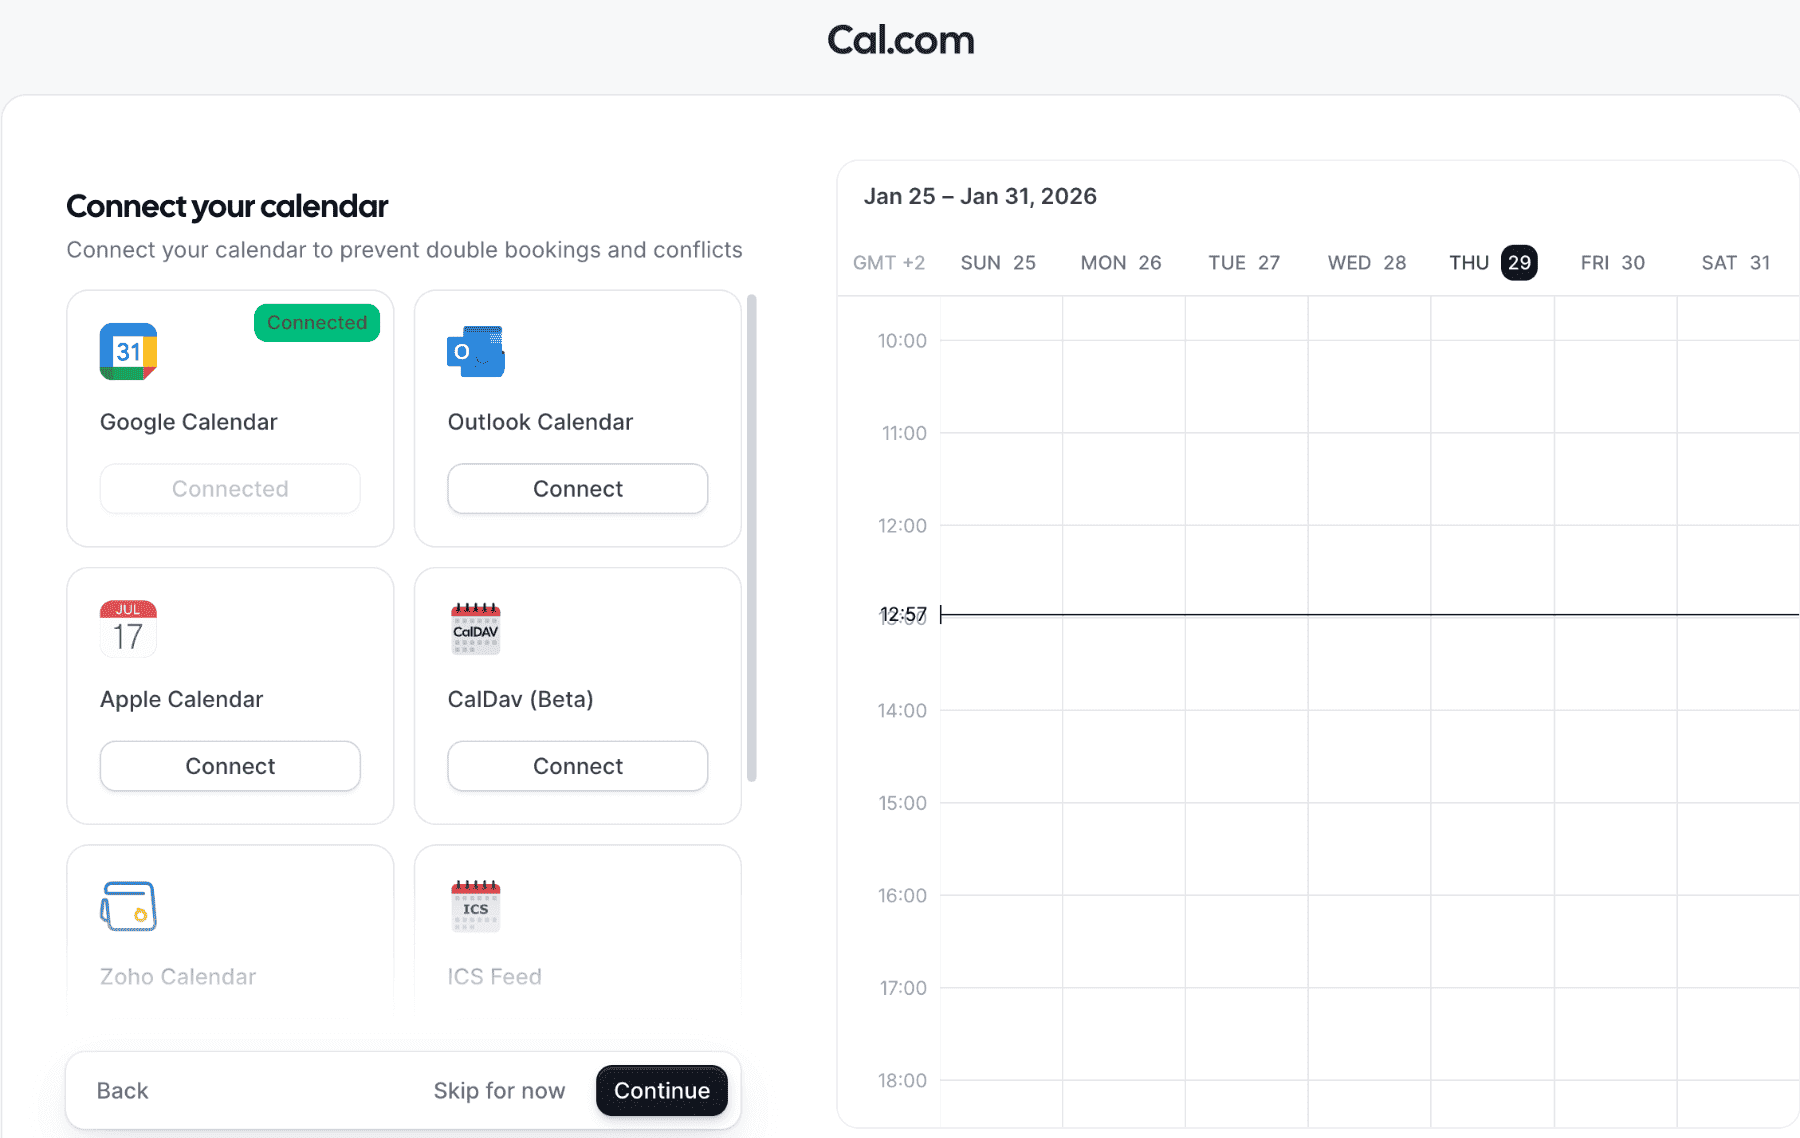
Just like Calendly, Cal.com syncs with Google Calendar, Outlook, and iCloud. When you connect your calendar, your availability updates in real time. No need to recreate your availability from scratch.
Step 2: Recreate your event types
In Cal.com, your meetings are called event types. You can set up different ones for things like intro calls, paid sessions, or internal meetings.
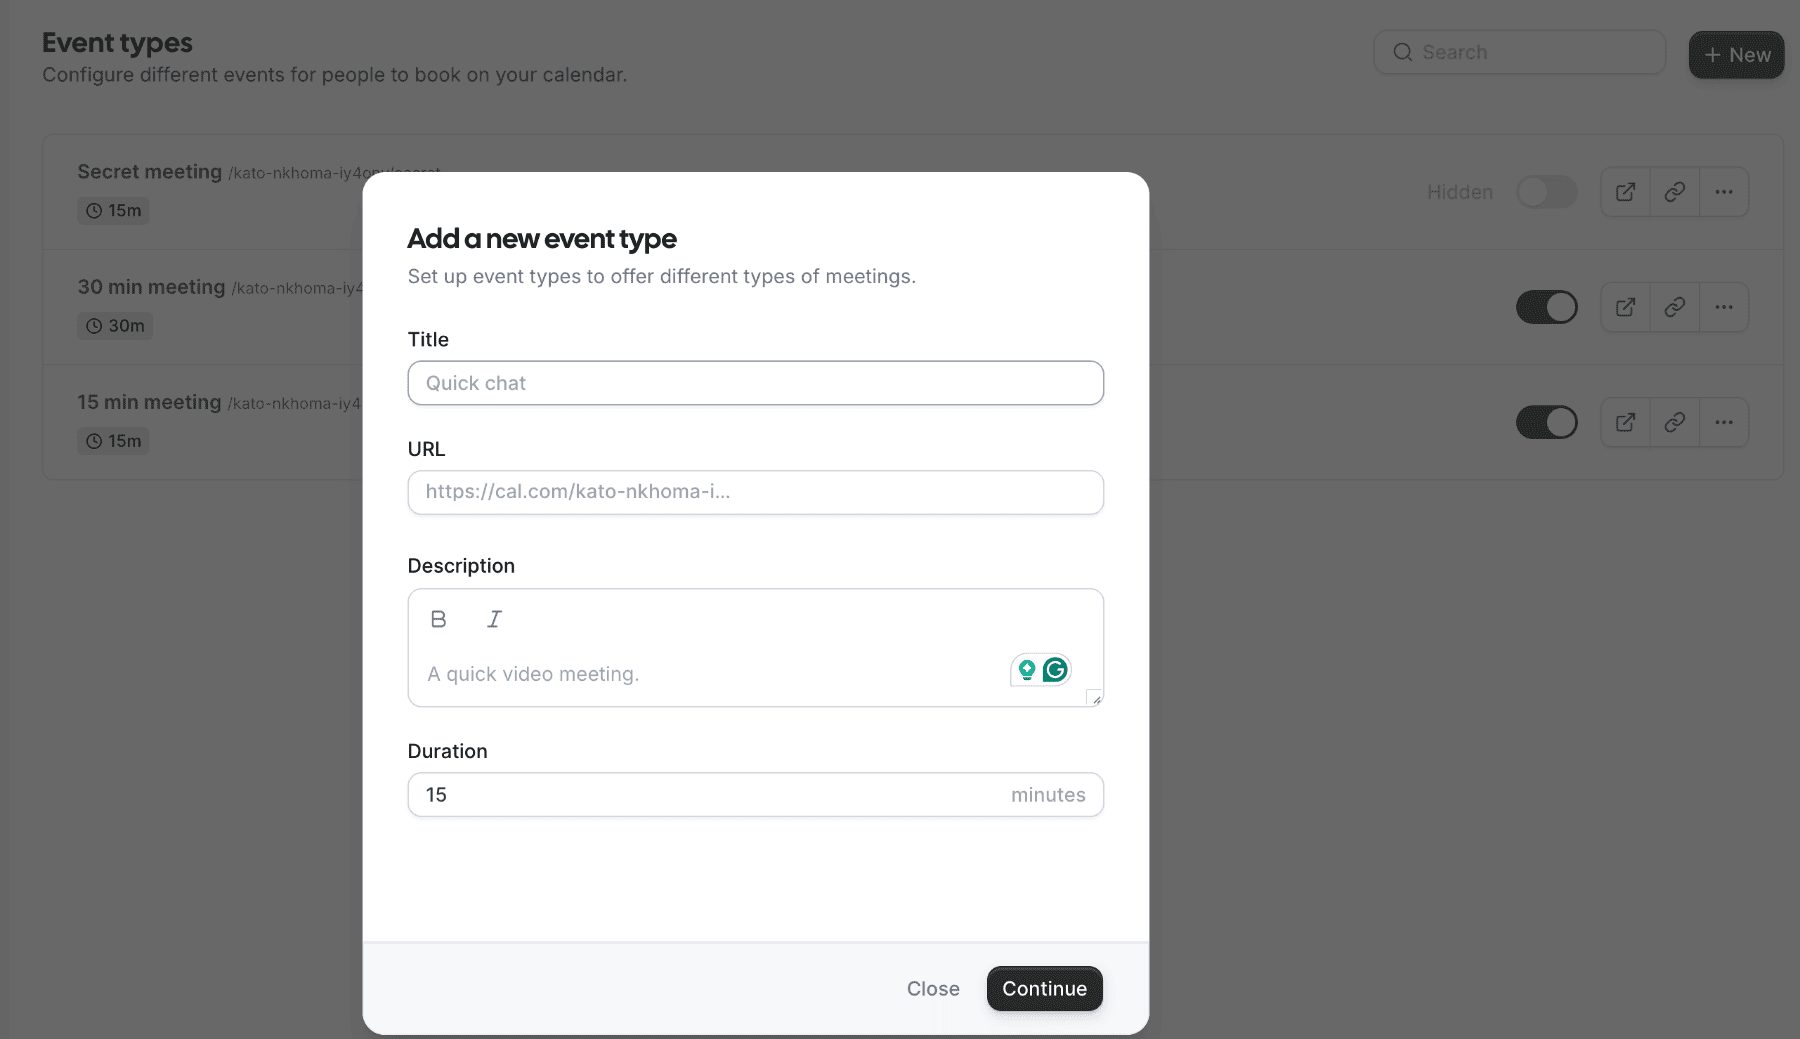
You define the duration, buffers, location (Zoom, Cal Video, phone), and availability. You can also add custom instructions or intake questions. If you used routing logic or workflows in Calendly, Cal.com supports that too.
Step 3: Set up your video conferencing
Cal.com integrates with Zoom, Google Meet, Microsoft Teams, and others you can find in the Cal App Store. You can also use Cal Video for a fully branded experience, with your logo and domain.
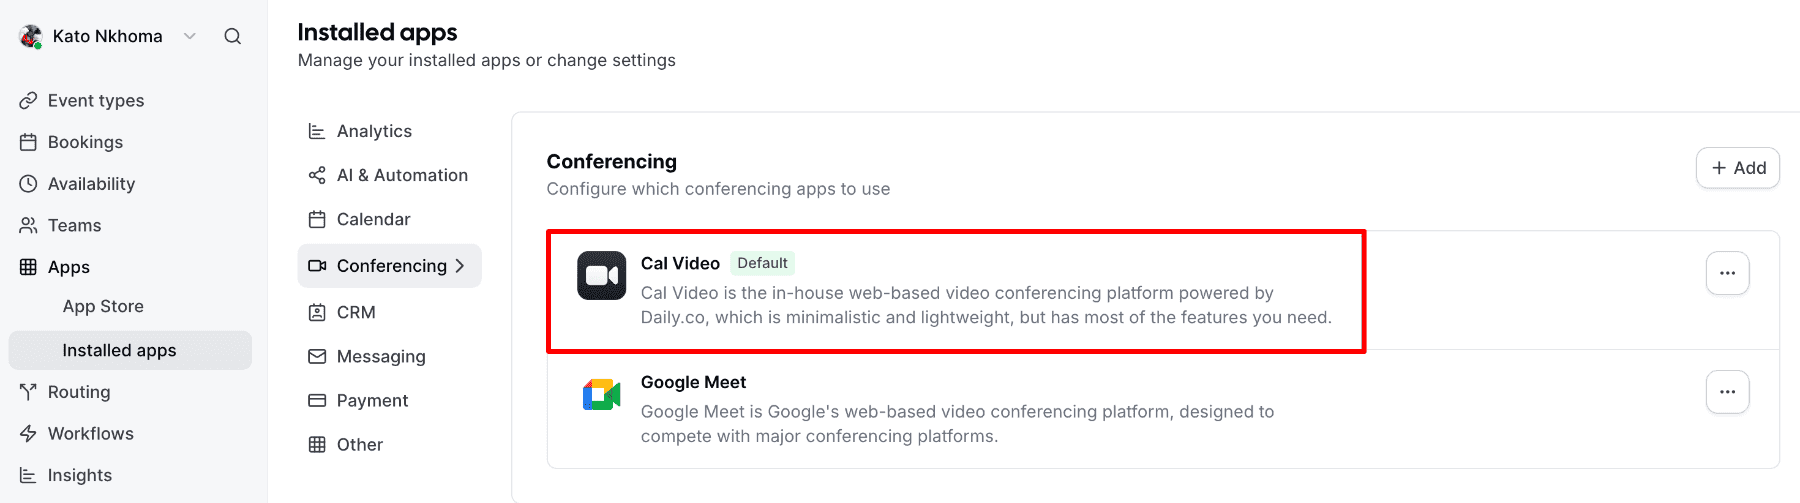
Once connected, Cal.com automatically adds the right meeting link to every booking.
Step 4: Automate your workflows
Use Cal.com’s Workflows tool to automate the experience around each meeting.
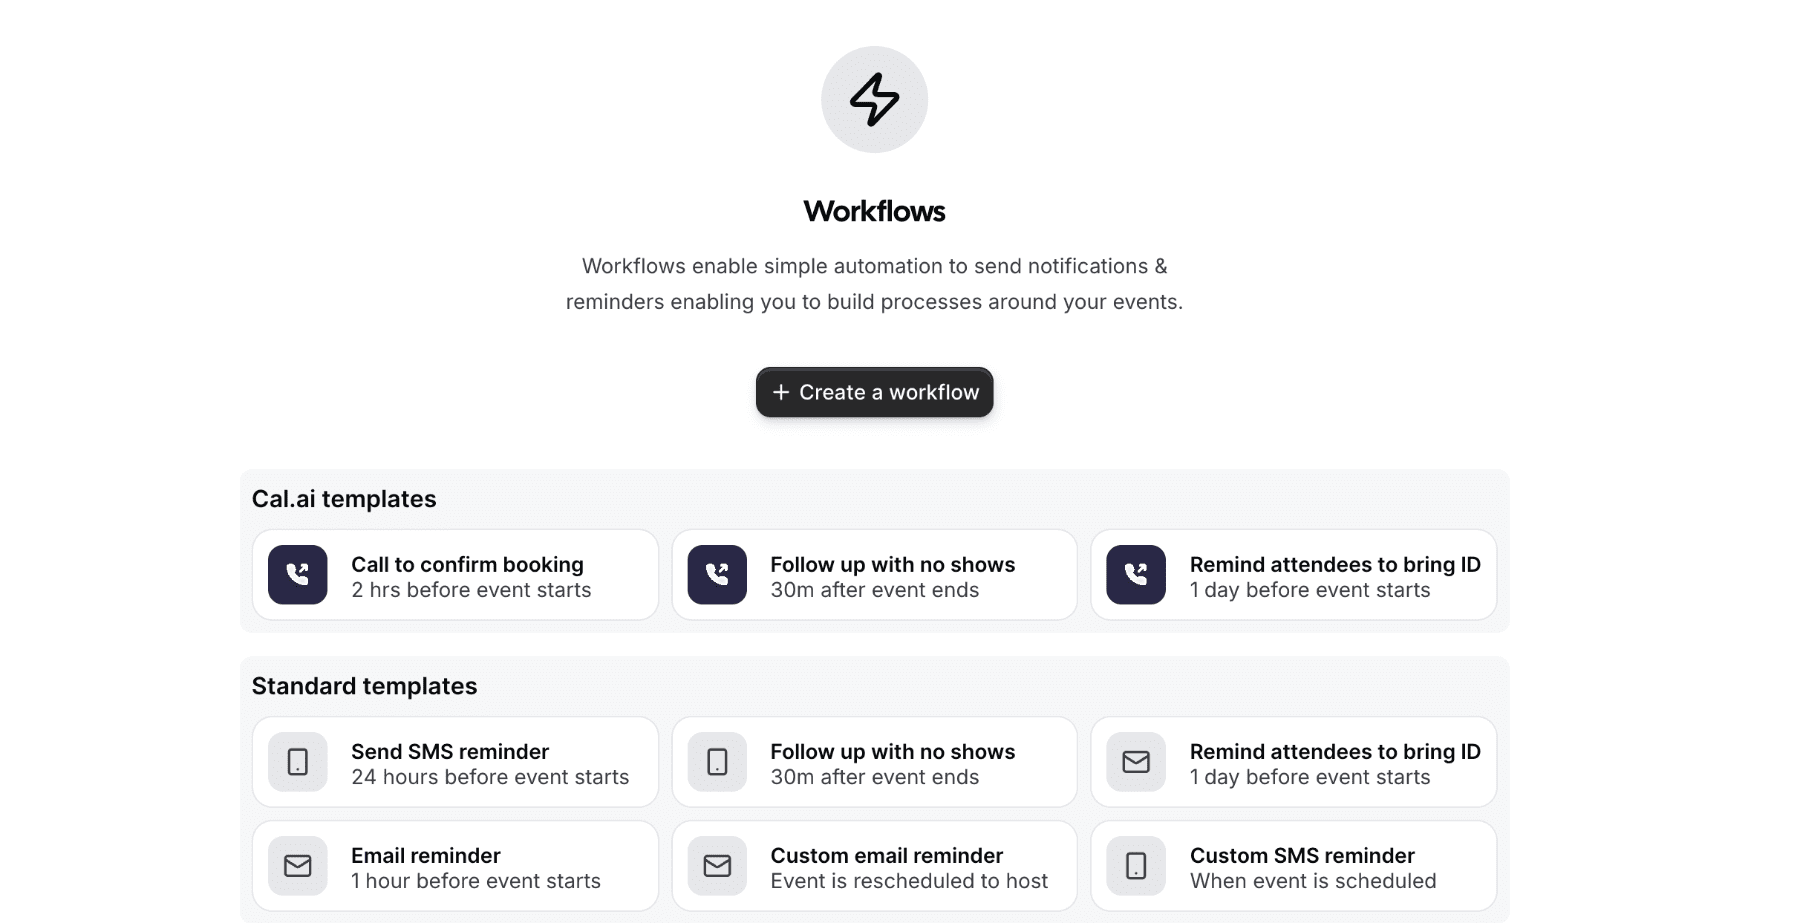
With workflows, you can:
Trigger post-meeting messages
Control the timing and content of each step
It works behind the scenes to keep no-shows low and communication consistent.
Step 5: Enable payments (optional)
If you collect payment for bookings, Cal.com makes it easy. Connect your favorite payment gateway account and add pricing to any event type.
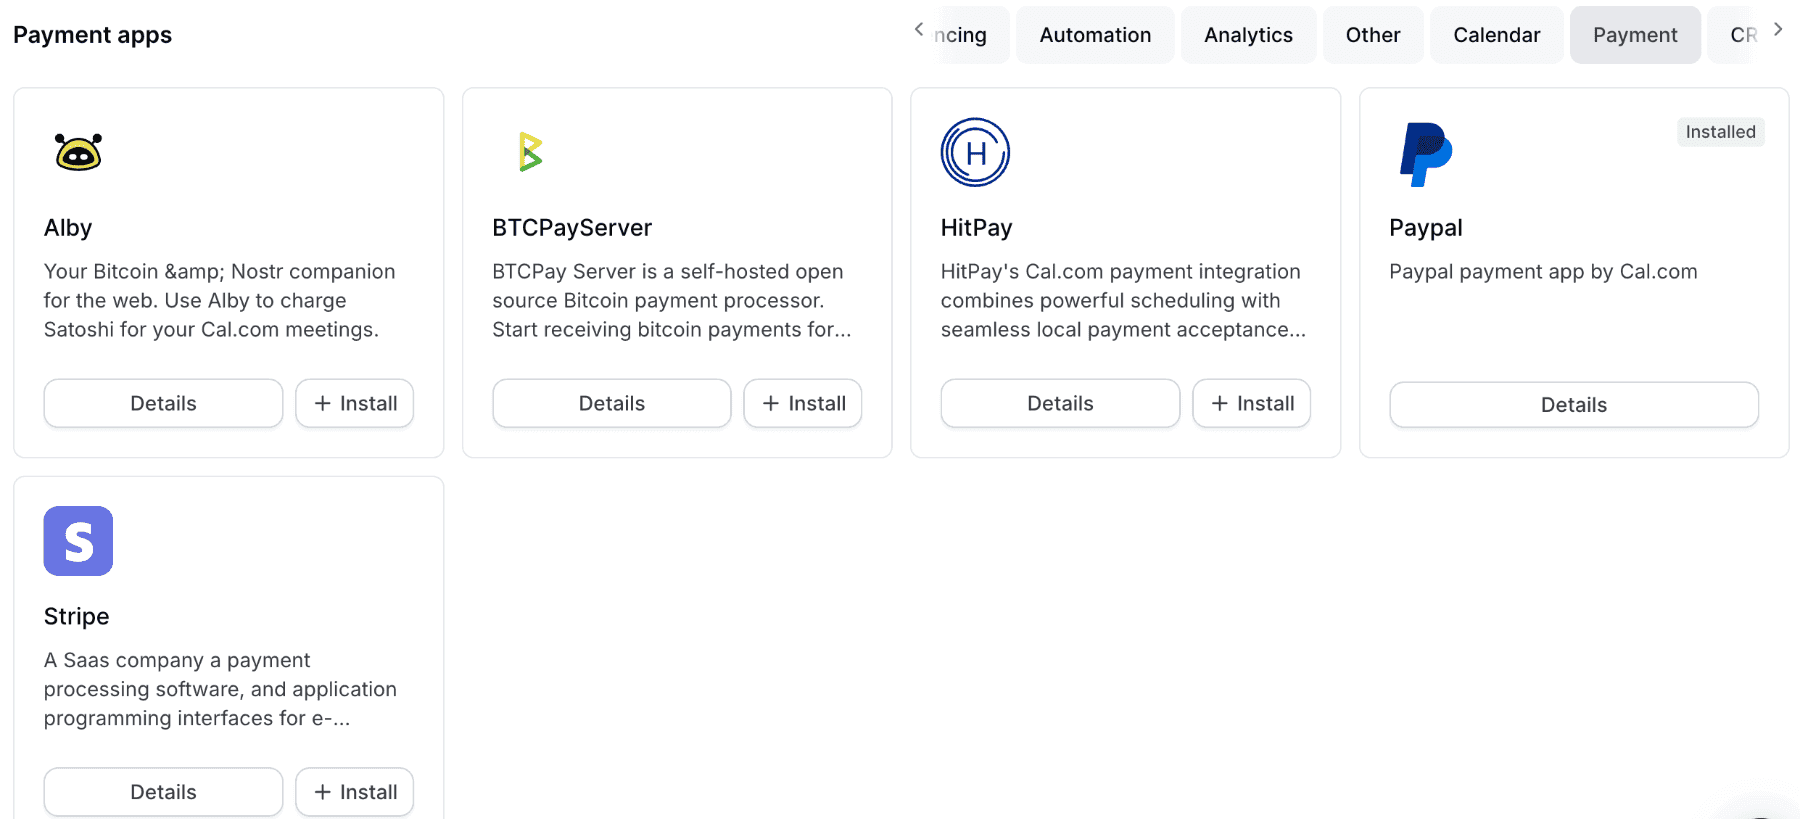
You can collect full payments or deposits. You can even create free and paid options depending on the service. It is great for coaches, consultants, therapists, and other service providers.
Step 6: Share your link
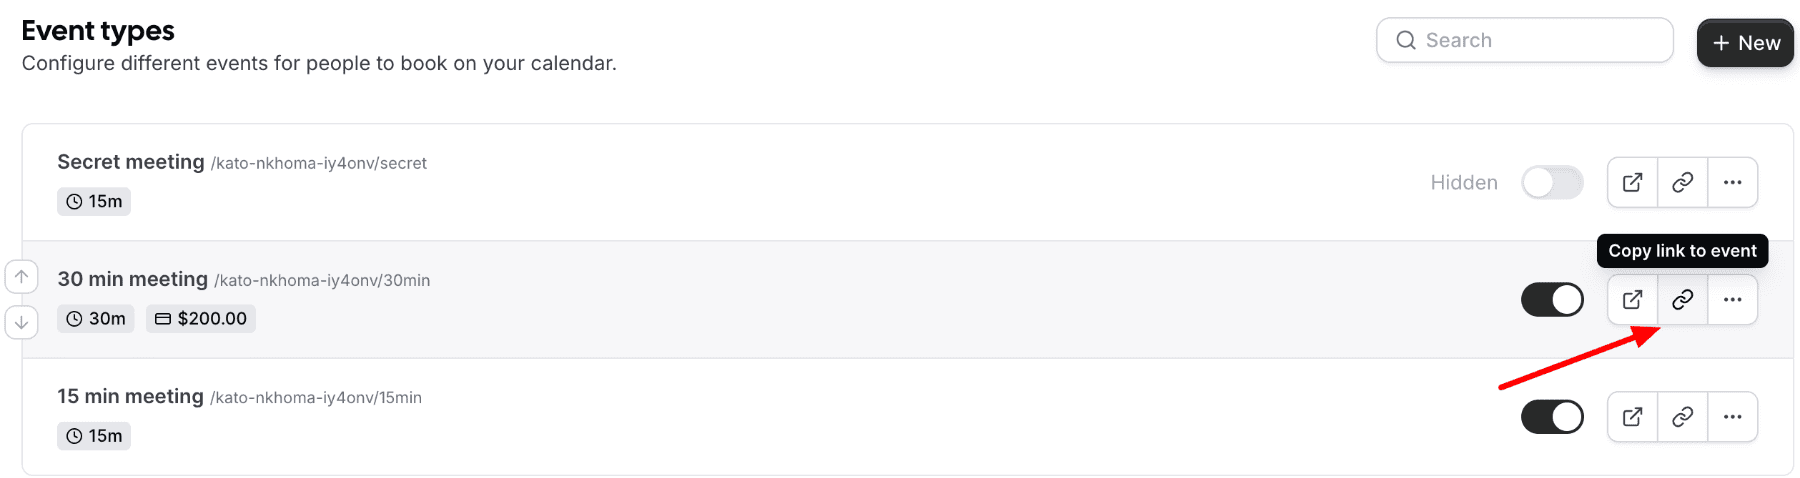
Once your setup is ready, grab your booking link and share it where it matters:
Add it to your website or landing page
Link it in your email signature
Include it in your Instagram bio or Linktree
You can also generate QR codes or embed a widget directly on your site.
Moving your team?
If you are moving a team off Calendly, Cal.com makes it easy to bring everyone into one shared space.
Add multiple users
Set roles and permissions
Use shared event types and workflows
Whether you are a small team or a growing company, Cal.com gives you full control of the scheduling experience.
What you gain
More control over your booking experience
Flat pricing that scales with your team
Custom branding from start to finish
Open source flexibility
Advanced workflows without extra tools
Read about more reasons why people are switching here
Ready to switch?
Ready to switch from Calendly to Cal.com?
We’ll cover your remaining Calendly contract and onboard you to Cal.com for free. Check out our special offer to Calendly users.
Get started in under 10 minutes. No disruption. No learning curve. Just a better way to manage your time.
Need more options?
Then check out our list of the best Calendly alternatives.
FAQs on switching from Calendly to Cal.com
1. Can I really switch from Calendly to Cal.com in under 10 minutes?
Yes. The process is designed to be fast and simple, enabling you to move your scheduling setup from Calendly to Cal.com in about 10 minutes with minimal disruption.
2. Do I need to recreate my calendar availability in Cal.com?
No. Once you connect your calendar (Google Calendar, Outlook, or iCloud), Cal.com syncs your availability in real time so you don’t have to manually recreate it.
3. What happens to my event types from Calendly?
You’ll recreate your event types in Cal.com (called “event types”), where you set duration, buffers, conferencing, availability, and intake questions, similar to how you did it in Calendly.
4. Can I keep video conferencing and automation features?
Yes. Cal.com lets you integrate with Zoom, Google Meet, Microsoft Teams, and its own Cal Video, and also offers workflow automation for reminders, follow-ups, and other scheduling actions.
5. What if I collect payments through my scheduling tool?
Cal.com supports payments via Stripe, allowing you to add pricing or deposits to event types, just as you can in Calendly (optional setup).

Get started with Cal.com for free today!
Experience seamless scheduling and productivity with no hidden fees. Sign up in seconds and start simplifying your scheduling today, no credit card required!


